Tag: Photo Booth Setup

  • Friendsgiving With the iPhone You Already Have

    Friendsgiving With the iPhone You Already Have

    You do not need to buy anything new for a Friendsgiving photo booth. If you have an iPhone, a tripod and a free app, you can make a booth in about five minutes. Here is how to do it so it feels like part of the party, not a project.

    What you need

    • An iPhone running iOS 26 or later.
    • A small tripod or a phone stand.
    • ZillaBooth, which is free to download.
    • A spot with decent light, such as a bright corner or a lamp near the table.

    That is all. There is no account to create and no watermark on the photos.

    Set the phone before the pie comes out

    Set the phone on a tripod at the end of the table or on a shelf facing the room, before dinner starts. If you do it ahead of time, the first photo is not a scramble. Check that the camera sees the whole table or the couch, and that the phone is steady.

    Open ZillaBooth and pick a layout. The app gives you a countdown and four frames, then puts them together as a classic strip or a 2×2 grid. Both layouts are free.

    Why four frames beat one

    A single group photo usually captures one expression. Four frames capture the whole moment: the serious pose, the silly face, the person who laughs, and the one who sneaks in a kiss on the cheek. The finished grid tells a story, and that is why photo booth pictures feel different from a normal snapshot.

    Pocket for extra control

    The free version covers the basics. If you want more, Pocket adds adjustable timers, flash control, black and white, and borders. It is a one-time purchase. Many people start free, try one dinner, and decide afterward.

    A longer timer is handy at a crowded table, and a bit of flash helps when the room is lit by candles.

    Make it part of the evening

    A few ideas keep the booth fun without a lot of work:

    • Ask each guest to bring one prop, such as a funny hat or a paper turkey.
    • Start a pose challenge: formal, silly, surprised, and “dramatic thank-you”.
    • Run one session after the main course and one after dessert.
    • Share the best grid in the group chat that night.

    A note on lighting

    Dining rooms are often dim. Turn on a lamp near the phone and avoid putting a bright window behind your guests. If everyone looks like a silhouette, move the tripod a little and try again. A quick test photo before dinner saves frustration later.

    Keep the host happy

    If you are a guest, offer to handle the booth. The host will be busy with the food, and you will be the hero for taking charge of the photos. If you are the host, ask a friend to be the booth captain and enjoy dinner.

    One more thing

    You can also try the same idea at other gatherings. The event photo booth app page shows how larger parties use ZillaBooth, and the Pocket page explains what the upgrade adds for home setups.

    Ready to set up your table? Download ZillaBooth from the App Store and take a test grid before the guests arrive.

  • Pet Photography: The “Dog Booth” Setup

    Pet Photography: The “Dog Booth” Setup

    The Ultimate Pet Photography Solution: Setting Up the ZillaBooth “Dog Booth”

    For years, pet photography has been a wild frontier, defined by chasing an excited Labrador across a park or patiently waiting for a grumpy cat to acknowledge your existence. But as pet birthdays, adoption milestones, and dedicated “paw-ties” become the norm, the demand for high-quality, studio-grade photographs has grown exponentially. The solution lies not in better gear alone, but in a tailored setup that respects the animal’s nature and streamlines the process: the dedicated ZillaBooth “Dog Booth.”

    This novel approach leverages the compact, customizable nature of the ZillaBooth system, specifically adapting it for low-height, pet-centric photography. The goal is simple: to create a contained, comfortable, and consistent environment that captures the pet’s personality in sharp focus, without the stress of a traditional studio or the chaos of a public event. For junior writers and event organizers alike, mastering this setup is the key to delivering professional-grade pet portraits efficiently and reliably.

    Why a Dedicated, Low-Height Booth for Pets?

    The biggest challenge in photographing animals is getting them to cooperate with human-sized equipment. A standard photo booth setup is often too tall, requiring the dog to strain its neck or look drastically up, resulting in unnatural angles and sometimes intimidating shadows. The low-height Dog Booth setup fundamentally solves this problem.

    By configuring the ZillaBooth’s main camera housing and light source to sit between 18 to 24 inches off the floor…roughly the eye level of a medium to large dog…you achieve three critical benefits:1. Natural Eye Contact and Pose: The dog looks straight ahead, resulting in the classic, engaging, and emotionally resonant eye-level portrait. For smaller dogs and cats, a small, blanket-covered platform can be placed in the booth space to boost them to the perfect height, ensuring the camera is always meeting them where they are.
    2. Reduced Intimidation: A large, tall piece of equipment can be scary. Lowering the booth makes the whole structure less imposing, helping to keep pets relaxed and focused on the reward or the handler.
    3. Consistent Lighting and Background: In a controlled booth, the background is always clean, and the lighting is perfectly consistent, shot after shot. This is essential for adoption events where quick, high-quality images are needed for marketing, or for birthday parties where clients expect a polished result.The Core Setup: Hardware and Logistics

    The ZillaBooth system is ideal because of its modular design. To build the Dog Booth, you should focus on simplicity and sturdiness. * The Stand: Use the ZillaBooth Mini or a specialized short stand. The overall stability is paramount…pets move, bump, and lean, so the setup must be rock-solid. A wide base is highly recommended.
    * The Background: The backdrop needs to be durable and easily cleaned. Forget paper rolls. Opt for washable vinyl or a high-quality, wrinkle-free fabric that is simple, like a muted grey, cream, or a soft blue. For maximum efficiency at events, pre-mount the backdrop to a low-height support system just behind the main shooting area. Critically, ensure the backdrop extends well onto the floor to hide any seams where the wall meets the ground.
    * The Floor/Surface: The pet will be standing or sitting on this surface. It must be non-slip (a smooth floor can be stressful) and non-reflective. Use a rubber mat, a small, durable rug, or a seamless continuation of your vinyl backdrop material.
    * Lighting: While softboxes work, for maximum efficiency and a clean look, a ring flash or a diffused LED ring light mounted around the lens is often best. It creates an attractive catchlight in the pet’s eyes and ensures even illumination, minimizing harsh shadows without requiring complex setup. The light source should be close to the camera axis (and therefore low to the ground) to provide even light at the dog’s eye level.The Secret Weapon: Mastering the ZillaBooth Custom Timer

    The true magic of the Dog Booth lies in using the ZillaBooth’s Custom Timer feature, not as a simple delay, but as a strategic tool for capturing the split-second of perfect focus. In standard photography, a pet’s peak moment of attention…when they are truly looking at the lens…lasts only a fraction of a second, often too fast for a human to trigger the shutter after setting the treat/toy. The Custom Timer changes this dynamic.

    The “Get-The-Dog-To-Look” Technique:1. Pre-Focus and Settings: The photographer (or booth operator) should pre-set the focus and exposure. If the ZillaBooth uses a dedicated camera, set it to Shutter Priority or Manual mode with a fast enough shutter speed (1/200th of a second or faster) to freeze any slight movements, which are common in pets.
    2. The Lure Placement: The key to a direct gaze is the lure. Attach a piece of Velcro or a small clip to the ZillaBooth’s lens housing. The handler’s job is to place a high-value treat, a squeaky toy, or a favorite ball directly above or adjacent to the lens. This trains the pet’s gaze to be centered on the camera.
    3. Activating the Custom Timer: This is the critical step. Instead of the standard 3-second or 10-second timer, use the Custom Timer to set a precise delay, typically between 2.5 and 4 seconds. The time must be just long enough for the handler to perform their action, but short enough to prevent the pet’s attention from wandering.
    4. The Handler’s Signal and Release: The handler presses the remote shutter button (or taps the booth screen) to initiate the Custom Timer. During the countdown, the handler performs two actions in rapid succession:
    * The Sound/Signal: They use a distinct sound, word (like “Look!”), or a squeeze of the squeaky toy to snap the pet’s attention to the lure/lens.
    * The Release: Approximately 0.5 seconds before the timer hits zero, the handler quickly removes the lure from the lens. This creates a moment of high anticipation, where the pet is locked on the exact spot the treat just was, which is the center of the lens.
    5. The Perfect Capture: The shutter fires exactly when the dog’s eyes are wide, focused, and anticipating the reward. The handler immediately rewards the pet post-shot, reinforcing the behavior.This method transforms the passive wait of a standard timer into an active, synchronized technique, guaranteeing the perfect, focused look on nearly every single shot. The consistency is unparalleled for event photography.

    Integrating the Dog Booth into Pet Events

    The physical setup is only half the battle; integrating the booth into the energetic environment of a pet event requires a thoughtful workflow. * Establish a Calm Zone: The Dog Booth area should be clearly delineated as a “Calm Zone.” Use physical barriers (like velvet ropes or decorative fencing) to create a queue line that keeps other animals at a safe distance. High-energy distractions are the enemy of a good pet portrait.
    * The Two-Person Team: This setup works best with two people:
    * The Booth Operator: Manages the ZillaBooth settings, ensures the background and lighting are perfect, and fires the Custom Timer.
    * The Handler/Pet’s Owner: Responsible for calming the pet, placing the lure, and rewarding the successful capture. Having the owner be the handler dramatically increases the pet’s comfort and compliance.
    * Minimize Session Time: Pet attention spans are short. The goal should be 2-3 minutes max per session. Pre-set the shots and run a tight, reward-based workflow. You only need a few frames to get the winning shot thanks to the Custom Timer technique.
    * Use Props Wisely: If using props (birthday hats, bow ties), ensure they are comfortable and introduced before the pet enters the booth area. Never force a pet to wear a prop it dislikes, as this will instantly ruin the portrait’s mood. Keep them small, simple, and theme-appropriate.Advanced Workflow and Post-Processing Tips

    To truly elevate the results from a simple snapshot to a polished portrait, a few advanced considerations apply: * Tethering for Instant Review: Connect the ZillaBooth’s camera to a large monitor. This allows the pet’s owner/handler to see the results immediately, providing instant positive reinforcement for them and encouraging more cooperation. For adoption events, this instant preview is great for generating excitement about the dog’s new profile picture.
    * Environmental Conditioning: Before the event starts, allow a few of the calmest or most handler-motivated pets to spend 30 seconds simply standing in the booth area without taking a single picture. Give them a treat. This acclimation phase helps normalize the space before the pressure of the session begins.
    * Post-Processing for Texture and Detail: The low-height, direct light setup is excellent for detail. In post-processing, focus on gently sharpening the eyes and enhancing the texture of the fur. While pets are not models, subtle dodging and burning can add depth and drama to the fur lines, especially for darker-coated animals.
    * Client Deliverables: The Dog Booth is perfect for generating not just digital files, but immediate, high-quality prints. Integrate a dedicated event printer with the ZillaBooth for instant take-home memories. A 4×6 print of the pet in its birthday hat is a tangible, invaluable souvenir.The ZillaBooth Dog Booth represents a shift from reactive to proactive pet photography. It’s an exercise in control, comfort, and precise timing. By lowering the camera, selecting the right surfaces, and most importantly, weaponizing the Custom Timer, junior writers can create a step-by-step guide that empowers anyone to capture the stunning, heart-melting portraits that every pet owner…and every adopting family…dreams of having. The result is a system that not only captures better photos but also ensures the experience is positive and memorable for the pet at the center of the frame.

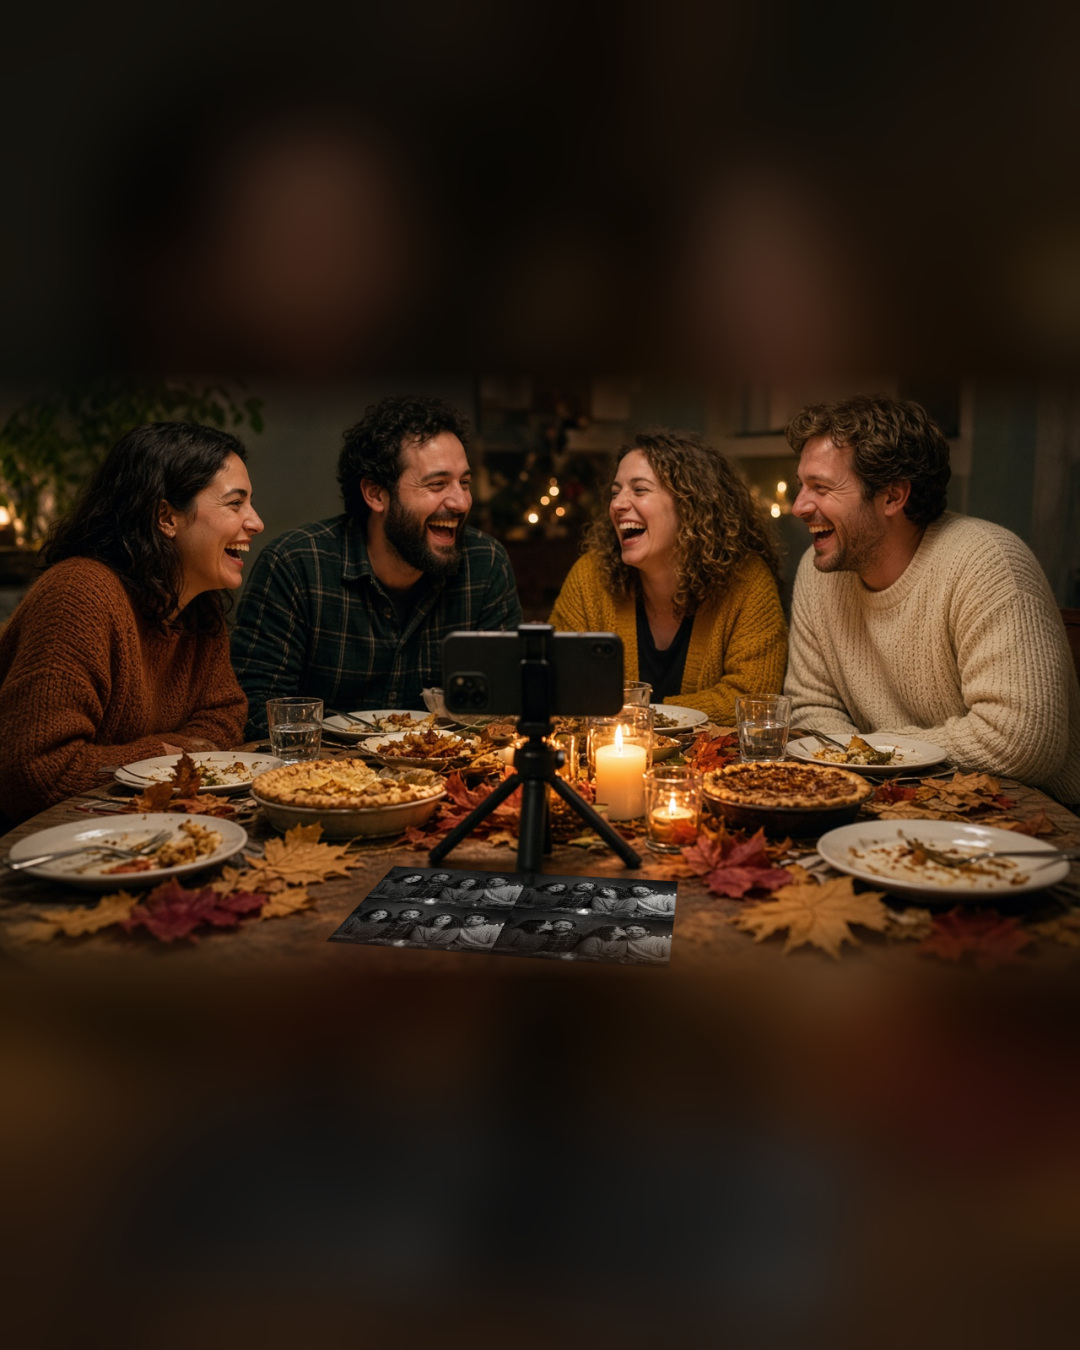
  • Friendsgiving Photo Booth Checklist: Phone and Tripod

    Friendsgiving Photo Booth Checklist: Phone and Tripod

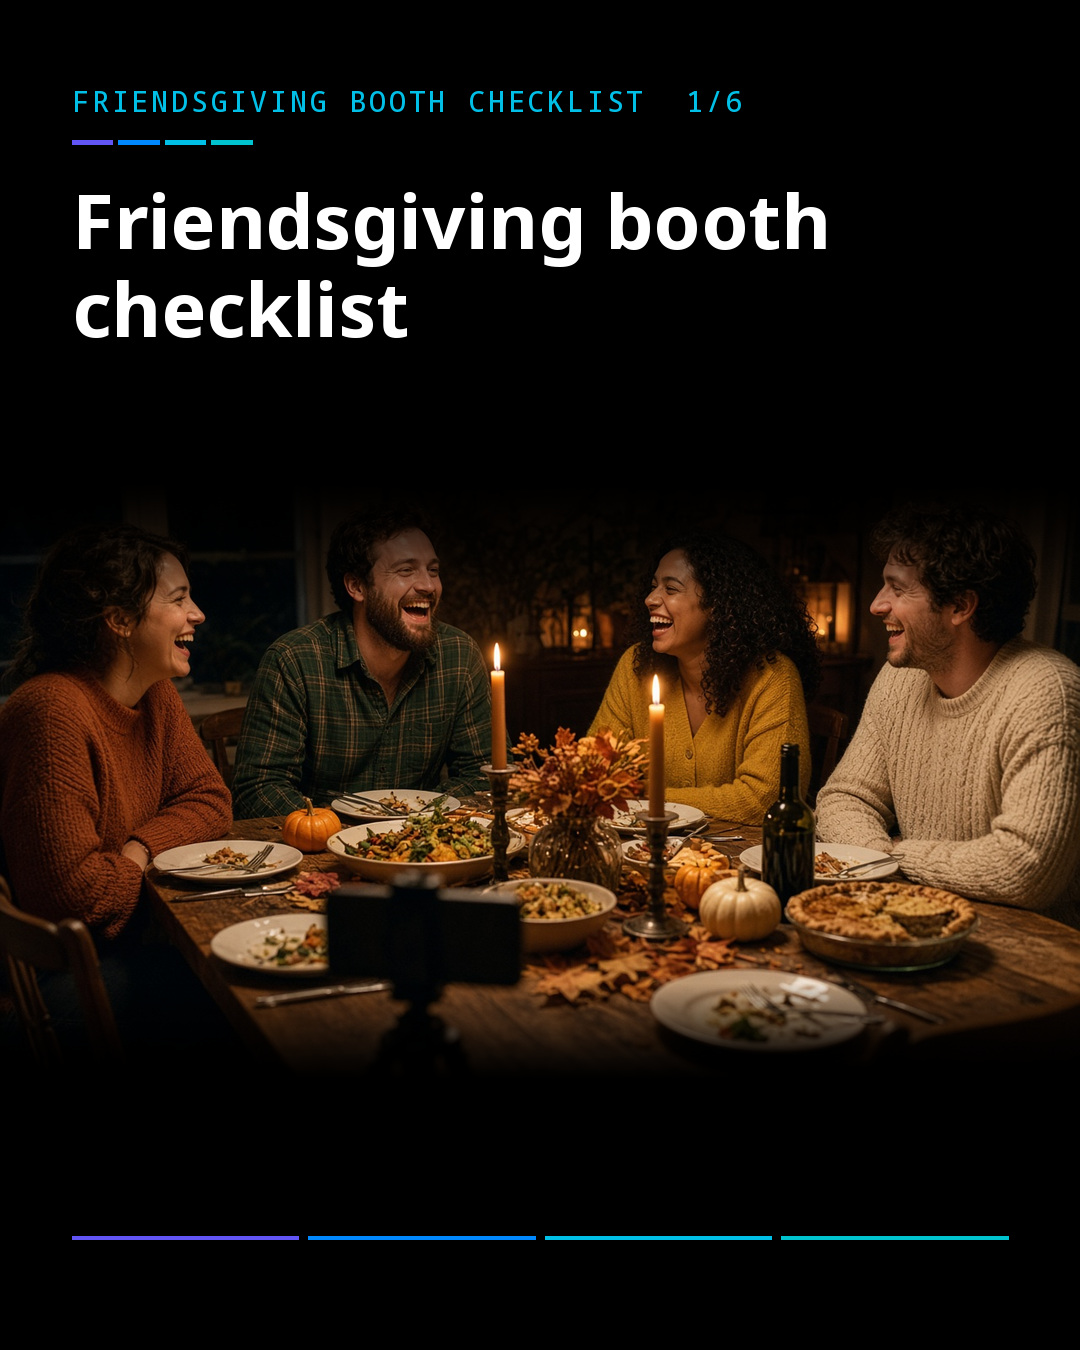
    Friendsgiving is the easy kind of holiday. Nobody is flying home, the food is potluck, and the group chat is full of jokes. It also deserves a better photo than one person holding a phone at arm’s length while everyone else leans in. Here is a five-minute photo booth setup that fits on a dinner table.

    1. Put the phone on a small tripod

    A tiny tabletop tripod is enough. Set it at the end of the table, facing the group, with the camera at about eye level when people sit. Make sure the phone cannot be knocked over by an elbow or a gravy boat.

    2. Set a timer so everyone is in it

    ZillaBooth takes four photos in a row after a countdown, which is the classic photo booth rhythm. Start it, then everyone gets time to lean in. Pocket adds adjustable timers, so you can give a big group a few extra seconds.

    3. Add a little flash for a dim dining room

    Candlelit tables look warm in person and murky in photos. With Pocket, you can set the flash to Auto, On or Off, using your device’s flash where it has one. Try a test photo before the pie comes out. If the picture looks flat, turn the flash on. If it looks harsh, move a lamp closer and turn it off. Our lighting guide has more tips.

    4. Print one black-and-white grid

    A black-and-white print looks great on a fridge, and it hides the odd color from candles and string lights. Pocket includes a black-and-white collage filter, which is the only filter in the app. Printing works on every tier through AirPrint, so if you have an AirPrint printer on your Wi-Fi, you can print the grid at the table.

    5. Print one for the fridge

    Pick the best grid of the night and print it. Stick it up at home, or hand it to the host as a thank-you. Hosts often remember the dinner for months because of one good photo on the fridge.

    What it costs

    ZillaBooth is free to download, with classic strips and 2×2 grids and no watermark. Pocket is a one-time purchase. For a one-night dinner, the free app does the job, and Pocket is there if you want more control over timers, flash and the black-and-white look.

    A few tips for a smooth dinner

    • Charge the phone beforehand, and keep a charger nearby.
    • Ask the host to pick the spot early, so nobody has to move plates later.
    • Assign a “booth captain” who starts the countdown and makes sure the shy friend is in frame.
    • Take one session before dinner and one after dessert. The second one is always funnier.

    Send the checklist to the host

    If you are not hosting, forward this to whoever is. A simple setup removes the pressure of a photo plan, and everyone gets a picture of the night. You can also see how the same idea works at bigger gatherings on the event photo booth app page.

    For a deeper look at what each tier offers, visit the Pocket page. When you are ready, download ZillaBooth from the App Store and run a test grid before the turkey comes out.

  • The Rehearsal Dinner Booth: A Warm-Up Round

    The Rehearsal Dinner Booth: A Warm-Up Round

    The rehearsal dinner is the calm before the wedding. The wedding party is relaxed, family is meeting for the first time, and nobody is in a rush. That makes it the best moment to try out your photo booth, and a very good excuse to take the first photos of the weekend.

    Why test at the rehearsal dinner

    Running the booth the night before gives you three things.

    First, a real test. You will see how long a session takes, where the stand works best, and whether the light is flattering. Second, a trained group. The wedding party will know how the booth works, so they can show other guests the next day. Third, a head start on the guest book. If you are planning a photo guest book, a few early strips already fill the first page.

    Keep it low-key

    A rehearsal dinner is not a full reception, so the booth should be simple. Put the iPad on a stand near the tables, where people are already milling around. Open ZillaBooth, choose a 2×2 grid, and let people walk up on their own.

    The countdown does most of the directing. Guests tap, pose, and see the finished picture in a few seconds. A small sign that says “Tap to start” helps.

    A few things to find out

    Use the evening as a rehearsal in the proper sense. Check these items:

    • Who hogs the frame, and who needs a nudge to join in?
    • How loud is the room, and can guests hear the countdown?
    • Which pose wins? Every group has one.
    • Does the stand sit steady on the floor or table you plan to use?
    • Is the light soft enough, or do you need a lamp in front?

    Write down what you learn. You will use it the next day.

    Prints and email

    If you want to try printing, printing works on every tier through AirPrint, so any AirPrint printer on the same Wi-Fi is enough to test. You can also share the pictures from the iPad. A printed strip makes a lovely thank-you for parents and grandparents.

    If you plan to use a names-and-date design at the reception, Pro lets you add your own PNG overlay to every picture. The rehearsal dinner is a great time to check that the text is readable on the iPad screen. The Pro page has the details.

    Who should be the booth friend?

    Ask one person in the wedding party to take charge. They do not need to be technical. They just need to remember where the paper and charger live and be willing to show guests how to start. By the reception, that person will be a pro.

    What to do afterward

    Look through the test pictures with the wedding party. Pick a favorite and save it for the slideshow or the thank-you card. If anything looked off, adjust the stand, the light or the printer location before the big day.

    For a full plan for the reception itself, read our wedding reception photo booth checklist. You can also see how couples use ZillaBooth on the wedding photo booth page.

    Want to try it this weekend? Download ZillaBooth from the App Store and set up a warm-up round.

  • Booth Night at the Bar: One More Round

    Booth Night at the Bar: One More Round

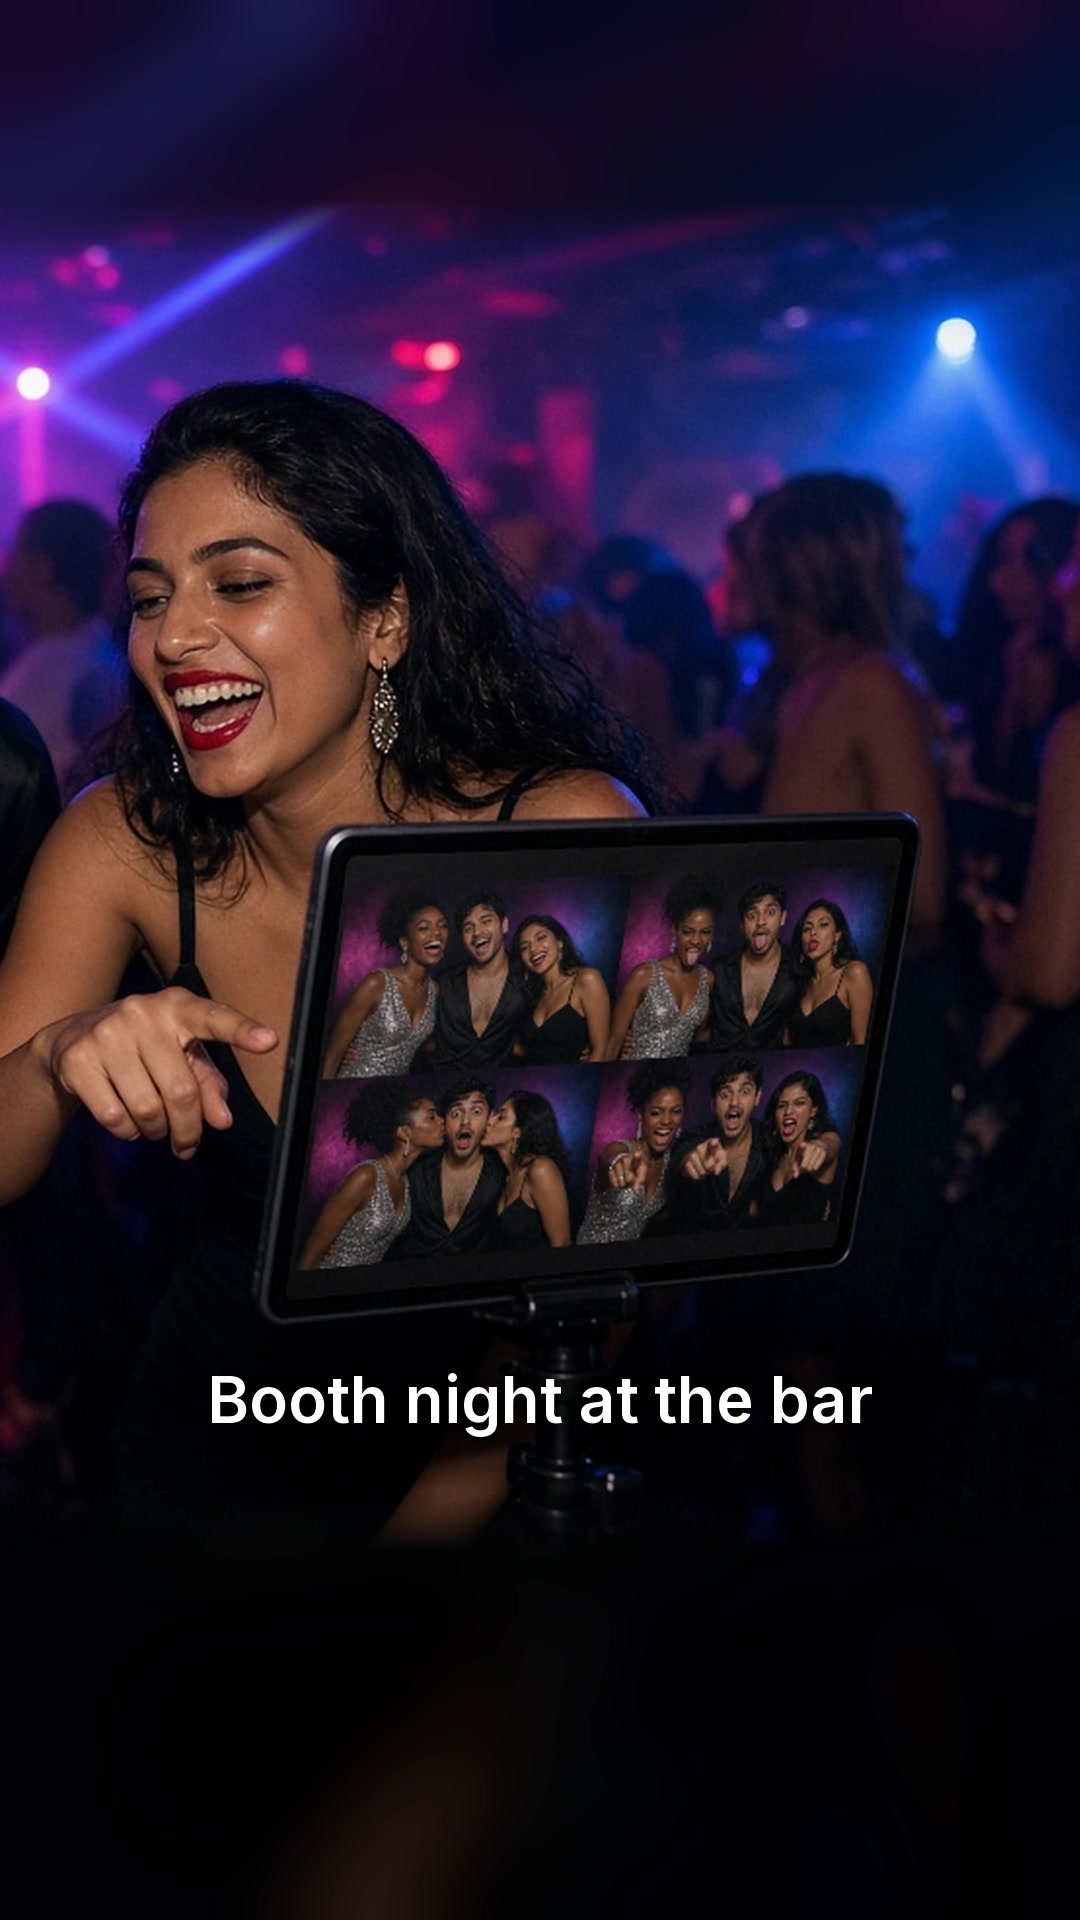
    Every bar has a night that needs a reason to come out. A themed booth night gives regulars something to look forward to, and it gives newcomers a reason to stay for one more round. All it takes is an iPad on a stand, a printer, and a plan.

    Pick a night

    Choose the slowest night of the week, or the one you want to build up. Tuesday trivia crowds, Thursday after-work groups and Sunday afternoon regulars all work. Give it a name, such as “Booth Night,” and put it on the chalkboard so it feels like a ritual.

    Consistency helps. If guests know the booth is out every Thursday, they will plan around it.

    Holiday weeks make an easy theme. Dress the room up for December, and if you’re in South Florida, the best Christmas light installers in Boca Raton can have the bar glowing before the first strip prints.

    Set up the booth

    Put an iPad on a stand near the end of the bar or by a cozy table. Open ZillaBooth, choose a 2×2 grid or a classic strip, and take a test session with a bartender. Guests tap, pose through the countdown, and get four photos in one finished picture.

    Strips and grids are free in the core app, with no watermark and no account. That means you can test the idea for a night with no commitment.

    Add the print moment

    A printed picture is a souvenir that guests carry out the door and show to friends. Printing works on every tier through AirPrint, so an AirPrint printer behind the bar is enough, and Pro adds Simple Printing, a one-tap Print button. Keep a small stack of paper under the counter and check it at the start of each shift.

    Put your venue on every grid

    If you run booth night more than once, a venue overlay is worth the effort. With Pro, you can add your own PNG overlay to every grid, so your bar’s name or logo appears on each picture. Guests share the photos with their friends, and your bar gets a little free marketing each time.

    Keep guests on the booth

    Bars get busy, and a curious guest might open the settings by accident. Apple’s Guided Access locks the iPad to ZillaBooth, and with Pro, Hide Settings keeps the settings button out of sight. Together they keep the iPad on the booth screen, even when the room is full.

    Promote it

    A booth night works best when people know about it ahead of time:

    • Post a short preview on your account the day before.
    • Add a line to the chalkboard or menu.
    • Ask guests to tag the bar when they post their grid.
    • Share the best grid of the week the next morning.

    If you want more ideas on how bars use the night out as a marketing moment, read our post on bar and nightclub marketing.

    Staff notes

    A booth should not slow down service. Give one person the job of checking paper and wiping the screen once an hour, and let everyone else focus on the bar. Put a “Tap to start” sign on the stand so staff do not have to explain it.

    Is it worth it?

    It costs very little to find out. Free ZillaBooth is enough to run a trial night, and an AirPrint printer is the only extra hardware. If it works, you can look at Pro for the overlay and the one-tap print button. The event photo booth app page explains how other venues use it.

    Want to give it a try? See what ZillaBooth Pro adds for venues, or start free and run your first booth night this month.

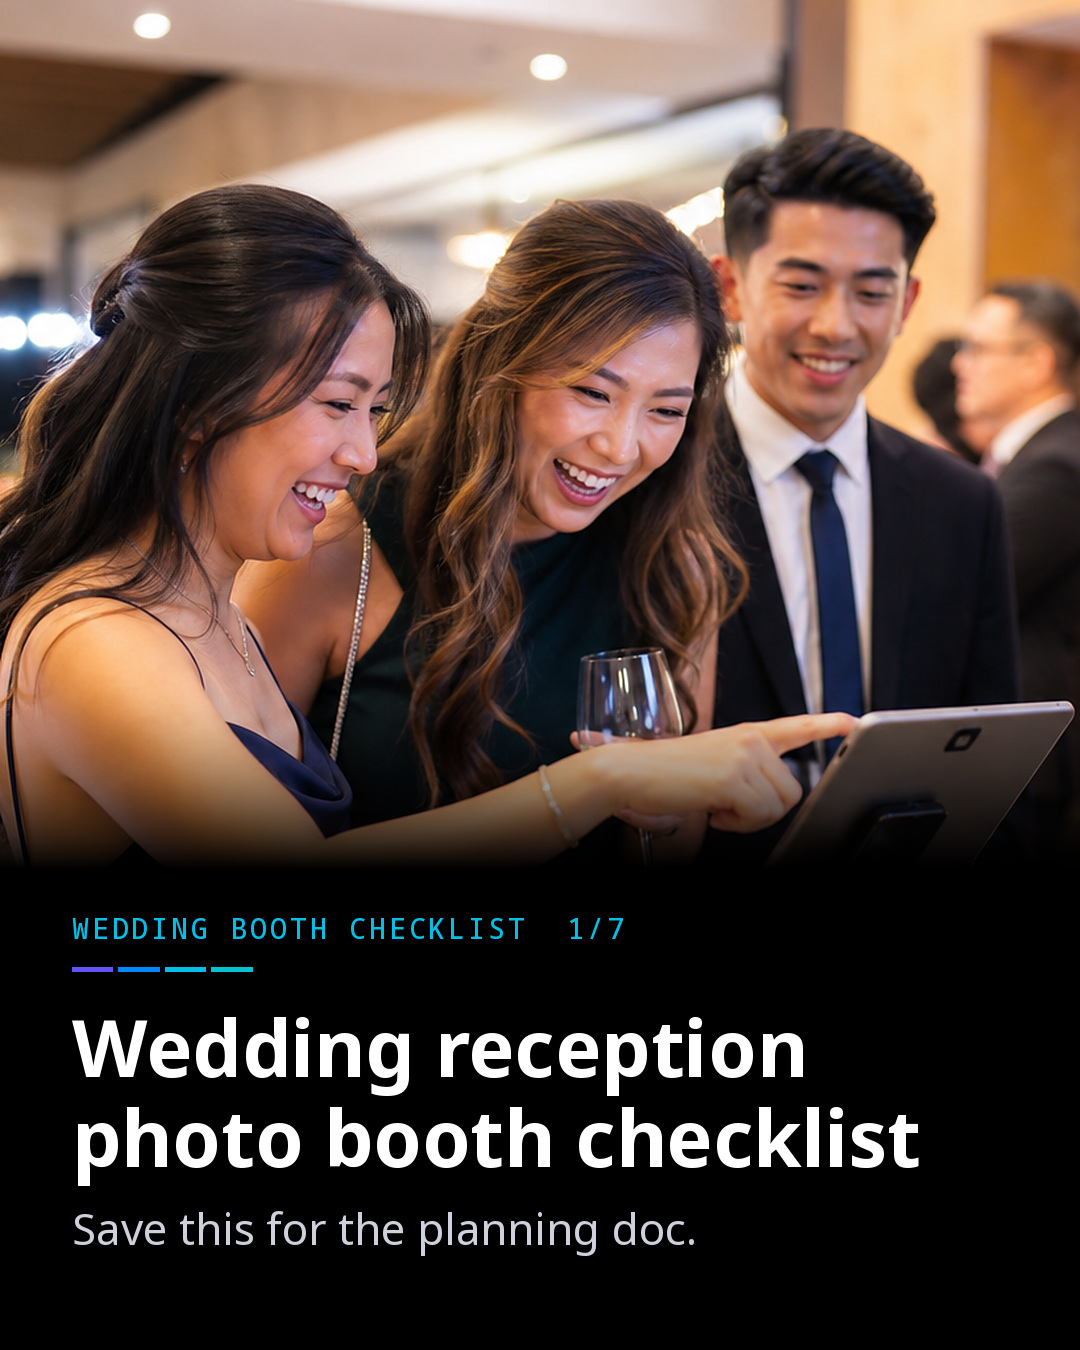
  • Wedding Reception Photo Booth Checklist, One Page

    Wedding Reception Photo Booth Checklist, One Page

    Planning a reception means a hundred small decisions, and the photo booth should not be one of the hard ones. This is a one-page checklist you can save to your planning document. It assumes you are using an iPad and ZillaBooth, and it is built so that guests can run the booth themselves while the wedding party enjoys the night.

    The gear

    • An iPad you already own, running iOS 26 or later.
    • A sturdy stand that holds it at chest height.
    • A power cable long enough to reach the nearest outlet.
    • An AirPrint printer and paper, if you want prints.

    The spot

    Put the booth near the bar, not on the dance floor. People linger by the bar, so they will happily wait for a turn. Keep an outlet within reach and leave a little space around the stand so a group of six can stand together. If you want a deeper dive on placement, our guide to lighting a dim venue also covers where to put the stand.

    The light

    Reception lighting drops after dinner. One soft light in front of the booth, pointed at faces, makes the biggest difference. Take a test grid at the time of day the party will be at its darkest, and adjust from there.

    The layout

    ZillaBooth gives you a classic 1×4 strip or a 2×2 grid after a four-photo countdown. A grid is easier for groups, and a strip is lovely for couples. Both are free, with no watermark and no account. If you are undecided, read why the 2×2 grid is still a favorite.

    Your names on the strip

    With Pro, you can add a PNG overlay with your names and the date, one design for each layout. Most couples make it in a graphics app or ask a designer friend. Keep the text away from the edges and make sure it has enough contrast against photos.

    How guests take it home

    Some guests want a printed strip and some want an email. Printing works on every tier through AirPrint, and Pro adds Simple Printing, a one-tap Print button after you choose a printer. For email, Pro includes Simple Email Sharing, which sends the photos from your own email address. Offering both means nobody leaves without their picture.

    Lock it in

    By the end of a long reception, someone has usually found the settings. Turn on Apple’s Guided Access to lock the iPad to ZillaBooth, and with Pro, Hide Settings keeps the settings button out of sight.

    If the reception runs late, set Auto-Lock to Never in the iPad’s Display & Brightness settings, start Guided Access, and keep the iPad plugged in so the screen stays on all event.

    The final test

    Do a full run-through the day before:

    • Take a strip as a couple and print it.
    • Check that the printer is on the same Wi-Fi network as the iPad.
    • Walk a friend through the booth without explaining it, and see what they ask.
    • Pack spare paper and a charger.

    Who looks after it

    Name one friend as the booth contact, someone who can refill paper and answer a question. The booth itself does not need a staff member, but a single contact person keeps small problems from becoming big ones.

    Where to learn more

    The wedding photo booth page has more details on how couples use ZillaBooth at receptions, and the Pro page lists the features that matter for overlays, printing and email. When you are ready, try ZillaBooth Pro or start with the free app and run a practice session at home.

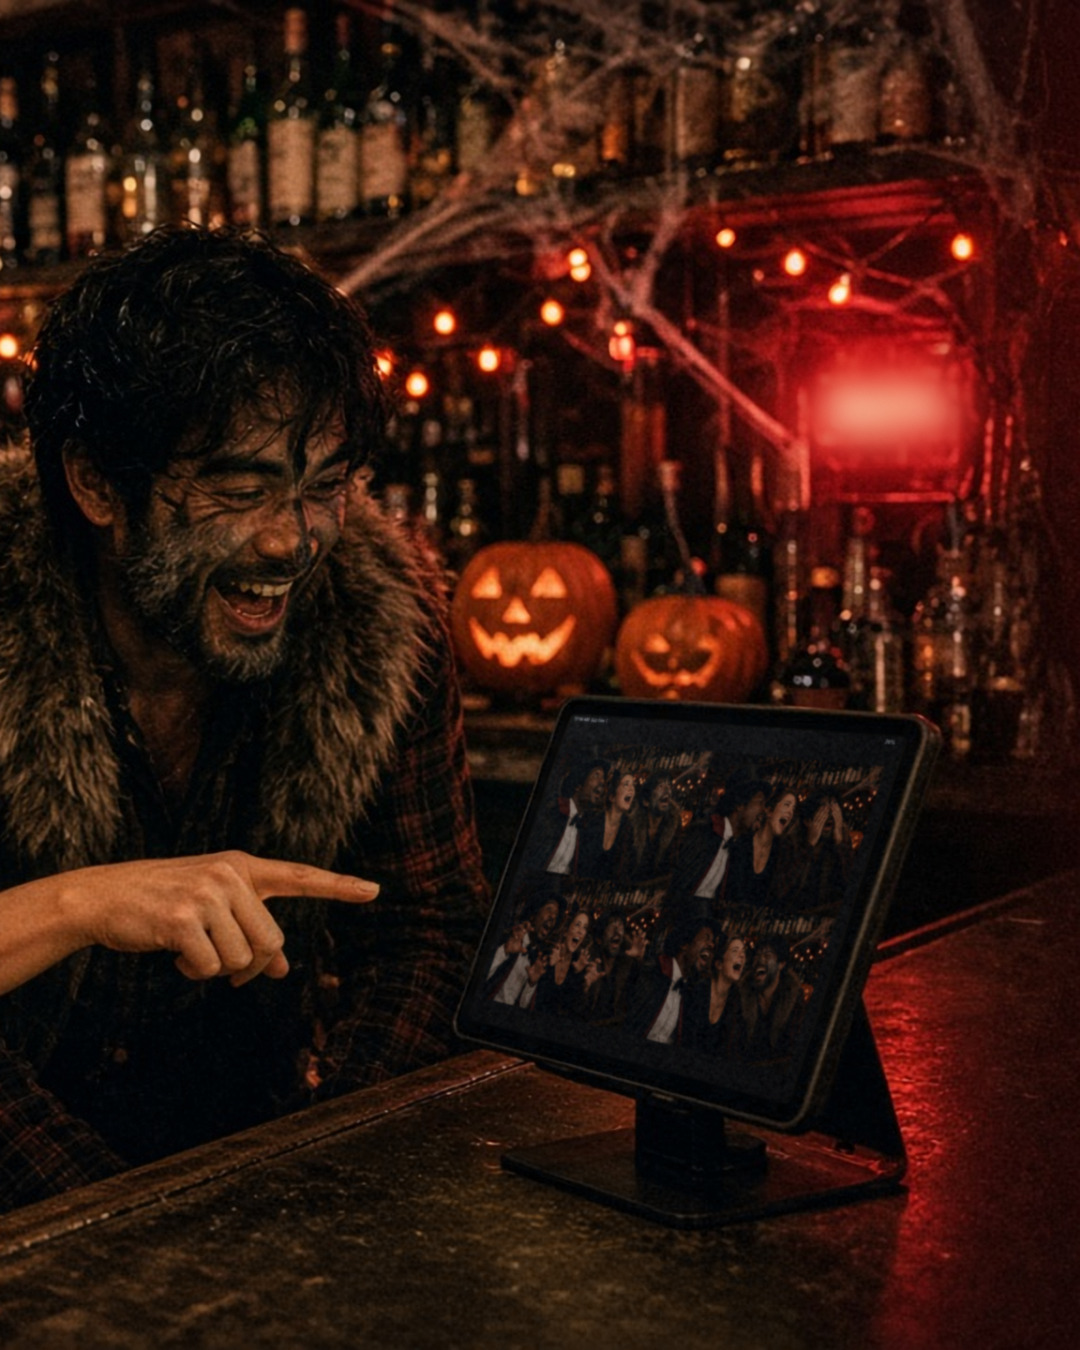
  • Four Frames, One Grid: Halloween Night at the Bar

    Four Frames, One Grid: Halloween Night at the Bar

    Halloween night at the bar is loud, crowded and full of costumes people spent weeks on. It is also a great night for a photo booth, because groups already want to pose and show off. Here is a simple way to run one that tells the story of the night in four frames.

    Four prompts, one grid

    ZillaBooth takes four photos in a row after a countdown and puts them together as a 2×2 grid. That structure gives you a built-in storyline. Tape four prompts next to the iPad and let the costumes direct themselves:

    1. Everyone looks up.
    2. Someone hides their eyes.
    3. Claws out.
    4. The whole crew screams.

    Guests do not need instructions beyond that. The countdown does the rest, and the finished grid reads like a tiny horror movie.

    Where to put it

    Place the iPad on a stand at the end of the bar, where people are already waiting for drinks. Keep it out of the main walkway so the line does not block the bartenders. If your bar has a dim corner near the back, that works too, as long as you add a bit of light on faces. One small lamp in front of the booth is usually enough.

    A quick check before opening:

    • Take a test grid with a staff member in costume.
    • Make sure the iPad is plugged in and the stand is steady.
    • Wipe the screen. Fingerprints show up under purple light.

    Prints and shares

    Guests love a physical keepsake, and a bar is a natural place for one. Printing works on every tier through AirPrint, so an AirPrint printer behind the bar is all you need, and Pro adds Simple Printing, a one-tap Print button. Guests can also share the grid from the iPad to their own phones, which spreads the picture around social media long after last call.

    Make it feel like your bar

    If you plan to run this more than once, a little branding helps. With Pro, you can add your own PNG overlay to every grid, such as the bar’s name or a Halloween border. Guests post the picture, and your name goes along with it.

    For a long night, Apple’s Guided Access locks the iPad to ZillaBooth, and with Pro, Hide Settings keeps the settings button out of sight. That way a curious guest cannot wander out of the app halfway through the evening.

    Staff tips

    Bartenders are busy, so the booth should not add to their work. A few things help:

    • Assign one person to check the paper once an hour.
    • Put a “Tap to start” sign on the stand.
    • Keep a small tray of props, such as fangs and hats, at the end of the bar.
    • Let the first group of the night take a few practice photos so others see how it works.

    Why this works

    A photo booth gives guests a reason to stay for one more round, and it gives the bar a reason to get tagged in photos. For more ideas on how venues use the night out as a marketing moment, see our post on bar and nightclub marketing. You can also read more on the event photo booth app page.

    Planning a booth night? Look at ZillaBooth Pro for overlays and printing, or start free and run a test grid this week.

  • How to Turn an iPad Into a Wedding Photo Booth

    How to Turn an iPad Into a Wedding Photo Booth

    How do I turn an iPad into a wedding photo booth?

    To turn an iPad into a wedding photo booth, put it on a sturdy stand at chest height near soft, even light, install ZillaBooth from the App Store, and with ZillaBooth Pro, lock it to the app with Guided Access so guests can run it themselves. ZillaBooth Pro also lets guests tap Print for a strip through Simple Printing and email their photos to themselves from your own email address.

    1. Stand: mount the iPad on a sturdy stand at about chest height, near an outlet so it stays plugged in. In Guided Access, set Display Auto-Lock to Never and keep the iPad plugged in so the screen stays on all event.
    2. Lighting: face guests toward soft, even light, such as a window by day or a lamp or LED panel at night, and keep bright windows behind the iPad, not behind the guests.
    3. ZillaBooth: install ZillaBooth (iPadOS 26 or later) and pick a 2×2 grid or a 1×4 strip.
    4. Guided Access (Pro recommended): lock the iPad to ZillaBooth. With ZillaBooth Pro, the settings button hides automatically while the iPad or iPhone is locked in Guided Access or Single App Mode, and comes back when you end it.
    5. Simple Printing (Pro): select your AirPrint printer once in Simple Printing so guests can tap Print to send their strip to it. DNP printers work through DNP’s WCM-Plus.
    6. Guest email (Pro): set up Simple Email Sharing with your email account’s SMTP settings so photos arrive from your own email address.
    7. Test run: run a full session, including printing and email, before guests arrive.

    A wedding photo booth does not have to be a big rented box with a curtain. If you own an iPad, you already have most of what you need. Here is how couples and planners set one up with ZillaBooth, step by step.

    Step 1: Stand and spot

    Start with a sturdy stand, the kind that holds the iPad at about chest height. Place it near the bar or the lounge area rather than on the dance floor. People linger by the bar, and they will wait for a turn without grumbling. Keep an outlet nearby so the iPad stays plugged in all evening.

    For more on lighting a dim venue, see our lighting guide.

    Step 2: Open the app and pick a layout

    ZillaBooth is free to download. It needs iOS 26 or later. Open the app, and choose a classic 1×4 strip or a 2×2 grid. A grid is a good default at weddings because it holds a whole group, while a strip suits couples and small groups.

    The free version (Core) has no watermark and needs no account, so there is nothing to sign up for before the reception.

    Step 3: Let guests run it

    Guests tap the screen, and a countdown starts. Four photos later, the finished picture appears. That is the whole experience, and it is why wedding parties and grandparents can both use it without help. Test it yourself with a few people before the day so you know exactly how long a session takes.

    Step 4: Add printing and email

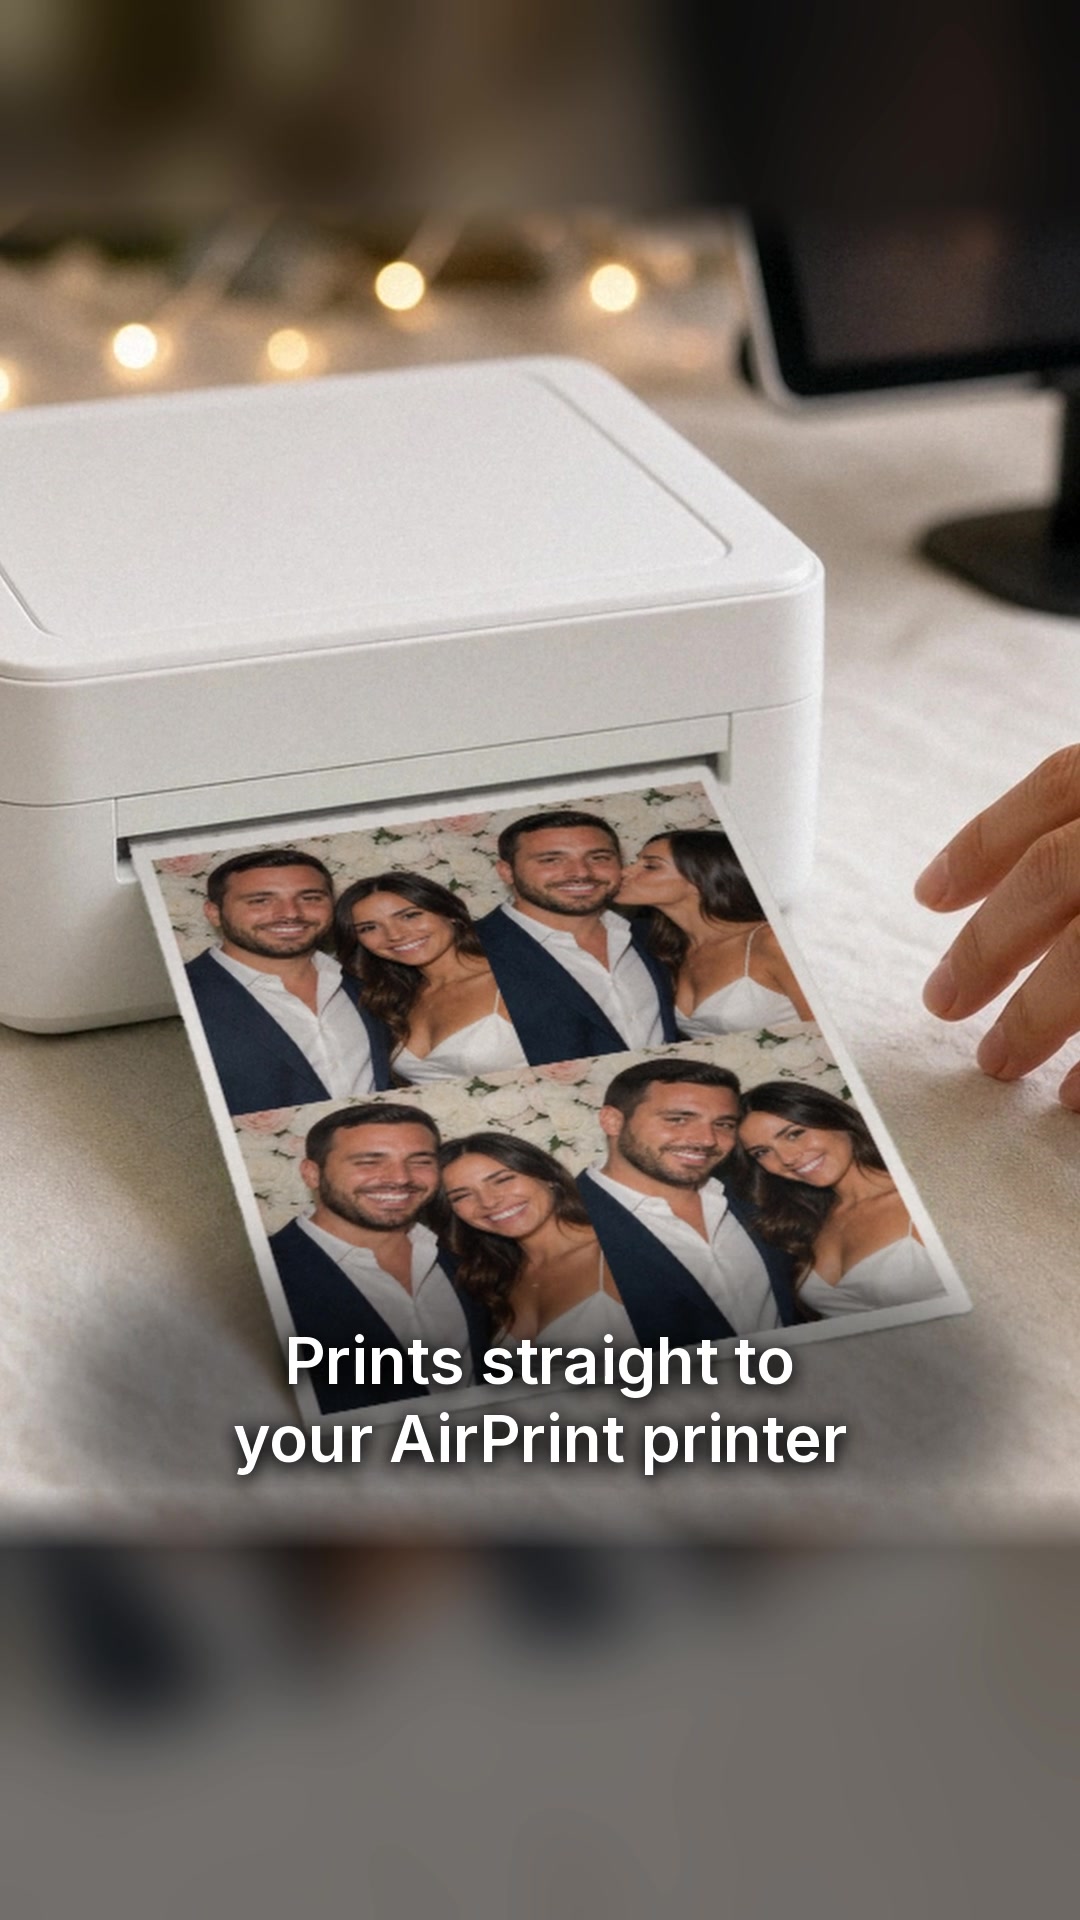
    If you want prints, set up an AirPrint printer on the same Wi-Fi network as the iPad. With ZillaBooth Pro, Simple Printing sends each strip to that saved printer with one tap when guests tap Print, and DNP printers work through DNP’s WCM-Plus. You can also print from the iOS share sheet. Place the printer within sight of the booth, but away from the walkway.

    For guests who prefer a digital copy, Pro includes Simple Email Sharing, which sends the photos from your own email address (on your own domain, if you have one) using your email account’s SMTP settings. Guests type their address on the iPad and the photos arrive in their inbox.

    Step 5: Make it yours

    Pro lets you add your own PNG overlay, for example your names and the date, to every picture. You create the design as a PNG in any graphics tool, then load it into the app. Overlays work one at a time.

    Step 6: Keep guests in the app

    At a long reception, someone will eventually poke around in the settings. Turn on Apple’s Guided Access to lock the iPad to ZillaBooth. With ZillaBooth Pro, the settings button hides automatically while the iPad or iPhone is locked in Guided Access or Single App Mode, and comes back when you end it. Together they keep the iPad on the booth screen.

    What it costs

    ZillaBooth Core is free. Pocket is a one-time purchase, and Pro is a monthly or yearly subscription that includes Pocket. You can see current pricing in the app. Most couples start with Core and a test run, then decide whether they want prints and overlays on the day. The Pocket page explains what the one-time upgrade adds.

    A short checklist for the day before

    • Charge the iPad and pack the charger.
    • Print a test strip and check the paper.
    • Tape a “Tap to start” sign to the stand.
    • Ask one friend to be the booth contact in case someone has a question.

    FAQ

    Can I use an iPad as a wedding photo booth?

    Yes. ZillaBooth turns an iPad into a wedding photo booth that makes classic 2×2 grids and 1×4 strips. ZillaBooth Pro adds a self-serve setup with Guided Access, Simple Printing and guest email from your own email address (SMTP).

    Do I need ZillaBooth Pro for a wedding?

    Not to take photos: the free version runs the booth and guests can share from the iPad. Pro is worth it if you want Simple Printing, guest email from your own email address (SMTP), a custom overlay with your names and date, or external camera support on iPad (UVC webcams, plus Canon EOS cameras from about 2010 on; tested on the Rebel SL2, support varies by model).

    How do I stop guests leaving the photo booth app?

    Turn on Apple’s Guided Access and start it inside ZillaBooth. With ZillaBooth Pro, the settings button hides automatically while the iPad or iPhone is locked in Guided Access or Single App Mode, and comes back when you end it.

    Which printer works with an iPad photo booth?

    With ZillaBooth Pro, Simple Printing sends each strip to a saved AirPrint printer with one tap; DNP photo printers work through DNP’s WCM-Plus. On any tier, you can also print from the iOS share sheet. See using DNP printers with ZillaBooth.

    Ready to try it?

    You can see how it fits into a full reception on the wedding photo booth page, and the Pro page lists the extras for overlays, email and printing. When you are ready, download ZillaBooth from the App Store, set it up on a quiet evening, and run a few test sessions with friends.

    Comparing apps first? See the best photo booth apps for iPad, our Simple Booth alternatives guide, or why an iPad is a cheap alternative to renting a photo booth.

    Example strips and grids

    A few example layouts in the style guests make with ZillaBooth: classic 1×4 strips, 2×2 grids, and Pocket looks with black-and-white photos and borders. These are illustrations, not photos from real events.

  • Halloween Photo Booth Checklist for Your iPad

    Halloween Photo Booth Checklist for Your iPad

    Costumes deserve better than a blurry phone picture taken in a hallway. If you are hosting a Halloween party this year, the iPad you already own can be the photo booth. Here is a five-step checklist you can run through in about fifteen minutes.

    1. Put the iPad on a stand at chest height

    Hand-holding is how you end up with crooked photos and tired arms. A tabletop or floor stand keeps the camera steady and at a comfortable height for most guests. Tape a small mark on the floor where people should stand so everyone ends up in frame, even the one in the giant inflatable dinosaur suit.

    2. Light the faces, not the cobwebs

    Halloween rooms are dark on purpose, and cameras hate that. Put one lamp in front of the booth, pointing at where faces will be. A warm bulb keeps the mood, and you can leave the purple lights and fog on behind the guests. Take a test photo and adjust until you can see everyone’s makeup.

    3. Pick a 2×2 grid or a classic strip

    ZillaBooth takes four photos in a row after a countdown and gives you one finished picture. You can choose a 2×2 grid or a classic 1×4 strip. A grid works well for groups because everyone fits in each frame. A strip feels more old-school and suits couples and pairs. Both layouts are free, with no watermark and no account.

    4. Add a spooky overlay with your party name

    With Pro, you can put your own PNG overlay on every picture, such as a cobweb border with the party name and the date. You design it once in any graphics tool and load it in. Our post on designing overlays for non-designers explains how to keep text readable. If you would rather skip this step, the plain grid still looks great.

    5. Decide how guests take it home

    Some people want a print for the fridge, and some want a copy on their phone. Printing works on every tier through AirPrint, so if you have an AirPrint printer on your Wi-Fi, guests can print. Guests can also share the picture straight from the iPad, which is handy for the friend who left early.

    A few extra tips

    • Keep a small basket of props near the stand. Simple things work: plastic fangs, a witch hat, a cardboard sign.
    • Do a full run-through before the first guest arrives. Take a strip with the host and fix anything that looks off.
    • Plug the iPad in. Four-photo sessions all night add up, and a dead screen at 10 pm is a sad ending.
    • Put a small sign by the stand that says “Tap to start”.

    Where to go from here

    If you are planning a larger party, the event photo booth app page shows how the same setup scales to a venue. If you only need a simple setup for the family or a few friends, the Pocket upgrade adds adjustable timers and flash control.

    Ready to build your booth? Get ZillaBooth from the App Store, run a test strip tonight, and save the checklist for party day.

  • Walk Up, Pose, Print: A Self-Serve iPad Photo Booth

    Walk Up, Pose, Print: A Self-Serve iPad Photo Booth

    The best event photo booth is the one nobody has to explain. A guest walks up, taps the screen, poses, and leaves with something to hold. That is the whole idea behind running ZillaBooth on an iPad, and it works the same way at a birthday, a wedding or a company night.

    What a guest sees

    The iPad sits on a stand with the camera screen open. A guest taps once and a countdown starts. Four photos are taken in a row, and then the finished picture appears, either a classic strip or a 2×2 grid, whichever layout you picked.

    From there they choose what happens next. They can print it, send it to themselves, or both. There is no app to install on their phone and no account to create. Strips and grids are free in the core app, with no watermark.

    That is why a self-serve booth works so well. Guests figure it out in about five seconds, and the host gets to enjoy the party.

    What you set up once

    Most of the work happens before the doors open. Put the iPad on a sturdy stand at chest height, near an outlet if you can. Pick your layout, take a test strip, and check the lighting on a face, not on an empty chair.

    If you want prints, you need a printer. Printing works on every tier through AirPrint, so any AirPrint printer on the same network is enough to get started. With Pro, Simple Printing adds a one-tap Print button for guests once you have chosen a printer. If you want the full walkthrough, our printing station guide covers placement and paper.

    If you would rather guests keep a digital copy, Pro adds Simple Email Sharing, which sends each guest’s photos from your own email address. Guests type their address, and the photos arrive in their inbox with your name on the sender line.

    Small things that keep the line moving

    A few habits make a big difference:

    • Put a small sign next to the iPad that says “Tap to start”. It saves a lot of questions.
    • Keep the printer within sight but out of the traffic path, so guests do not crowd the booth while they wait.
    • Add a second light if the room is dim. One lamp pointed at faces beats any amount of editing.
    • Check the paper and ink before the party, not during it.

    Who it suits

    A self-serve booth is a good fit anywhere guests mingle: weddings, milestone birthdays, retirement parties, holiday gatherings and office nights. If you are comparing options, the event photo booth app page shows how ZillaBooth fits different event types, and the Pro page explains what operators get when they run booths on a regular basis.

    Give it a try

    You can start without paying anything. ZillaBooth is free to download, and it turns the iPhone or iPad you already own into a four-shot photo booth. Set it up on a quiet evening, run a few test strips with whoever is nearby, and you will know exactly how your event will feel.

    Ready to try it? Download ZillaBooth from the App Store and run a test strip tonight.

  • ZillaBooth Now Works with DNP Dye-Sub Printers via WCM-Plus

    ZillaBooth Now Works with DNP Dye-Sub Printers via WCM-Plus

    Running a busy photobooth means prints have to keep up. ZillaBooth Pro already prints through Apple AirPrint with Simple Printing, so guests can send their photo straight to a saved printer with no print dialog. With DNP’s WCM-Plus Wireless Communication Module in the middle, that same AirPrint sheet now reaches DNP dye-sublimation printers — including DS620A, DS820A, QW410, DS-RX1HS, DS40, and DS80.

    You don’t need a custom SDK or a special ZillaBooth driver. Connect your DNP printer(s) to WCM-Plus over USB, put the iPad on the same network (Wi‑Fi or wired Ethernet), turn on Simple Printing in ZillaBooth Pro, and choose the WCM-advertised printer (for example DS620-4x6) once from the iOS printer list. ZillaBooth saves it, so every print after that goes straight to the printer with no dialog.

    Why operators care

    • High-volume dye-sub quality from DNP event printers
    • Up to three DNP printers on one WCM-Plus, with a managed queue (processing / transferred / failed, reprint last ten)
    • Browser admin portal for live queue, media remaining, and device health — no separate DNP management app
    • Flexible networking: hotspot, venue Wi‑Fi, or Ethernet (including Apple USB‑C Ethernet adapter paths)

    Get the full setup

    Step-by-step hardware, hotspot IP notes (192.168.4.1 vs venue LAN IP vs direct-cable 192.168.5.1), QW410 power caveats, monitoring tips, and official DNP / Apple links are in our support guide:

    → ZillaBooth + DNP Printers via WCM-Plus — Compatibility & Setup Guide

    Questions? Hello@ZillaBooth.com

  • iPad vs. The World: Turning Your Tablet into a Professional Kiosk

    iPad vs. The World: Turning Your Tablet into a Professional Kiosk

    The modern reception floor is the front line of any professional operation. It’s the first impression for clients, the central hub for deliveries, and the point of check-in for employees. In this high-traffic, high-stakes environment, the choice of a digital sign-in or informational display solution cannot be a compromise. You don’t need a consumer-grade tablet with a fancy stand; you need a dedicated, hardened, professional kiosk…a system that’s reliable, secure, and visitors can use themselves once Guided Access and Pro’s Hide Settings are on and the iPad is plugged in, from the first morning rush to the last night shift.

    This is where the combination of Apple’s iPad and the ZillaBooth Pro application delivers a solution that truly earns the title of “ultimate reliability.” What sets this setup apart is the clever, dual-layered use of the iPad’s native operating system features, specifically Guided Access, in conjunction with the application-level security provided by ZillaBooth Pro’s “Hide Settings” feature. Together, they transform a versatile consumer device into a bulletproof, single-purpose professional tool.

    The fundamental challenge with using any standard tablet as a kiosk is maintaining continuous, focused operation. Users are curious. A finger might swipe up to access the home screen, the device might dim and go to sleep during a lull, or a well-meaning but confused visitor might accidentally start adjusting the screen brightness or attempting to connect to a different Wi-Fi network. These small disruptions lead to system failure, requiring intervention from already busy staff. The goal is as few interventions as possible.

    The first critical step in building a self-serve kiosk is guaranteeing the screen stays on and the user cannot exit the application. On the iPad, that starts with Guided Access, Apple’s built-in accessibility feature. With ZillaBooth Pro and Guided Access or Single App Mode on, the screen stays on all event. Set Auto-Lock to Never and keep the iPad plugged in.

    Layer 1: Guided Access (Screen Stays On)

    Guided Access is Apple’s system-level kiosk mode. It is designed to lock the device into a single application and manage which hardware buttons and screen areas are active. This is the ultimate tool for turning a general-purpose tablet into a singular, dedicated digital device.

    Setting up Guided Access for a Bulletproof Kiosk:1. Access the Controls: Navigate to the iPad’s Settings app, tap on Accessibility, and then select Guided Access.
    2. Enable and Set Security: Turn the toggle switch ON. Crucially, tap on Passcode Settings and set a secure Guided Access Passcode. This passcode is the master key that will be required to exit the ZillaBooth Pro app or change any Guided Access settings. Using Face ID or Touch ID is highly recommended as a fast, secure alternative to the passcode for authorized staff.
    3. Activate the Kiosk Session: Open the ZillaBooth Pro application. Now, quickly triple-click the Home button (on older models) or the Side/Power button (on newer models). This action will bring up the Guided Access initiation screen.
    4. Configure Essential Options: Before hitting ‘Start’ in the top right corner, check the ‘Options’ menu in the bottom-left. This is where you disable all failure points.
    * Disable Sleep/Wake Button: This stops anyone from putting the screen to sleep with the physical button. To keep it on all day, also set Auto-Lock to Never in Settings > Display & Brightness and keep the iPad plugged in.
    * Disable Volume Buttons: Prevents users from accidentally muting the device or attempting to exit the app through any non-screen controls.
    * Disable Touch: While you generally need touch enabled for a kiosk, this option is vital for advanced troubleshooting. You can temporarily disable touch across the entire screen, allowing you to clean the screen or prevent interaction while a remote update is running.
    * Time Limit: Ensure this is disabled, as the kiosk must operate indefinitely.
    5. Start the Session: Tap ‘Start.’ The iPad is now entirely locked into the ZillaBooth Pro application. A triple-click of the button will only allow an exit upon successful entry of the Guided Access Passcode.Why Guided Access Creates the Ultimate Reliable Solution:

    The reliability is not merely functional; it is systemic. Guided Access is an operating system feature, meaning it overrides the application itself and all other potential system alerts. An application crashing, a rogue notification attempting to pull the user away, or even the device trying to update in the background will all be contained by the Guided Access fence. For a busy reception floor, the benefit is clear: the kiosk remains fixed on the ZillaBooth Pro interface, running hour after hour without anyone re-launching it, as long as the iPad stays plugged in. This level of system-enforced focus is unparalleled and forms the secure shell that contains the application.

    Layer 2: Locking Down the App with “Hide Settings”

    While Guided Access handles the external, system-level security…preventing the user from exiting the app…the ZillaBooth Pro “Hide Settings” feature handles the internal, application-level security.

    Every professional application has configurable settings, whether it’s changing the default language, adjusting camera settings for a photo booth feature, or re-configuring the Wi-Fi connection the app uses. These settings are crucial for management but represent a vulnerability in a self-serve, public environment. Even if a user cannot exit the app, they could potentially find an in-app path to tamper with the kiosk’s configuration, compromising data integrity or the user experience.

    The Role of ZillaBooth Pro’s “Hide Settings”:

    In ZillaBooth Pro, Hide Settings works on its own. Whenever Guided Access or Single App Mode is on, the Settings button disappears from the booth screen, so guests can’t reach your setup.

    How “Hide Settings” works in ZillaBooth Pro:1. There’s no switch to find. Hide Settings is automatic with Pro.
    2. Start Guided Access (or Single App Mode) on the iPad.
    3. The Settings button disappears from the booth screen while the iPad is locked to the app.
    4. Check it: the Settings button should be gone. To get it back, end Guided Access with your passcode.Why the Dual-Layer Approach Is Self-Serve and Secure:

    This two-pronged defense is what makes the iPad/ZillaBooth Pro solution a dependable self-serve setup. * External Security (Guided Access, screen stays on): Prevents unauthorized device interaction (exiting the app, turning off the screen, using system buttons). With Auto-Lock set to Never and the iPad plugged in, the device stays awake and running your app.
    * Internal Security (ZillaBooth Pro Hide Settings): Prevents unauthorized application interaction (changing your layout, overlay, or sharing settings). This ensures the integrity of your data and the consistency of the user experience.This combination lets visitors use the kiosk themselves with far less supervision. If a user tries to exit, they hit the Guided Access passcode lock. If a user manages to find an in-app configuration menu, the “Hide Settings” feature renders it inoperable. This cuts down on supervision and ensures the data you collect is never compromised by unauthorized configuration changes.

    The iPad vs. The World: Why iOS Wins the Kiosk War

    While other tablets exist, the iPad’s unique architecture and integration are essential to this robust self-serve solution, justifying its place in a professional environment:1. Unified OS and Hardware: Apple controls both the hardware and the software, ensuring that Guided Access is a perfectly integrated, rock-solid feature that is immune to the kind of software bugs or hardware inconsistencies that can plague third-party kiosk modes on fragmented operating systems.
    2. Predictable Power Management: The iPad’s power management is highly standardized, which is critical for long-term, always-on operation. You know exactly how the device will behave when plugged in for days or even weeks on end.
    3. Enterprise Aesthetic and Durability: iPads are built with high-quality components, offering a sleek, professional appearance that elevates the look of any reception floor. Their glass and aluminum construction is durable and easy to clean, critical for a high-touch, public-facing machine.
    4. Simplified Management: Once locked down, managing a fleet of iPads is simpler than managing a mixed environment. Set up one booth, and the next one takes the same few steps.In the fast-paced environment of a busy reception floor, every second spent troubleshooting a digital device is a second lost on core business operations. By implementing the technical tandem of the iPad’s Guided Access (with Pro, the screen stays on while it runs) and ZillaBooth Pro’s “Hide Settings,” you create more than just a tablet in a stand…you create a dependable, industrial-strength, self-serve digital receptionist. Set Auto-Lock to Never, keep it plugged in, and visitors can use it all day.

  • Top 15 DIY Photo Booth Props on a Budget

    Top 15 DIY Photo Booth Props on a Budget

    The post highlights inexpensive photo booth props that can help guests take playful, shareable photos. It focuses on budget-friendly wearables, signs, and inflatables such as oversized sunglasses, feather boas, letterboards, speech bubbles, and giant frames.

    It also suggests avoiding costly rental equipment by using an iPad with the ZillaBooth app to create a self-serve photo booth guests run themselves, with Guided Access and the iPad plugged in (Pro adds Hide Settings).

    Great Photos Start With Great Props

    You don’t need to spend a fortune to get your guests laughing and posing. The secret to a hilarious, highly shareable photo booth is a great prop table. Skip the expensive rental add-ons and hit up Amazon or your local dollar store for these budget-friendly hits.

    Guests enjoying a DIY photo booth at an event — section 1

    Wearables & Accessories

    • Oversized Sunglasses: Heart-shaped, pixelated “deal with it” glasses, or giant stars.
    • Feather Boas: A classic. Buy a multi-color pack so guests can mix and match.
    • Novelty Hats: Think cowboy hats, crowns, captain’s hats, and sequin fedoras.
    • Faux Mustaches & Lips: Get the ones mounted on wooden dowel rods for easy posing.

    Signs & Letterboards

    • Felt Letterboard: Pre-write a funny party slogan or let guests write their own!
    • Dry Erase Speech Bubbles: Let guests write custom messages to the host or couple.
    • Mugshot Boards: Perfect for birthdays and bachelorette parties.

    Inflatables

    • Inflatable Guitars & Microphones: Instant rockstar vibes.
    • Giant Picture Frames: An inflatable gold baroque frame guests can hold up.
    Diagram illustrating a photo booth workflow for Top 15 DIY Photo Booth Props on a Budget

    Ready to Set Up Your Booth?

    Now that you have your props, you need the camera! Don’t spend a fortune renting a machine. Download ZillaBooth, mount your iPad on a stand, and turn it into a self-serve photo booth guests run themselves, with Guided Access and the iPad plugged in (Pro adds Hide Settings).

    Check out our DIY iPad Photo Booth App

  • How to Make a Stunning DIY Photo Booth Backdrop

    How to Make a Stunning DIY Photo Booth Backdrop

    A budget-friendly photo booth backdrop can be built with a simple PVC pipe frame and inexpensive materials. The post suggests using foil fringe curtains, sequin fabric, or balloon garlands to create a themed background.

    It also notes that a phone or iPad on a tripod can be used with the ZillaBooth app to let guests take photos throughout the event.

    Set the Scene on a Budget

    A plain white wall isn’t going to cut it. A dedicated backdrop tells your guests exactly where the photo booth is and sets the visual theme for your event. Building one yourself is surprisingly easy and cheap.

    Guests enjoying a DIY photo booth at an event — section 1

    The Frame: PVC Pipe is Your Best Friend

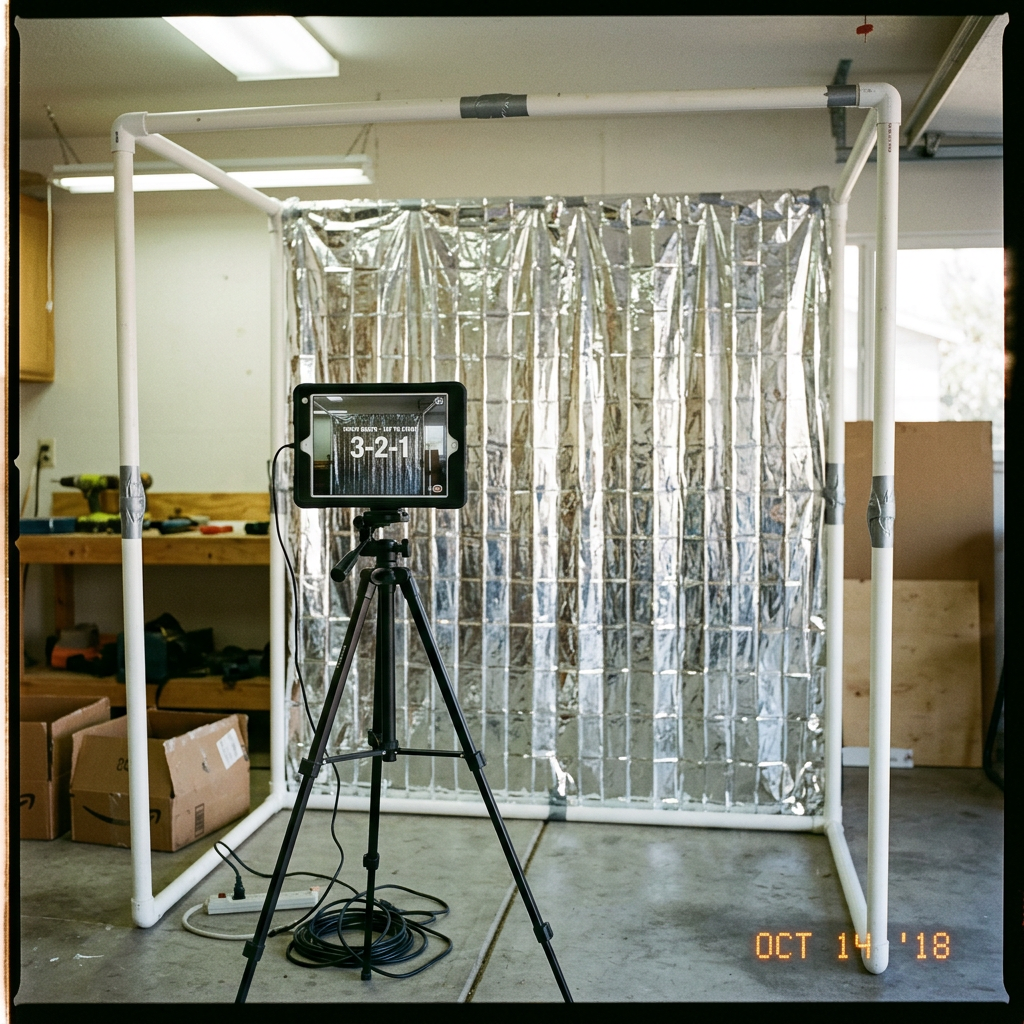
    You don’t need to buy an expensive photography stand. A quick trip to the hardware store for some 1-inch PVC pipes and connector joints is all you need. You can build a sturdy 7×7 foot frame for under $25. It’s lightweight, easy to assemble on-site, and breaks down for storage.

    3 Cheap & Easy Backdrop Ideas

    1. Foil Fringe Curtains: The ultimate party hack. Tape 3 or 4 metallic fringe curtains to your top pipe. They cost about $10 a pack and look incredibly vibrant on camera.
    2. Sequin Fabric Panels: Buy a cheap sequin tablecloth online and drape it over your frame. It catches the ring light beautifully and gives a premium, Hollywood feel.
    3. Balloon Garlands: Buy a DIY balloon arch kit. Attach it to one corner of your frame and let it cascade down the side for a modern, organic look.
    Diagram illustrating a photo booth workflow for How to Make a Stunning DIY Photo Booth Backdrop

    Capture the Magic

    Once your backdrop is glowing, put it to use! Download ZillaBooth on your iPhone or iPad, set it on a tripod, and let your guests capture memories all night long.

    See how the Birthday Party Photo Booth App works

  • ZillaBooth QR Code Photo Delivery Setup

    ZillaBooth QR Code Photo Delivery Setup

    Want to let guests walk away from your photo booth with their photos without exchanging phone numbers, handing out USBs, or managing a complicated app? QR Code Image Delivery makes it effortless — guests scan a posted QR code, find their photo in a shared cloud gallery, and save it directly to their phone in seconds.

    The best part: this works with ZillaBooth right now, using features already built in. No app updates, no new subscriptions, no code. Just a 15-minute setup using free tools you likely already have.

    What is QR Code Image Delivery?

    QR Code Image Delivery is a setup — not a separate feature — that uses ZillaBooth’s built-in Simplified Sharing BCC field together with an IFTTT automation and a cloud storage folder (like Google Drive) to create a self-updating photo gallery guests can access by scanning a single QR code.

    Guests enjoying a DIY photo booth at an event — section 1

    Every time a guest completes a photo session and taps Share, ZillaBooth silently BCC’s a copy of the email — photo attachment included — to an IFTTT trigger address. IFTTT automatically deposits that photo into your cloud folder. Guests scan the QR code you’ve posted near the booth, open the gallery on their phone, and save their photo. No app to download. No account to create. No friction.

    What you’ll need

    Guests enjoying a DIY photo booth at an event — section 2

    Step 1 — Create your event’s Google Drive folder

    Start by creating a dedicated folder in your cloud storage provider (like Google Drive) for your event. Giving it a specific name (like Smith Wedding 2026 Photos) keeps it organized and ensures guests only see photos from their event.

    Guests enjoying a DIY photo booth at an event — section 3
    Placeholder for ZillaBooth app screenshot pending manual capture
    Replace this image: ZillaBooth settings screen for ZillaBooth QR Code Photo Delivery Setup
    1. Open Google Drive and create a new folder for your event.
    2. Right-click the folder → Share → change access to “Anyone with the link can view.”
    3. Copy the shareable link — you’ll use it to generate your QR code in Step 4.

    Tip: Create a fresh folder and QR code for each event so guests only see photos from that day — not from previous sessions.

    Step 2 — Set up the IFTTT automation

    IFTTT (If This Then That) is a free automation platform that connects your apps and services. Here you’ll set it up to watch for incoming emails and automatically save any photo attachments to your Google Drive folder.

    1. Sign in at ifttt.com.
    2. Use the pre-built applet Save email attachments to Google Drive — it does exactly what you need.
    3. Click Connect and authorize both your email and Google Drive accounts when prompted.
    4. When configuring the action, set the Google Drive folder path to the event folder you created in Step 1.
    5. Save and enable the applet.
    6. Note your IFTTT trigger email address: trigger@applet.ifttt.com — this is the address you’ll enter in ZillaBooth.

    That’s the automation. Any email sent to trigger@applet.ifttt.com with a file attachment will have that attachment automatically uploaded to your specified Google Drive folder.

    Step 3 — Configure ZillaBooth’s BCC field

    1. Open ZillaBooth and navigate to your Simplified Sharing settings.
    2. In the BCC field, enter: trigger@applet.ifttt.com (or whatever your specific IFTTT trigger email address is)
    3. Save your settings.

    That’s it on the ZillaBooth side. From this point on, every time a guest completes a session and taps Share, ZillaBooth will silently BCC that email — and IFTTT will automatically deposit the photo into your Google Drive event folder.

    Step 4 — Generate and display your QR code

    1. Take the shareable Google Drive folder link you copied in Step 1.
    2. Paste it into a free QR code generator.
    3. Download the QR code image.
    4. Print it on a sign, postcard, table tent, or sticker — anywhere guests will see it near the booth.

    Suggested sign text: “Scan to get your photos! Your image will appear here within seconds of sharing.”

    Tip: Many QR code generators let you add a logo or custom colors. Drop in your event or company branding to make the sign look polished and professional.

    The guest experience

    Here’s what the flow looks like from a guest’s point of view:

    1. Guest takes photos at the ZillaBooth.
    2. Guest enters any email address at the sharing screen (their own, a placeholder, or a dummy — it doesn’t matter) and taps Share.
    3. The photo arrives in the Google Drive folder automatically via IFTTT — typically within seconds to about a minute.
    4. Guest scans the QR code posted near the booth, opens the folder on their phone, finds their photo, and saves it.

    The flow is familiar, zero-friction, and requires no app installation on the guest’s part.

    Tips and customization

    • One folder per event: Create a fresh Google Drive folder and a new QR code for each event so guests only see photos from their event — not previous ones.
    • Want it even faster? Upgrade to IFTTT Pro for near-real-time automation speeds. The free tier can have up to a 1-hour delay.
    • Not a Google Drive user? IFTTT also supports Dropbox, OneDrive, Box, and others. Swap in whatever cloud storage you already use — the ZillaBooth BCC configuration stays exactly the same.
    • Want branded QR codes? Tools like QRCode Monkey let you embed a logo and choose custom colors for a more polished look. For a streamlined, minimal QR code, we love using PEW’s Corner QR Code Generator.
    • Already use Make or Zapier? Both platforms support similar email-to-cloud-storage automations if you prefer them over IFTTT.

    A note on the sharing step

    For this flow to work, the guest does need to complete the Simplified Sharing step — entering an email and tapping Share. This is intentional: it’s the action that triggers ZillaBooth to send the BCC. In practice it takes only a few seconds, and many guests will enter their real email address anyway to receive a personal copy of their photo.

    Ready to set it up?

    Download ZillaBooth free and give your guests the effortless photo pickup experience they’ll remember.

  • Lighting 101: How to Light Your DIY Booth for “Low Light” Venues

    Lighting 101: How to Light Your DIY Booth for “Low Light” Venues

    The days of harshly lit, sterile-looking event spaces are over. A major, undeniable shift has taken place in the event industry, particularly in weddings and milestone celebrations: the rise of the atmospheric, low-light ceremony and reception. This aesthetic, characterized by hundreds of flickering candles, string lights, dramatic uplighting, and strategically placed spot lamps, creates an air of romance, intimacy, and sophisticated moodiness that guests adore. It’s a photographer’s dream for ambiance, but it can quickly become a photo booth operator’s nightmare.

    If you’re running a DIY photo booth like ZillaBooth…a system celebrated for its portability and professional-grade results…you know that great photos rely on one thing above all else: great lighting. When you introduce a powerful, non-diffused light source like a standard camera flash into a carefully curated low-light environment, you risk blowing out the atmosphere. However, if you rely on the venue’s dim lighting, you’ll end up with dark, grainy, blurry, and frankly unusable photos.

    The good news? You don’t have to choose between a moody ambiance and delivering stellar photo booth strips. By understanding the fundamentals of lighting control and leveraging specific tools with your ZillaBooth, you can conquer any dark reception hall and turn the low-light setting into an artistic advantage. We’re going to break down two essential, yet distinct, strategies for achieving flawless results: the consistent, soft glow of the ring light and the high-contrast drama of a forced flash.

    Strategy 1: The Ring Light … Simple, Soft, and Effective

    For operators seeking a classic, flattering, and instantly recognizable photo booth look, pairing your ZillaBooth with a dedicated, high-quality ring light is the best strategy. The ring light offers a consistent, diffuse, and shadow-minimizing light source that is perfect for low-light conditions because it adds light without destroying the existing mood.

    Guests enjoying a DIY photo booth at an event — section 1

    Selecting the Right Ring Light

    Not all ring lights are created equal. When operating in a low-light venue, you need control and power. Look for a model that meets these specifications:

    1. Large Diameter (18-20 inches): A larger light source is a softer light source. A wider diameter ensures the light wraps around the subject’s face, reducing harsh shadows and creating the signature, attractive circular catchlights in the eyes.
    2. Adjustable Color Temperature (Bi-Color): This is non-negotiable for working in moody venues. Low-light spaces often use warm (amber/yellow) tungsten or LED lighting (typically 2700K-3500K). To prevent your photo booth subjects from looking blue or cold, you need to match the ambient warmth. A bi-color ring light allows you to dial in the color temperature from cool white (daylight, ~5500K) all the way down to a warm tungsten glow (~3200K). Match the light to the venue’s color scheme for a cohesive, professional look.
    3. Variable Dimming: Being able to adjust the brightness from 10% to 100% is crucial. In a very dark room, you may need it at 80% or higher. If the venue has some existing light, you might only need 30% to serve as a flattering fill light.

    Setting Up the Ring Light with ZillaBooth

    Integrating the ring light with the ZillaBooth is straightforward and results in a beautiful, consistent product. * Mounting: If your ZillaBooth stand supports it, mount the ring light directly around the camera lens. This ensures the light is perfectly centered for that iconic, shadowless look. If it requires a separate stand, position the ring light as close as possible to the lens axis.

    The closer the light is to the camera, the softer the final image will appear. * Dialing In the Power: The key to using a ring light in a low-light venue is consistency . Once you’ve set the color temperature to match the venue’s warmth, take a few test shots. Increase the power until the subject’s face is brightly and evenly illuminated, but stop before the light begins to “spill” too heavily onto the background, which would destroy the dark, moody ambiance. The goal is to isolate the subject.

    Diagram illustrating a photo booth workflow for Lighting 101: How to Light Your DIY Booth for

    Pro Tip: The Power of Proximity


    Remember the inverse square law of light: light falls off rapidly as the distance from the source increases. By positioning the ZillaBooth and ring light system a comfortable distance from the background (say, 5-8 feet), the ring light will brilliantly illuminate the subjects while the background remains in the relative darkness, enhancing the cozy, dramatic feel of the low-light venue. The soft, even light of the ring light is the best way to guarantee flattering, high-quality images while respecting the intentional darkness of the room.

    Strategy 2: Flash On … High-Contrast Drama

    While the ring light offers soft consistency, there are times when you need raw, uncompromising power, especially if you want to capture the dynamic energy of a packed, dark dance floor or if you encounter a space that is so dark that a ring light alone introduces too much noise or motion blur. This is where ZillaBooth’s flash earns its keep. It’s on by default, and Pocket (included with Pro) lets you switch between Auto, On and Off.

    Guests enjoying a DIY photo booth at an event — section 3

    Understanding the Forced Flash Aesthetic

    In auto-mode, a standard camera flash tries to balance the flash with the dim ambient light, which often results in a slow shutter speed. Slow shutter speeds in a photo booth environment guarantee motion blur…ruined photos. Setting ZillaBooth’s flash to On makes it fire on every shot, whatever the room light. This accomplishes two critical things:

    1. It freezes motion: A powerful, brief flash allows the camera to use a fast shutter speed (e.g., 1/160th of a second), which completely eliminates motion blur from dancing or moving guests. The subject is frozen perfectly in time.
    2. It creates high contrast: By forcing a fast, powerful, and undiffused flash, you create a dramatic, high-contrast look often called the “paparazzi aesthetic” or “editorial flash.” The subject is intensely illuminated, while the rest of the dark room falls away into deep, black shadows. This aesthetic perfectly complements the drama of a low-light venue.

    How to Use ZillaBooth’s Flash Setting

    The core principle is to take the flash function out of automatic control. * Find the Setting: Open ZillaBooth Settings and find the flash option (flash control comes with Pocket and Pro).

    • Set It to On: Turn the flash on so it fires with every single shot. ZillaBooth still sets the exposure for you.
    • Let Exposure Take Care of Itself: ZillaBooth handles shutter speed and ISO automatically, so there’s nothing to dial in. With the flash as the main light, the camera can keep your subject sharp on its own.
    Photo booth setup at an event for Lighting 101: How to Light Your DIY Booth for

    Pro Tip: The Drag the Shutter Technique (Advanced)

    If you want to capture some of the beautiful ambient background light (like those string lights or candles) while still freezing the subject, photographers use a technique called “dragging the shutter.” ZillaBooth sets exposure automatically, so you can’t drag the shutter by hand, but you can get close.

    • Keep the flash on and leave some of the venue’s string lights or candles in the background.
    • In a dim room, the camera may keep the shutter open a little longer on its own (results vary by device), so the flash freezes your guests while a bit of that warm background light glows through. The result is a dynamic, high-energy photo…a sharp subject with a moody, artistic, slightly blurred backdrop. This is a highly professional technique that works wonders in dark spaces.
    Diagram illustrating a photo booth workflow for Lighting 101: How to Light Your DIY Booth for

    Bonus Tips for Flawless Dark Venue Booths

    Mastering the light is only part of the equation; placement and preparation are equally important when dealing with the challenge of low-light venues. * Background Management: In a dark venue, the background can be a messy distraction. If you’re not using a dedicated backdrop, place the ZillaBooth against a dark, featureless wall or an area where the lighting is particularly sparse. This lets your lighting strategy (whether ring light or forced flash) isolate the subjects and allow the rest of the room to fade away, enhancing the portrait-like quality of the photos.

    • Avoid Competing Light Sources: Position the photo booth away from any venue spotlights, aggressively bright exit signs, or large windows. These competing light sources can confuse the camera and create wildly inconsistent exposures in your shots. You want your controlled light source to be the only significant light source on your subject.
    • Use the Prop Tray Strategically: Glitter, sequins, and reflective surfaces are your friends when working with direct light. Encourage the use of shiny props. The ring light or the forced flash will bounce aggressively off these materials, creating an explosive, dynamic effect that adds visual energy to the photo, which is especially important in an otherwise dark setting.
    • Lens Maintenance: Dust or smudges on the camera lens are invisible in bright light but become glaringly obvious when a powerful flash or ring light hits the glass. Before the event and periodically throughout, give your lens a quick wipe with a microfiber cloth. A clean lens ensures maximum light transmission and crystal-clear results.The modern low-light event is an aesthetic challenge, but it’s also a powerful opportunity. By implementing the soft, consistent light of a high-quality ring light or the dramatic, sharp contrast of a forced flash, you transform the ZillaBooth from a simple camera system into a sophisticated lighting tool. You no longer have to compromise the beauty of the venue for the quality of the photo…you can leverage the darkness to make your guests truly stand out. Go forth and master the light, even when there is almost none.
  • The “Second Shooter” You Don’t Have to Pay

    The “Second Shooter” You Don’t Have to Pay

    The modern wedding or large-scale event is a whirlwind of fleeting moments, intimate connections, and sprawling activity across multiple locations. From the silent, nervous anticipation of the bridal party to the raucous, uninhibited joy on the dance floor, every client wants proof that their entire world was captured, preserved, and documented. This is not just a passing preference; the data confirms it. Over half…a staggering 52% of all couples…express a clear desire for comprehensive, wall-to-wall photographic documentation that captures every single aspect of their day, from the grand entrance to the tiny, unscripted moments others might miss.

    For professional photographers, this mandate creates an immediate, costly, and often logistical challenge. The traditional solution is simple, yet expensive: hire a dedicated second shooter.

    A human second shooter is invaluable for capturing multiple angles during the ceremony, covering the groom’s prep while the main shooter is with the bride, or ensuring detail shots are taken while the couple’s portrait session is underway. However, a human second shooter means a second payroll, a second vendor meal, and a second set of complex scheduling and management considerations. For many clients, the added expense simply pushes their photography budget past its breaking point, forcing them to compromise on their dream of full-day coverage.

    But what if you could have all the benefits of that second shooter…the extended coverage, the different perspective, the dedicated documentation of an entire segment of your event…without any of the associated costs or logistical headaches?

    Enter ZillaBooth: The Automated Professional Second Shooter.

    ZillaBooth is not a traditional, clumsy photo booth with fuzzy digital output and novelty props. It is a strategically deployed, automated photographic station designed by professionals to function as a seamless, high-resolution complement to the lead photographer. We’ve redefined the role of the “photo booth” and elevated it into a dedicated, stationary camera operator whose sole purpose is to fill the critical coverage gap that a single roving photographer, no matter how talented, simply cannot manage on their own.

    Its function is precisely framed by the needs of a comprehensive documentation plan: the main photographer is liberated to roam. They are free to chase the perfect light, follow the couple through various locations, direct the formal family portraits, and ensure every scheduled, key moment is captured with the artistry and technical precision that justifies your high-end service.

    Meanwhile, ZillaBooth takes on the crucial task of dedicated guest documentation. It remains permanently in one spot, acting as an unwavering, high-quality camera capturing the energy, the fun, and the candid authenticity of your attendees. This separation of duties is the strategic advantage that satisfies the client’s demand for 100% coverage without the 100% markup of a human assistant.

    The Power of Stationary Coverage: Why A Booth Works Better Than a Roving Eye

    The single biggest failure point in event photography is often the coverage of the reception, cocktail hour, and late-night guest interactions. The main photographer is pulled in a dozen directions: detail shots of the cake, the official first dance, candid moments between the couple and their parents, and vendor hand-offs. It is impossible for one person to also simultaneously capture the atmosphere of the cocktail lounge or the spontaneous group photo attempts by the bar.

    Analog film photograph of section 1 related to The

    ZillaBooth is placed in a high-traffic, low-formality area…the perfect environment for its role. It provides a consistent, professional lighting setup and high-resolution camera gear that is always on, always ready, and always focused on one thing: capturing the guests in their element.1.

    Consistency and Quality: Unlike a photographer who must constantly adjust their lighting and exposure as they move through a space, ZillaBooth is a fixed-light scenario. Set it up once with good lighting, and every single image…from the first snap of the evening to the final shot…is perfectly lit, consistently exposed, and razor-sharp. This consistency makes the resulting archive feel cohesive and professional, not like a collection of disparate phone snaps.

    1. The Candid Factor: The human element, while essential for directed moments, can be a barrier for true candids. Guests often feel a degree of self-consciousness when a photographer raises a long lens to their face. The genius of the automated ZillaBooth is that it is a machine. Guests interact with it differently. The moments captured in a booth…the silly faces, the uninhibited laughter, the in-jokes acted out with props…are often the most raw, honest, and truly personal photographs of the entire day. These are the spontaneous “paparazzi aesthetic” moments of genuine fun, the ones that capture the true spirit of the celebration, which perfectly complements the main photographer’s polished, editorial work. ZillaBooth harvests an archive of pure, unforced guest joy.

    2. Complete Archival Coverage: The numbers don’t lie. A single photographer, even with a second, is limited by their attention and movement. ZillaBooth is an unblinking eye that works for hours without a break, generating a massive volume of guest data. This is what clients are truly paying for when they demand “every aspect of the day photographed”…they want every person captured, not just the principals. ZillaBooth guarantees a photographic record of every attendee who steps in front of the lens.Technical Integration into the Professional Workflow

    Analog film photograph of section 2 related to The

    For professional photographers, ZillaBooth isn’t competition; it’s a force multiplier. It integrates seamlessly into the post-production workflow, acting as an outsourced department of the photography team. File Handling: With Pocket’s auto-save (included with Pro), ZillaBooth saves every photo on the iPad, so you can hand the full set to the lead photographer after the event. This allows the primary photography team to color-correct, edit, and deliver the booth photos alongside the rest of the professional archive, maintaining brand consistency across all images.

    • Customization: It becomes another tool for branding and personalization. Clients can select custom backdrops that match the event’s aesthetic…a professional floral wall, a clean geometric pattern, or a custom step-and-repeat banner. The output feels intentional and curated, not like an afterthought.
    • Instant Gratification & Marketing: ZillaBooth lets guests share right away. While the full set goes to the photographer after the event, guests can email their collage to themselves on the spot. This creates massive on-the-day engagement, ensures immediate positive feedback for the client, and generates organic social media buzz for the entire event…all without distracting the lead photographer.Strategic Deployment: Maximizing the Value of Your Automated Shooter
    Analog film photograph of section 3 related to The

    Where you place ZillaBooth determines the quality and type of secondary coverage you achieve. Treat it as a strategic camera position, not just a decoration.1. The Cocktail Hour Anchor: Position the ZillaBooth near the bar or entrance during the cocktail hour. This is a crucial time when the main photographer is often occupied with family portraits or couple’s portraits. The Booth captures every arriving guest, ensuring the initial energy and fashion of the event are documented.

    1. The Reception Entertainment Zone: Place it near the periphery of the main reception hall or, ideally, near the dance floor entrance. As the party progresses and inhibitions lower, the Booth becomes an entertainment magnet, yielding those truly candid, high-energy, late-night shots that a photographer might miss while focusing on the main events.
    2. Bridal/Groom Prep Alternative: For extended coverage packages, consider setting up a simplified ZillaBooth station during the morning prep in one of the primary getting-ready locations. It provides a fun, lighthearted alternative for the bridal party to use while the main photographer is focused on the gown, the details, or the first look, generating an extra set of casual images without the need for a third photographer.In an industry where comprehensive coverage is quickly becoming the expectation, not the luxury, relying solely on human resources is an unsustainable business model for both the client and the photographer. ZillaBooth provides the elegant, technological answer. It is a cost-effective, high-quality, and reliable automated camera station that stands guard, documenting the vital and dynamic guest experience while the lead photographer is free to capture the story of the principals.

    It is the stationary, dedicated, and professional second shooter that never needs a break, never asks for overtime, and perfectly complements the artistry of the human team. By framing ZillaBooth not as a fun accessory, but as a critical piece of the photographic infrastructure, you give clients the full, 52%-approved, wall-to-wall coverage they desire, allowing the main photographer to deliver their best work, and ultimately, ensuring that every single aspect of the celebration is beautifully and professionally captured. It’s not just a product; it’s a strategic partnership in full-service event documentation. For setup details, see our wedding photo booth guide.

  • Confirmation Animation: Celebrate Every Share

    Confirmation Animation: Celebrate Every Share

    Guests tap share and wonder: did it work? A confirmation animation closes that anxiety loop with a celebration guests feel—not a technical shrug.

    Available in Pro.

    The problem

    Silent share failures erode trust fast at events. Guests re-tap buttons, clog lines, or walk away unsure whether email or print actually succeeded. Without clear success feedback, even working booths feel broken—and staff spend time reassuring instead of hosting.

    Why it matters

    • Celebrate every share with a clear on-screen confirmation the moment the guest taps
    • Reduce guest uncertainty after email or share actions
    • Lower repeat attempts that slow busy lines
    • Pair with Simple Email Sharing and Simple Printing for end-to-end clarity
    • Make self-serve kiosks feel responsive and trustworthy
    Photorealistic corporate booth guest relieved after confirmation feedback, trade show setting, no UI visible — Confirmation Animation: Celebrate Every Successful Share

    Who it’s for

    Confirmation animation matters for Pro operators running guest-facing kiosks: corporate lead-capture booths, wedding teams using Simple Email Sharing, and anyone who has watched a guest ask did it go through three times.

    Real-world moments

    • A corporate booth confirms the email is on its way before the guest steps away
    • A wedding kiosk celebrates each share as guests send their photos by email
    • A festival booth gives instant feedback after high-volume share attempts
    Photorealistic wedding guest completing email share at kiosk, reception ambiance, no readable text — Confirmation Animation: Celebrate Every Successful Share

    How ZillaBooth delivers

    Pro’s confirmation animation plays the moment a guest taps to send or print, so they know their photo is on its way. Emails and prints queue and retry if the network drops. It complements Simple Email Sharing and Simple Printing so guests finish the booth loop confidently, which matters most at guest-led iPad setups where no staff member is there to nod yes.

    Photorealistic line of guests moving smoothly at booth with confident exits, high throughput event, no app UI readable — Confirmation Animation: Celebrate Every Successful Share

    Guests should never guess whether the booth did its job.

    Does confirmation appear for Simple Printing too?

    Yes. It plays when the guest taps to print, just like it does for email.

    Is confirmation animation on Pocket tier?

    No. The confirmation animation is part of ZillaBooth Pro, a monthly or yearly subscription.

    Why does feedback matter for corporate booths?

    Lead capture fails silently without confirmation—guests leave thinking they opted in when they did not.

    Does this work with hide settings enabled?

    Yes. It is part of the locked-down guest experience on kiosks running under Guided Access.

  • Printing Station Setup: The “Share & Print” Workflow

    Printing Station Setup: The “Share & Print” Workflow

    The “Share & Print” Workflow: Achieving Instant Photo Gratification

    In the fast-paced world of photo booth events, nothing satisfies a guest more than the instant gratification of a printed photo strip they can hold in their hands just moments after they strike a pose. For photo booth operators and event hosts, however, setting up a reliable, high-speed printing station can often feel like a complex wiring and software nightmare. But it doesn’t have to be.

    Guests enjoying a DIY photo booth at an event — section 1

    We’re introducing the “Share & Print” Workflow…the definitive guide to establishing a bulletproof printing station using ZillaBooth Pro’s Simple Printing feature, which gives guests a one-tap Print button, paired with the everyday simplicity of Apple’s AirPrint technology. This combination strips away the complexity, ensuring your guests get their prints instantly, every single time.

    Understanding the “Instant Gratification” Goal

    The primary goal of the “Share & Print” Workflow is speed and reliability. Aim for prints in under about 30 seconds; printer choice matters most. Achieving this requires eliminating bottlenecks…namely, complex driver installations, USB cable management, and manual print queuing.

    The traditional photo booth setup often involves a computer tethered via USB to a dedicated dye-sublimation printer. While reliable, this locks the operator to a single workstation. The “Share & Print” workflow liberates your host device (an iPad or iPhone running ZillaBooth Pro) by making the whole process wireless and close to hands-off. When a guest taps Print (or Send & Print), ZillaBooth sends the job, and AirPrint handles the communication…the photo simply appears.

    The ZillaBooth Pro Simple Printing Advantage

    Simple Printing (Settings → Pro → Simple Printing) is the brain of this operation. Pick one AirPrint printer, switch the toggle on, and from then on a guest’s Print or Send & Print tap sends the finished collage (a 2×2 grid or a 1×4 strip) straight to it.

    What Simple Printing gives you: * Zero Operator Intervention: The guest taps Print themselves. Nobody has to stand at the printer or send jobs by hand.

    • One Tap, One Print: Each print job is a single copy. If a group wants more than one, they can simply run another session.
    • Fail-Safe Queuing: ZillaBooth checks your printer about once a minute. If it goes offline, prints wait in a queue and go out automatically when it’s back (up to 3 attempts per job). You can also retry from the Print Queue.
    Diagram illustrating a photo booth workflow for Printing Station Setup: The

    Why AirPrint is Essential for Simplicity

    AirPrint is Apple’s native network printing technology. It is a communication protocol that allows Apple devices to find and print to compatible printers over a Wi-Fi network without requiring any driver installation or configuration. In the context of a live event, this is a monumental time-saver and a massive boost to reliability.

    Guests enjoying a DIY photo booth at an event — section 3

    Because ZillaBooth Pro runs on an Apple device (iPad or iPhone), an AirPrint-compatible printer instantly becomes a plug-and-play solution. There are no finicky drivers to install, no operating system compatibility issues, and no dedicated print server software needed. It’s a pure, clean, network-based transaction.

    Hardware Deep Dive: Recommendations for Reliability

    The “Share & Print” Workflow hinges on three core pieces of hardware: the Host Device, the Printer, and the Network.1. The Host Device (Running ZillaBooth Pro):

      * **Recommendation:** An iPad Pro or late-model iPhone. These devices have robust Wi-Fi chips that ensure stable network connections for AirPrint jobs. They also handle ZillaBooth Pro’s high-resolution image processing with ease. 

    1. The AirPrint-Compatible Printer:
      This is the most critical and often the most confusing choice. For a true “instant gratification” station, you need a balance of speed, quality, and consumables cost.
      • The Gold Standard (Dye-Sublimation): For professional photo booth use, a dye-sublimation (dye-sub) printer is non-negotiable. They offer water-resistant, durable prints that emerge completely dry, and they are blisteringly fast (often 8-15 seconds per 4×6 print).
        • Top Models: DNP DS620A or DS820A.
        • AirPrint Caveat: Most high-end dye-sub printers are not natively AirPrint compatible. To integrate them into the “Share & Print” Workflow, use DNP’s WCM-Plus print server, which makes supported DNP printers (DS620A, DS820A, QW410, DS-RX1HS, DS40, DS80) show up as AirPrint printers. Setup steps are in our DNP + WCM-Plus guide.
        • The Simple/Budget Option (Inkjet): For small, casual events or budget-conscious setups, a high-quality, AirPrint-certified inkjet photo printer is the simplest choice.
          • Top Models: Canon PIXMA Pro or specific Epson Expression models.
          • Advantage: Truly native AirPrint support, plug-and-play.
          • Disadvantage: Slower print speed, consumable ink/paper costs are higher per print, and prints are less durable than dye-sub prints.
          • The Network Setup:
            Reliability is paramount, meaning you should never rely on the venue’s public Wi-Fi.
            • Recommendation: Dedicated Wireless Access Point (WAP): Purchase a small, travel-sized wireless router (e.g., a GL.iNet router). This device creates a private, isolated, high-speed Wi-Fi network dedicated only to your photo booth equipment.
              • Setup: The WAP broadcasts a private network (e.g., “ZillaBooth Network”). Your iPad and your AirPrint-compatible printer both connect to this network. This eliminates interference from guest phones, venue networks, and other potential Wi-Fi clutter. It is the single biggest thing you can do for reliable AirPrint.Step-by-Step Tutorial: Setting Up the Simple Printing Workflow

    Once your hardware is assembled, setting up the seamless workflow takes less than ten minutes.

    Step 1: Printer and Network Initialization1. Connect the Printer: Power on your printer. If it is a native AirPrint device, follow its manual to connect it to your dedicated WAP network. If you are using a DNP dye-sub printer, connect it to the WCM-Plus unit and put the WCM-Plus on the same WAP network. 2. Connect the Host Device: Connect your iPad/iPhone running ZillaBooth Pro to the exact same dedicated WAP network.Step 2: ZillaBooth Pro Configuration1. Open ZillaBooth Pro: Launch the app and open Settings → Pro → Simple Printing. 2. Select Printer: Tap Configure Simple Printing, then Select Printer. The app should automatically detect any AirPrint-enabled printers on the network. Select your desired printer from the list (e.g., your DNP printer via WCM-Plus, or a Canon PIXMA). 3. Turn On Simple Printing: Back in the same menu, switch the Simple Printing toggle on. 4. Decide on Email: Leave email off for a print-only booth (guests see a Print button), or turn on Simple Email Sharing so guests choose Send or Send & Print. Simple Printing works either way.Step 3: Final Test Run1. Start a Session: Begin a photo session in ZillaBooth Pro. 2. Complete the Countdown: Pose for the four shots, then tap Print (or Send & Print) on the collage screen. 3. Monitor the Queue: The job goes to the printer right away. If you’ve turned on the Confirmation Animation, an emoji celebration rains across the screen the moment the guest taps Print. 4. Instant Gratification: The print job immediately transfers to the printer, and the photo should emerge in seconds.

    Troubleshooting and Advanced Tips

    The Print Job Fails to Send: The overwhelming majority of AirPrint issues stem from the network. * The Fix: Double-check that your iPad/iPhone and your AirPrint-enabled printer/bridge are connected to the same dedicated Wi-Fi network. Restarting the WAP, the printer, and the iPad in that order often clears transient network errors. My Dye-Sub Printer Isn’t AirPrint Compatible: This is the most common professional hurdle.

    * The Fix: For DNP printers, use DNP’s WCM-Plus (supported models: DS620A, DS820A, QW410, DS-RX1HS, DS40, DS80). Homemade bridges, such as a Raspberry Pi running CUPS, are not supported. Best Practices for High-Volume Events: * Pre-Print Calibration: Before every event, run 5-10 test prints to confirm color, cut, and network stability.

    • Manage Consumables: Always have spare paper and ribbon/ink on hand. Once guests discover the Print button, you’ll be printing more than you think.
    • Printer Placement: Place the printer close to the host device (within 20 feet) and ensure line-of-sight to your dedicated WAP for maximum signal strength and speed.By combining ZillaBooth Pro’s one-tap Simple Printing with the driverless simplicity of AirPrint and a dedicated network, you transform your photo booth operation. You move from a complicated wired mess to a sleek, wireless “Share & Print” machine that delivers on the promise of instant photo gratification, ensuring delighted guests and a smooth, stress-free event for you.
  • Simple Printing: One-Tap Photo Prints Guests Take Home

    Simple Printing: One-Tap Photo Prints Guests Take Home

    Digital shares are nice. A physical strip in hand is the moment guests grin and wave it at friends across the room. Simple Printing gives guests a one-tap Print button, so they get that instant takeaway without a volunteer chained to the printer.

    Available in ZillaBooth Pro.

    The problem

    Manual print workflows break down under volume: wrong printer selected, queue stalls, guests walk away before pickup. Operators lose the magic moment when digital-only booths forget that booths are tactile experiences. You need reliable printing that guests can start themselves and that keeps pace with the line.

    Why it matters

    • Guests tap Print (or Send & Print) and the collage goes straight to your printer
    • Deliver instant physical takeaways guests expect from pro booths
    • Reduce manual operator steps during high-traffic events
    • Pair it with the Confirmation Animation: an emoji celebration rains across the screen the moment a guest taps Print or Send & Print
    • Works with AirPrint printers, plus supported DNP dye-sub printers through WCM-Plus

    Who it’s for

    Simple Printing is core to ZillaBooth Pro workflows: wedding booth businesses, corporate experiential teams, venues offering print-inclusive packages, and hosts who want rental-style takeaways without rental pricing.

    Real-world moments

    • A wedding booth prints a strip whenever a guest taps Print, for the guest book table and take-home favors
    • A trade show activation pairs lead capture with instant printed collages
    • A holiday party prints 2×2 grids while guests share digitally in parallel

    How ZillaBooth delivers

    With ZillaBooth Pro, Simple Printing (Settings → Pro → Simple Printing) sends the finished collage to your chosen AirPrint printer the moment a guest taps Print or Send & Print—no manual export step between guests. Combined with overlays, Simple Email Sharing, and the Confirmation Animation, it recreates the full pro booth deliverable loop on iPad hardware you control.

    The best booth moment is the one guests hold in their hand.

    Which printers work with Simple Printing?

    Any AirPrint printer on the same Wi-Fi network as your iPad or iPhone. DNP dye-sub printers (DS620A, DS820A, QW410, DS-RX1HS, DS40, DS80) work through DNP’s WCM-Plus; see the DNP + WCM-Plus guide.

    Can guests skip printing if they only want digital?

    Yes. In a print-only booth, guests just tap Print. With email turned on, they choose Send (email only) or Send & Print.

    Do printed collages include my overlay?

    Yes. Overlays render into finished output before print jobs queue.

    Which tier includes Simple Printing?

    ZillaBooth Pro is a monthly or yearly subscription, and you can see current pricing in the app. It sits alongside the iPad kiosk tools and the other event features.

  • Guided Access + Auto-Lock: Keep Your Booth Screen On All Night

    Guided Access + Auto-Lock: Keep Your Booth Screen On All Night

    Midnight on the dance floor. The iPad dims. The line dissolves. Here’s how to keep that from happening: lock the iPad to ZillaBooth with Apple’s Guided Access. With Guided Access or Single App Mode on, the screen stays on all event. Set Auto-Lock to Never and keep the iPad plugged in.

    Keep Awake (Pro): with Guided Access, the booth screen stays on all event.

    The problem

    iOS power management assumes tablets sit idle on desks, not run a bright booth screen for six hours straight. Unexpected sleep breaks guest trust, slows the line, and sends you hunting for the side button while everyone watches. Long events need a plan for keeping the screen on.

    Why it matters

    • The screen stays on while Guided Access (or Single App Mode) is running
    • The booth stays visible in dim reception halls
    • No mid-line shutdowns from Auto-Lock, once it’s set to Never
    • Plugged into power, the iPad lasts through all-night weddings and festival hours
    • Pair with Auto-Restart so guests can run the booth themselves between sessions

    Who it’s for

    This setup is for every Pro operator running long events: wedding receptions past midnight, New Year’s Eve activations, venue installations, and anyone who has lost a booth to a dimmed screen at the worst moment.

    Real-world moments

    • A wedding booth stays on until after last call, with Guided Access on and the iPad plugged in
    • A New Year’s Eve party booth stays bright through the countdown and the biggest line of the night
    • A weekend venue installation stays guest-ready through long open hours

    How to set it up

    1. Turn on Guided Access in Settings → Accessibility → Guided Access and set a passcode. (On a dedicated booth iPad, you can use Single App Mode instead.)
    2. Set Auto-Lock to Never in Settings → Display & Brightness.
    3. Plug the iPad into power for the whole event.
    4. Open ZillaBooth and start Guided Access. With Pro, the booth screen stays on all event and Settings stay hidden while Guided Access is on.

    Add Auto-Restart and ambient status alerts, and you can focus on the event, not the tablet.

    The booth should outlast the dance floor—not nap during it.

    Does keeping the screen on drain the battery faster?

    Yes, a screen that stays on uses more power. Keep the iPad plugged in for all-night events.

    Do I still need Guided Access?

    Yes. The screen stays on only while Guided Access (or Single App Mode) is running, and Guided Access is also what keeps guests inside the app. Set Auto-Lock to Never as well.

    Which tier keeps the screen on with Guided Access?

    ZillaBooth Pro, a monthly or yearly subscription.

    Does it work with ambient status alerts?

    Yes. On the iPad Event Layout, Pro shows small on-screen badges for things like low battery or an offline printer, and with Guided Access on, the screen stays on so you can see them.

  • Auto-Restart: The Booth Stays Ready Between Guests

    Auto-Restart: The Booth Stays Ready Between Guests

    Guest one finishes. Guest two taps nothing because the booth still shows the last session’s share screen. Auto-restart keeps the kiosk ready so the line never stalls on a reset someone forgot to tap.

    Available in Pro.

    The problem

    Self-serve booths die quietly in the idle state after a share or print. The next guest assumes it is broken, staff scramble to reset, and throughput collapses during peak hours. Manual restart is fine for demos—it fails when two hundred guests expect rental-grade reliability.

    Why it matters

    • Return the booth to ready state automatically after each session
    • Keep lines moving without staff resetting between guests
    • Reduce abandoned attempts from confused walk-up users
    • Support guest-led kiosks at weddings and brand activations
    • Pair with attention shutter so each guest sees the same clear starting point

    Who it’s for

    Auto-restart is essential for Pro operators running guest-led booths: self-serve venue booths, festival kiosks with volunteer rotation, and operators who measure success in sessions per hour.

    Real-world moments

    • A wedding reception iPad kiosk resets automatically during peak dance-floor line surges
    • A trade show booth runs guest-led during keynote blocks, locked with Guided Access
    • A venue weekend kiosk stays ready between groups without a manual reset

    How ZillaBooth delivers

    Pro’s auto-restart returns the booth to a ready capture state after guests complete sharing, printing, or other session endings. Combined with Guided Access (with Pro, the screen stays on and Settings stay hidden) and the confirmation animation, it delivers the always-on reliability guests expect from rental booths.

    A pro booth is ready for the next guest before they step up.

    Does auto-restart work after Simple Printing?

    Yes. Auto-restart keeps kiosk flow continuous after print and share completions.

    Can I disable auto-restart for styled sessions?

    Pro event controls support pro workflows; configure behavior during pre-event setup.

    Which tier includes auto-restart?

    Auto-restart is part of ZillaBooth Pro, a monthly or yearly subscription.

    How does auto-restart relate to keeping the screen on?

    With Guided Access or Single App Mode on, the screen stays on all event, and auto-restart resets the session. Together, with Auto-Lock set to Never and the iPad plugged in, they keep the booth running.