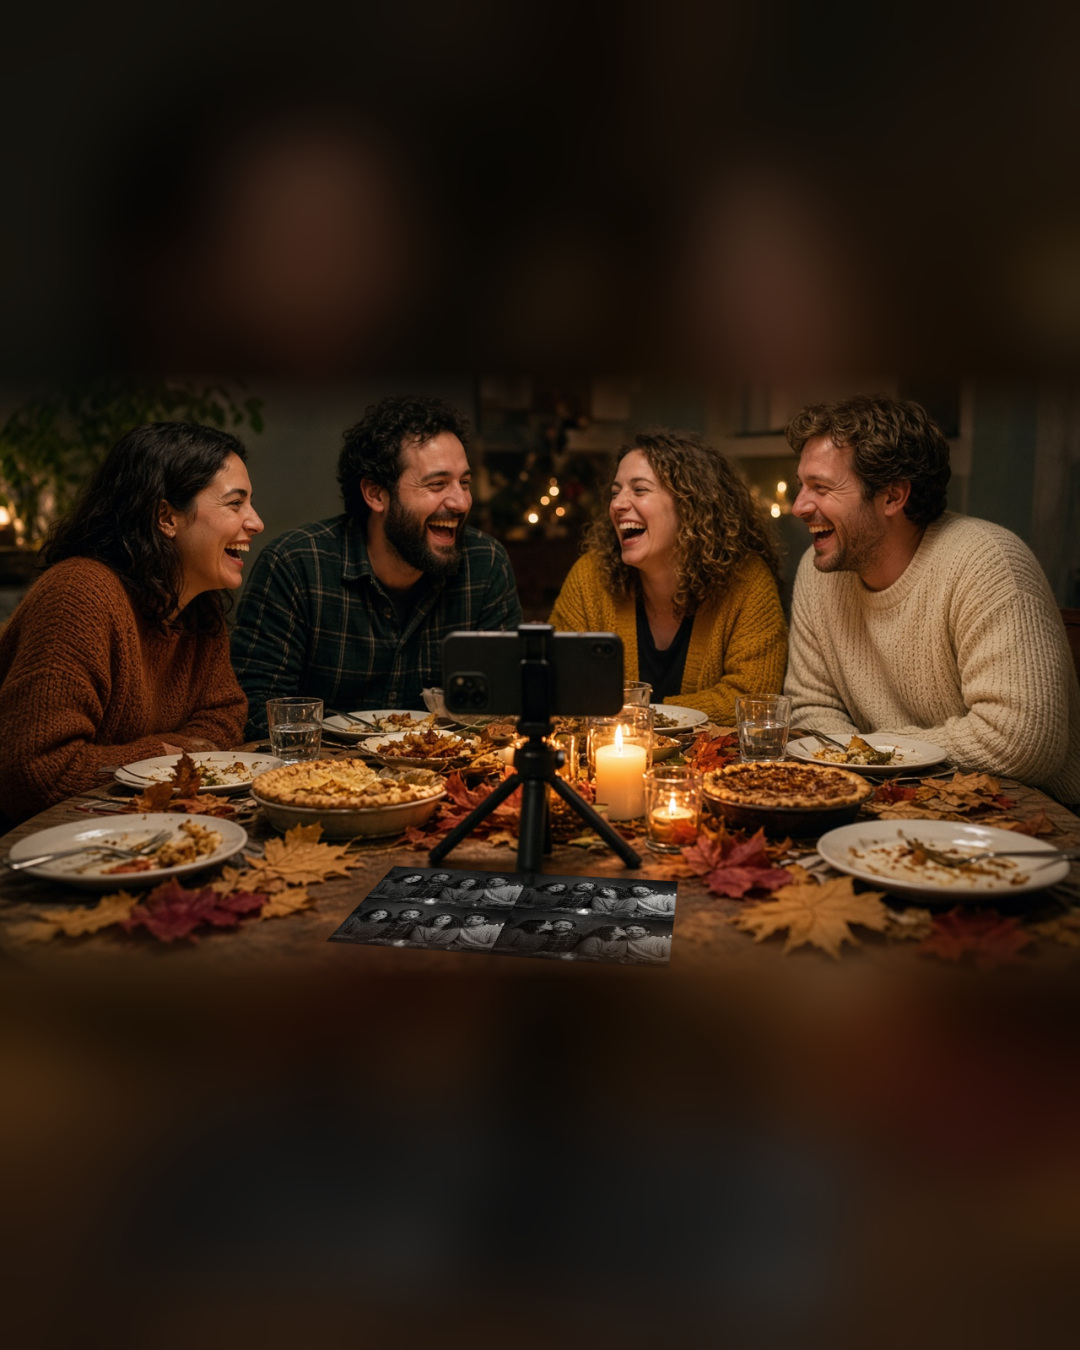
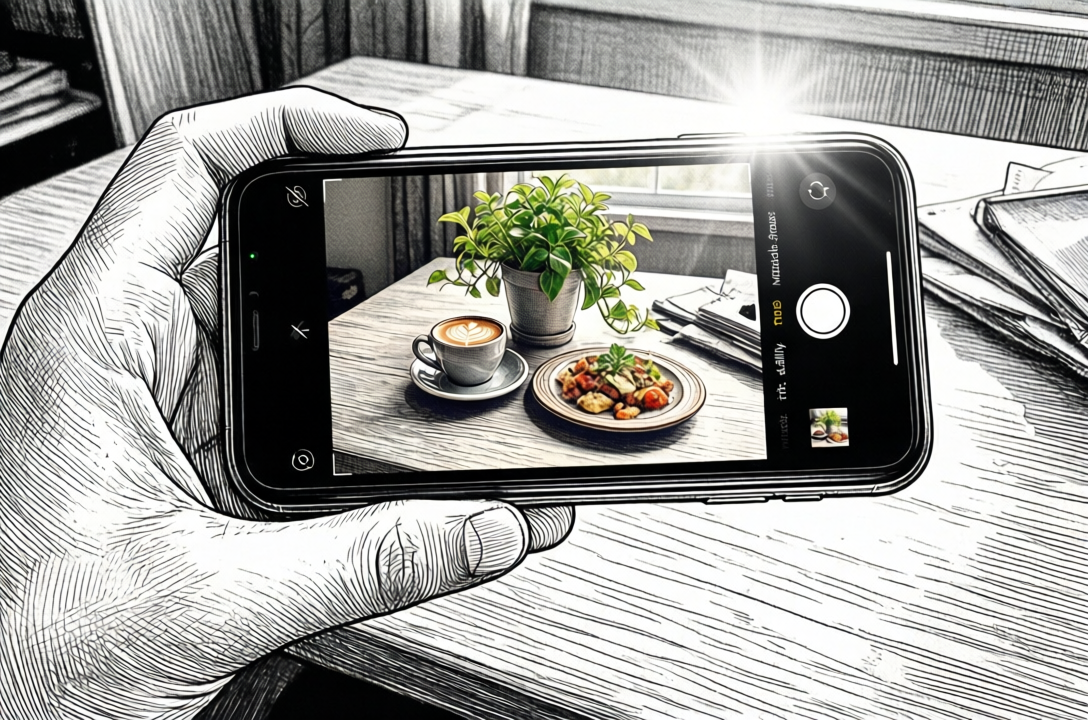
You do not need to buy anything new for a Friendsgiving photo booth. If you have an iPhone, a tripod and a free app, you can make a booth in about five minutes. Here is how to do it so it feels like part of the party, not a project.
What you need
An iPhone running iOS 26 or later.
A small tripod or a phone stand.
ZillaBooth, which is free to download.
A spot with decent light, such as a bright corner or a lamp near the table.
That is all. There is no account to create and no watermark on the photos.
Set the phone before the pie comes out
Set the phone on a tripod at the end of the table or on a shelf facing the room, before dinner starts. If you do it ahead of time, the first photo is not a scramble. Check that the camera sees the whole table or the couch, and that the phone is steady.
Open ZillaBooth and pick a layout. The app gives you a countdown and four frames, then puts them together as a classic strip or a 2×2 grid. Both layouts are free.
Why four frames beat one
A single group photo usually captures one expression. Four frames capture the whole moment: the serious pose, the silly face, the person who laughs, and the one who sneaks in a kiss on the cheek. The finished grid tells a story, and that is why photo booth pictures feel different from a normal snapshot.
Pocket for extra control
The free version covers the basics. If you want more, Pocket adds adjustable timers, flash control, black and white, and borders. It is a one-time purchase. Many people start free, try one dinner, and decide afterward.
A longer timer is handy at a crowded table, and a bit of flash helps when the room is lit by candles.
Make it part of the evening
A few ideas keep the booth fun without a lot of work:
Ask each guest to bring one prop, such as a funny hat or a paper turkey.
Start a pose challenge: formal, silly, surprised, and “dramatic thank-you”.
Run one session after the main course and one after dessert.
Share the best grid in the group chat that night.
A note on lighting
Dining rooms are often dim. Turn on a lamp near the phone and avoid putting a bright window behind your guests. If everyone looks like a silhouette, move the tripod a little and try again. A quick test photo before dinner saves frustration later.
Keep the host happy
If you are a guest, offer to handle the booth. The host will be busy with the food, and you will be the hero for taking charge of the photos. If you are the host, ask a friend to be the booth captain and enjoy dinner.
One more thing
You can also try the same idea at other gatherings. The event photo booth app page shows how larger parties use ZillaBooth, and the Pocket page explains what the upgrade adds for home setups.
The Ultimate Pet Photography Solution: Setting Up the ZillaBooth “Dog Booth”
For years, pet photography has been a wild frontier, defined by chasing an excited Labrador across a park or patiently waiting for a grumpy cat to acknowledge your existence. But as pet birthdays, adoption milestones, and dedicated “paw-ties” become the norm, the demand for high-quality, studio-grade photographs has grown exponentially. The solution lies not in better gear alone, but in a tailored setup that respects the animal’s nature and streamlines the process: the dedicated ZillaBooth “Dog Booth.”
This novel approach leverages the compact, customizable nature of the ZillaBooth system, specifically adapting it for low-height, pet-centric photography. The goal is simple: to create a contained, comfortable, and consistent environment that captures the pet’s personality in sharp focus, without the stress of a traditional studio or the chaos of a public event. For junior writers and event organizers alike, mastering this setup is the key to delivering professional-grade pet portraits efficiently and reliably.
Why a Dedicated, Low-Height Booth for Pets?
The biggest challenge in photographing animals is getting them to cooperate with human-sized equipment. A standard photo booth setup is often too tall, requiring the dog to strain its neck or look drastically up, resulting in unnatural angles and sometimes intimidating shadows. The low-height Dog Booth setup fundamentally solves this problem.
By configuring the ZillaBooth’s main camera housing and light source to sit between 18 to 24 inches off the floor…roughly the eye level of a medium to large dog…you achieve three critical benefits:1. Natural Eye Contact and Pose: The dog looks straight ahead, resulting in the classic, engaging, and emotionally resonant eye-level portrait. For smaller dogs and cats, a small, blanket-covered platform can be placed in the booth space to boost them to the perfect height, ensuring the camera is always meeting them where they are.
2. Reduced Intimidation: A large, tall piece of equipment can be scary. Lowering the booth makes the whole structure less imposing, helping to keep pets relaxed and focused on the reward or the handler.
3. Consistent Lighting and Background: In a controlled booth, the background is always clean, and the lighting is perfectly consistent, shot after shot. This is essential for adoption events where quick, high-quality images are needed for marketing, or for birthday parties where clients expect a polished result.The Core Setup: Hardware and Logistics
The ZillaBooth system is ideal because of its modular design. To build the Dog Booth, you should focus on simplicity and sturdiness. * The Stand: Use the ZillaBooth Mini or a specialized short stand. The overall stability is paramount…pets move, bump, and lean, so the setup must be rock-solid. A wide base is highly recommended.
* The Background: The backdrop needs to be durable and easily cleaned. Forget paper rolls. Opt for washable vinyl or a high-quality, wrinkle-free fabric that is simple, like a muted grey, cream, or a soft blue. For maximum efficiency at events, pre-mount the backdrop to a low-height support system just behind the main shooting area. Critically, ensure the backdrop extends well onto the floor to hide any seams where the wall meets the ground.
* The Floor/Surface: The pet will be standing or sitting on this surface. It must be non-slip (a smooth floor can be stressful) and non-reflective. Use a rubber mat, a small, durable rug, or a seamless continuation of your vinyl backdrop material.
* Lighting: While softboxes work, for maximum efficiency and a clean look, a ring flash or a diffused LED ring light mounted around the lens is often best. It creates an attractive catchlight in the pet’s eyes and ensures even illumination, minimizing harsh shadows without requiring complex setup. The light source should be close to the camera axis (and therefore low to the ground) to provide even light at the dog’s eye level.The Secret Weapon: Mastering the ZillaBooth Custom Timer
The true magic of the Dog Booth lies in using the ZillaBooth’s Custom Timer feature, not as a simple delay, but as a strategic tool for capturing the split-second of perfect focus. In standard photography, a pet’s peak moment of attention…when they are truly looking at the lens…lasts only a fraction of a second, often too fast for a human to trigger the shutter after setting the treat/toy. The Custom Timer changes this dynamic.
The “Get-The-Dog-To-Look” Technique:1. Pre-Focus and Settings: The photographer (or booth operator) should pre-set the focus and exposure. If the ZillaBooth uses a dedicated camera, set it to Shutter Priority or Manual mode with a fast enough shutter speed (1/200th of a second or faster) to freeze any slight movements, which are common in pets.
2. The Lure Placement: The key to a direct gaze is the lure. Attach a piece of Velcro or a small clip to the ZillaBooth’s lens housing. The handler’s job is to place a high-value treat, a squeaky toy, or a favorite ball directly above or adjacent to the lens. This trains the pet’s gaze to be centered on the camera.
3. Activating the Custom Timer: This is the critical step. Instead of the standard 3-second or 10-second timer, use the Custom Timer to set a precise delay, typically between 2.5 and 4 seconds. The time must be just long enough for the handler to perform their action, but short enough to prevent the pet’s attention from wandering.
4. The Handler’s Signal and Release: The handler presses the remote shutter button (or taps the booth screen) to initiate the Custom Timer. During the countdown, the handler performs two actions in rapid succession:
* The Sound/Signal: They use a distinct sound, word (like “Look!”), or a squeeze of the squeaky toy to snap the pet’s attention to the lure/lens.
* The Release: Approximately 0.5 seconds before the timer hits zero, the handler quickly removes the lure from the lens. This creates a moment of high anticipation, where the pet is locked on the exact spot the treat just was, which is the center of the lens.
5. The Perfect Capture: The shutter fires exactly when the dog’s eyes are wide, focused, and anticipating the reward. The handler immediately rewards the pet post-shot, reinforcing the behavior.This method transforms the passive wait of a standard timer into an active, synchronized technique, guaranteeing the perfect, focused look on nearly every single shot. The consistency is unparalleled for event photography.
Integrating the Dog Booth into Pet Events
The physical setup is only half the battle; integrating the booth into the energetic environment of a pet event requires a thoughtful workflow. * Establish a Calm Zone: The Dog Booth area should be clearly delineated as a “Calm Zone.” Use physical barriers (like velvet ropes or decorative fencing) to create a queue line that keeps other animals at a safe distance. High-energy distractions are the enemy of a good pet portrait.
* The Two-Person Team: This setup works best with two people:
* The Booth Operator: Manages the ZillaBooth settings, ensures the background and lighting are perfect, and fires the Custom Timer.
* The Handler/Pet’s Owner: Responsible for calming the pet, placing the lure, and rewarding the successful capture. Having the owner be the handler dramatically increases the pet’s comfort and compliance.
* Minimize Session Time: Pet attention spans are short. The goal should be 2-3 minutes max per session. Pre-set the shots and run a tight, reward-based workflow. You only need a few frames to get the winning shot thanks to the Custom Timer technique.
* Use Props Wisely: If using props (birthday hats, bow ties), ensure they are comfortable and introduced before the pet enters the booth area. Never force a pet to wear a prop it dislikes, as this will instantly ruin the portrait’s mood. Keep them small, simple, and theme-appropriate.Advanced Workflow and Post-Processing Tips
To truly elevate the results from a simple snapshot to a polished portrait, a few advanced considerations apply: * Tethering for Instant Review: Connect the ZillaBooth’s camera to a large monitor. This allows the pet’s owner/handler to see the results immediately, providing instant positive reinforcement for them and encouraging more cooperation. For adoption events, this instant preview is great for generating excitement about the dog’s new profile picture.
* Environmental Conditioning: Before the event starts, allow a few of the calmest or most handler-motivated pets to spend 30 seconds simply standing in the booth area without taking a single picture. Give them a treat. This acclimation phase helps normalize the space before the pressure of the session begins.
* Post-Processing for Texture and Detail: The low-height, direct light setup is excellent for detail. In post-processing, focus on gently sharpening the eyes and enhancing the texture of the fur. While pets are not models, subtle dodging and burning can add depth and drama to the fur lines, especially for darker-coated animals.
* Client Deliverables: The Dog Booth is perfect for generating not just digital files, but immediate, high-quality prints. Integrate a dedicated event printer with the ZillaBooth for instant take-home memories. A 4×6 print of the pet in its birthday hat is a tangible, invaluable souvenir.The ZillaBooth Dog Booth represents a shift from reactive to proactive pet photography. It’s an exercise in control, comfort, and precise timing. By lowering the camera, selecting the right surfaces, and most importantly, weaponizing the Custom Timer, junior writers can create a step-by-step guide that empowers anyone to capture the stunning, heart-melting portraits that every pet owner…and every adopting family…dreams of having. The result is a system that not only captures better photos but also ensures the experience is positive and memorable for the pet at the center of the frame.
Friendsgiving is the easy kind of holiday. Nobody is flying home, the food is potluck, and the group chat is full of jokes. It also deserves a better photo than one person holding a phone at arm’s length while everyone else leans in. Here is a five-minute photo booth setup that fits on a dinner table.
1. Put the phone on a small tripod
A tiny tabletop tripod is enough. Set it at the end of the table, facing the group, with the camera at about eye level when people sit. Make sure the phone cannot be knocked over by an elbow or a gravy boat.
2. Set a timer so everyone is in it
ZillaBooth takes four photos in a row after a countdown, which is the classic photo booth rhythm. Start it, then everyone gets time to lean in. Pocket adds adjustable timers, so you can give a big group a few extra seconds.
3. Add a little flash for a dim dining room
Candlelit tables look warm in person and murky in photos. With Pocket, you can set the flash to Auto, On or Off, using your device’s flash where it has one. Try a test photo before the pie comes out. If the picture looks flat, turn the flash on. If it looks harsh, move a lamp closer and turn it off. Our lighting guide has more tips.
4. Print one black-and-white grid
A black-and-white print looks great on a fridge, and it hides the odd color from candles and string lights. Pocket includes a black-and-white collage filter, which is the only filter in the app. Printing works on every tier through AirPrint, so if you have an AirPrint printer on your Wi-Fi, you can print the grid at the table.
5. Print one for the fridge
Pick the best grid of the night and print it. Stick it up at home, or hand it to the host as a thank-you. Hosts often remember the dinner for months because of one good photo on the fridge.
What it costs
ZillaBooth is free to download, with classic strips and 2×2 grids and no watermark. Pocket is a one-time purchase. For a one-night dinner, the free app does the job, and Pocket is there if you want more control over timers, flash and the black-and-white look.
A few tips for a smooth dinner
Charge the phone beforehand, and keep a charger nearby.
Ask the host to pick the spot early, so nobody has to move plates later.
Assign a “booth captain” who starts the countdown and makes sure the shy friend is in frame.
Take one session before dinner and one after dessert. The second one is always funnier.
Send the checklist to the host
If you are not hosting, forward this to whoever is. A simple setup removes the pressure of a photo plan, and everyone gets a picture of the night. You can also see how the same idea works at bigger gatherings on the event photo booth app page.
There’s a particular kind of joy in a photo strip. Four little frames stacked on top of each other, the first one a bit stiff, the second one warming up, the third one where somebody laughs too hard, and the fourth one that makes no sense at all. People keep them in wallets and tape them to mirrors for years.
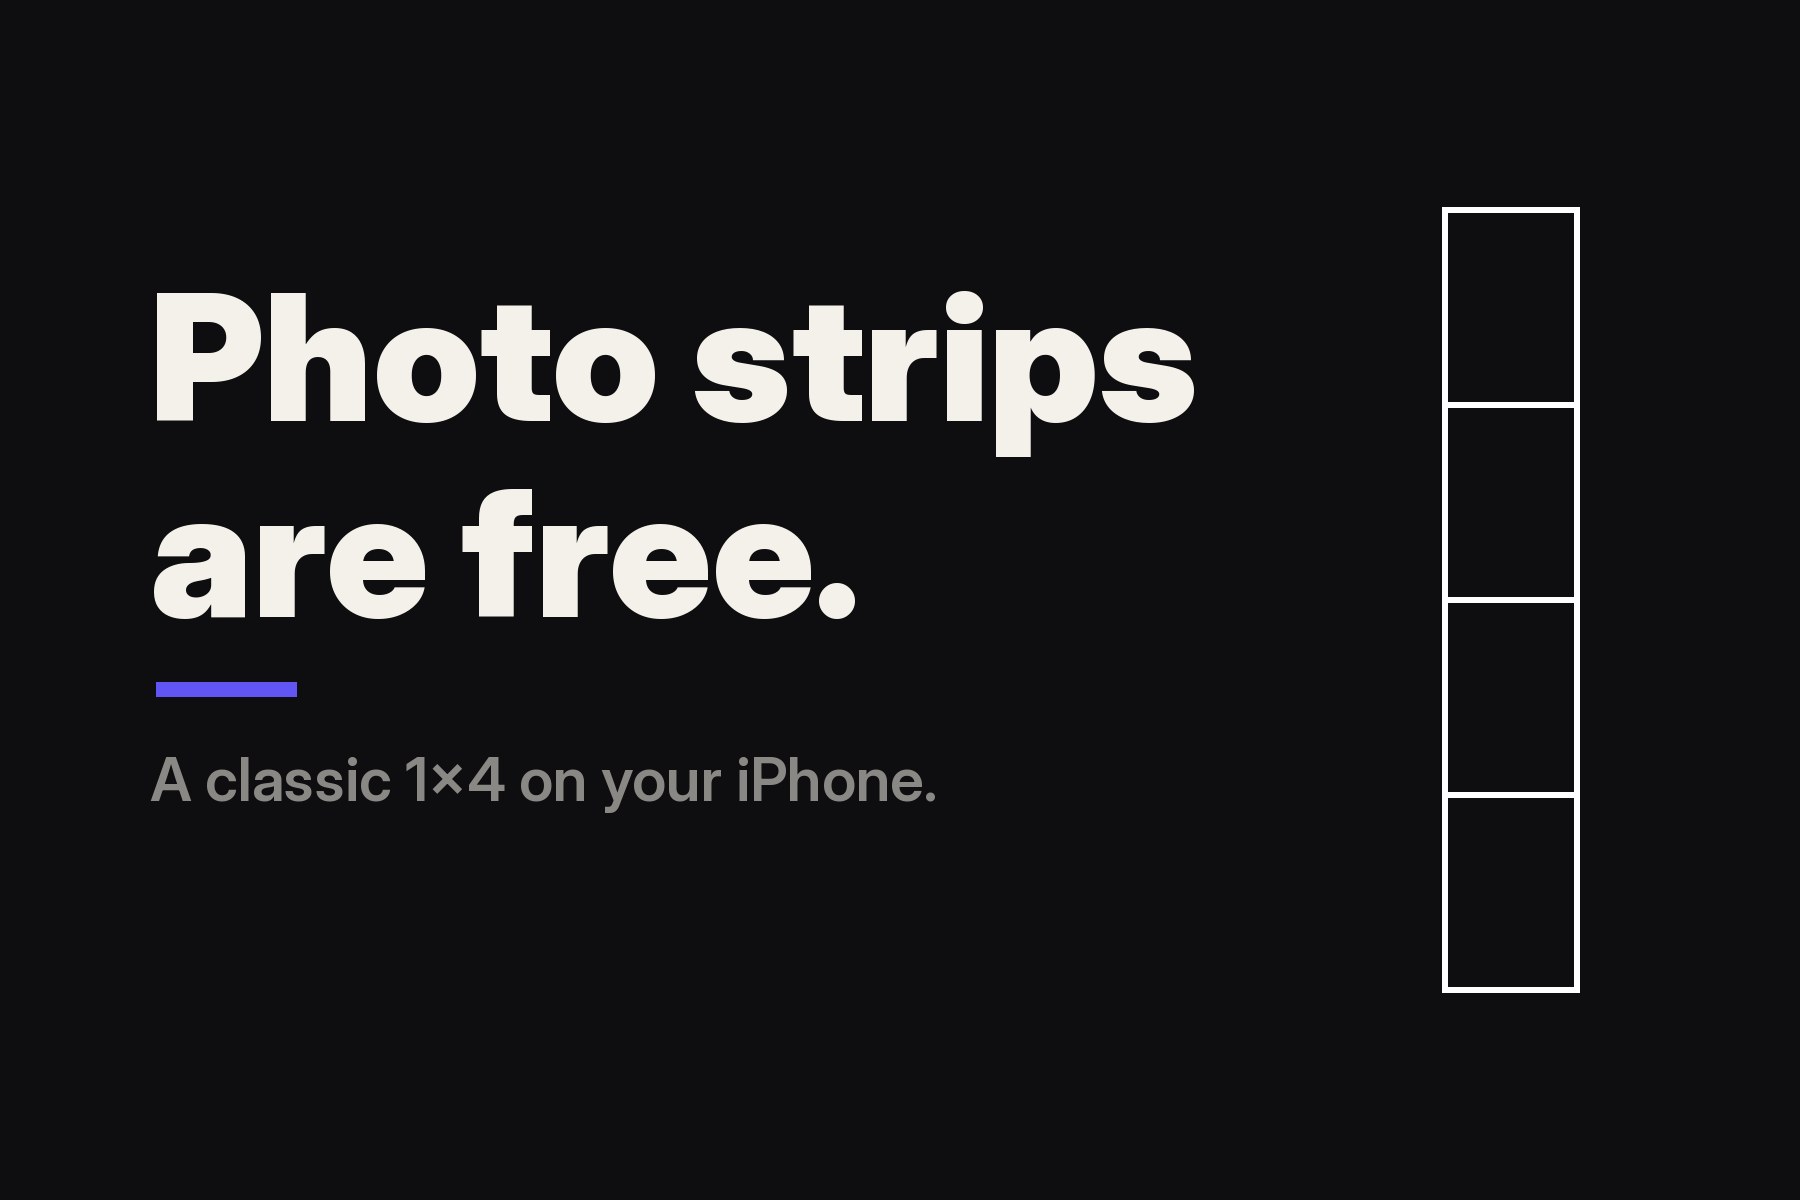
You don’t need a coin slot or a curtain to make one. You need your iPhone, a friend or two, and about a minute. And the strip itself costs nothing: classic 1×4 strips (and 2×2 grids) are free in ZillaBooth, with no watermark stamped across your faces.
Here’s how to make a good one.
What makes a photo strip a photo strip
A strip is four photos taken in a row, stacked vertically, with no chance to stop and check how you look. That last part is the whole point. You don’t get to pick your best angle and delete the rest. You get all four, and the sequence tells a tiny story. If you want the longer history of why it’s four and not three or six, we wrote about the science of the strip.
The 1×4 is the tall, skinny classic. Its cousin, the 2×2 grid, puts the same four frames in two rows of two. Both are free in ZillaBooth, and we love the grid too (here’s why it never goes out of style). Today, though, we’re making a strip.
How to make a classic 1×4 strip on your iPhone (five steps)
1. Find a bare wall
Real booths are boring inside on purpose. A plain curtain or a flat wall keeps the attention on faces. At home, look for a blank stretch of wall, a closed door, or the back of a bookshelf. Skip the busy kitchen counter and the window with the bright sky behind you.
If the wall has some color, great. A painted hallway or a tiled bathroom wall can look surprisingly good.
2. Stand close
Closer than you think. A booth is a small box, and that tightness is part of the look: shoulders touching, someone’s chin on someone else’s head. Hold the phone at about eye level, or prop it on a shelf, and squeeze in until everyone’s face fills the frame. If you can see your knees, you’re too far away.
3. Leave the flash on
Flash is on by default in ZillaBooth, and for this, leave it that way. That bright, slightly harsh, everyone-lit-the-same look is what makes an old booth strip feel like a booth strip. It’s flattering in an honest way: a little shine on the forehead, sharp eyes, nobody hiding in a shadow.
If the room is very bright already, that’s fine too. Just face the light rather than putting it behind you.
4. Pick the 1×4 strip and take four frames
Choose the 1×4 strip layout in ZillaBooth, then tap the shutter and get ready for four frames. Here’s the trick that separates a good strip from a forgettable one: plan nothing except the first pose. Smile for frame one. After that, react. Look at each other, lose it, pull a face, turn your back on the camera for frame four.
A few combinations that never fail:
Normal, normal, laughing, chaos. The classic arc.
The slow lean. Each frame, everyone leans a little further to one side until the last frame is mostly empty wall.
The swap. Two people trade places between every frame.
Deadpan to the end. No smiling allowed. Someone always cracks by frame three, and that’s the keeper.
Whatever happens, don’t retake it. The blink, the half-sneeze and the hair in the face are what you’ll love about it later.
5. Share it
When your strip is ready, it goes out through the iOS share sheet, the same menu you use for any photo. Text it to the group chat, AirDrop it to whoever was squeezed in next to you, or save it to your photos. Strips look great taped to a fridge.
A few small things that make a big difference
Wipe the lens. Phones live in pockets. A quick wipe with a soft shirt fixes most “why is it hazy” strips.
Turn the overhead light off if it’s yellow. With the flash doing the work, a warm ceiling bulb can add an odd color cast.
Take two strips. The second one is almost always better because everyone has stopped trying.
Let someone else hold the phone sometimes. The person who always takes the photo deserves to be in a strip too.
Why “free” matters here
Bar booths are wonderful, and if there’s one near you, go stand in that line. But a strip shouldn’t be something you only get a few times a year. The best strips come from ordinary nights: a kitchen at 1 a.m., a birthday dinner, the last evening before someone moves away. Those nights don’t come with a booth, so we put one on your phone and made the strip part free, no watermark, no strings.
There’s a reason people hang on to these. A single photo shows what someone looked like. A strip shows what it felt like to be there, a few seconds at a time. We wrote more about that in why the photo strip is the ultimate souvenir.
Make your first strip tonight
Download ZillaBooth, pick the 1×4 strip, find a bare wall and squeeze in. Four frames, flash on, no do-overs.
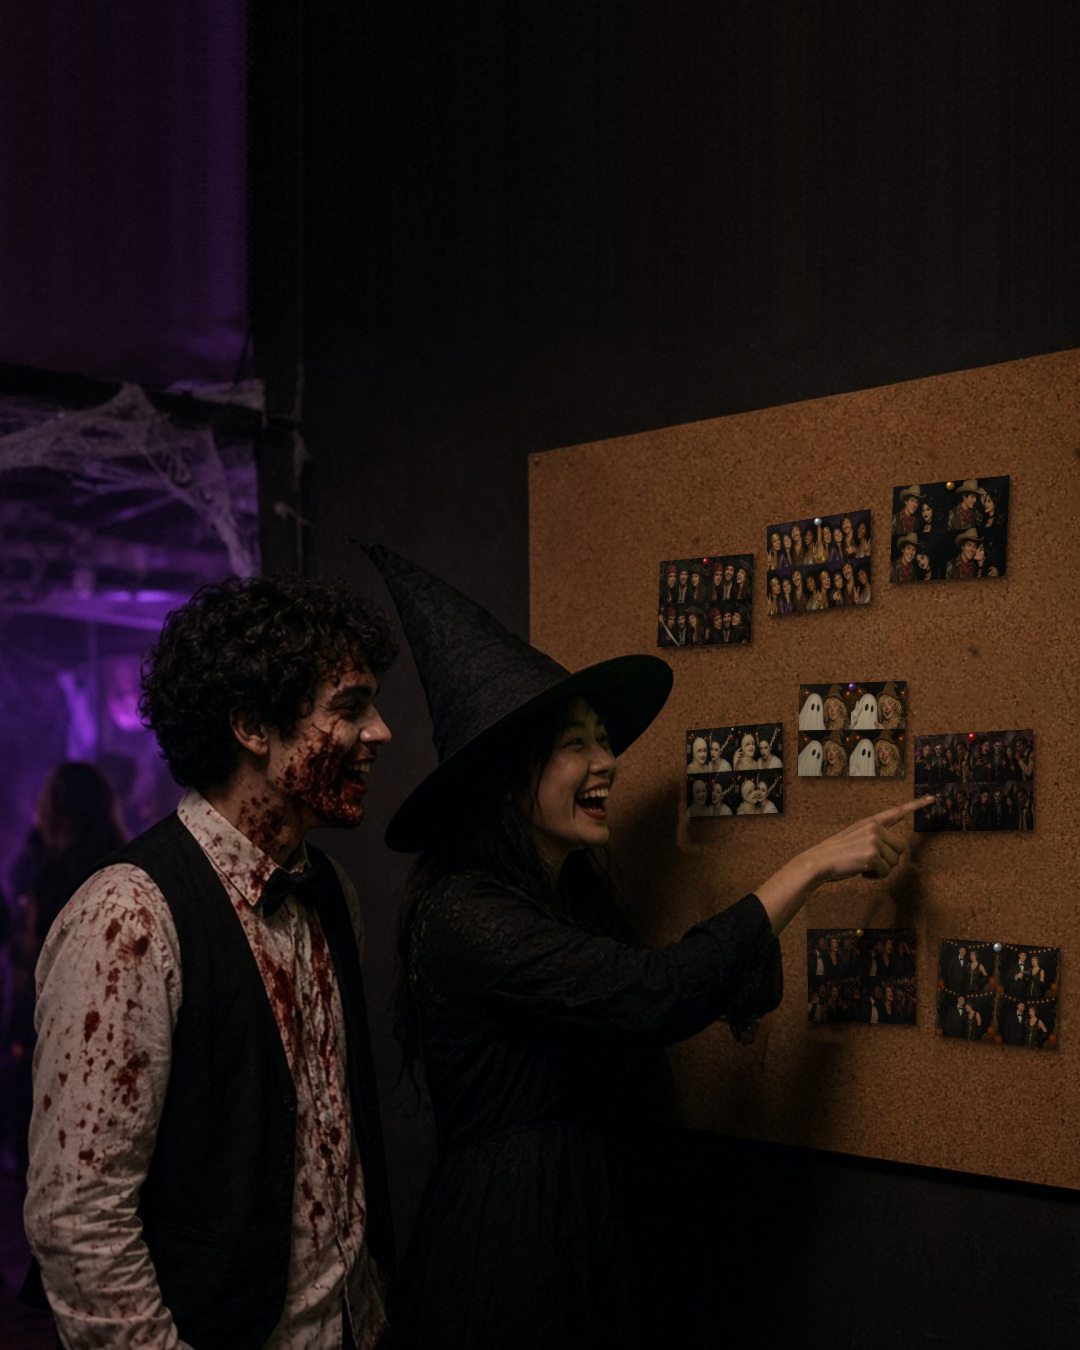
Every Halloween party has the same awkward moment around 10 pm. Someone has to announce the costume contest, a handful of people shout over the music, and the vote comes down to whoever has the loudest friends. A photo booth fixes that, and it gives you a keepsake for every guest at the same time.
The idea in one sentence
Put an iPad photo booth next to a printer and a corkboard. Every group prints its four-photo grid and pins it to the wall. At the end of the night, the room votes.
What you need
An iPad on a stand, running ZillaBooth.
An AirPrint printer on the same Wi-Fi network.
A corkboard or a stretch of wall, plus pins or tape.
A pen and a few slips of paper, or a jar of stickers, for voting.
That is the whole list. If you can find a small stand light, add it. Halloween rooms are dim and a little light in front of the booth makes costumes and makeup much easier to see.
Set it up
Place the booth where people can see it from the party but not so close to the speakers that nobody hears the countdown. Put the printer on a side table nearby, and put the corkboard right beside it so people can pin their prints the moment they come out.
Open ZillaBooth and choose the 2×2 grid. A grid is better than a strip for group costumes, because every frame can hold the whole group. Take a test print with the host’s family before guests arrive.
Printing works on every tier through AirPrint, and Pro adds Simple Printing, a one-tap Print button, so guests do not have to wait at the printer. If you do not have a printer, guests can still share their photos from the iPad, and you can pin a printout of the winners later.
Run the contest
Give each group a number or a name on a small card to pin beside their grid. Voting can be as simple as one sticker per guest. Set a time, say 11 pm, and let people walk the wall with their drink and pick a favorite.
A few ways to make it more fun:
Add categories: funniest, scariest, best group, best last-minute costume.
Ask each group to strike one pose that shows what the costume is supposed to be.
Take the winning grids down and keep them. They make a nice memory of the night, and you can photograph the whole wall for the group chat. If you plan to host again next year, you will already know how to set it up in ten minutes.
Keep it simple
You do not need a big budget or a rented booth to do this. A phone or an iPad is enough, and ZillaBooth’s classic strips and 2×2 grids are free, with no watermark. If you want more control over timers and flash for a dark party room, the Pocket upgrade adds both. You can also see how the same idea works for larger gatherings on the event photo booth app page.
Costumes deserve better than a blurry phone picture taken in a hallway. If you are hosting a Halloween party this year, the iPad you already own can be the photo booth. Here is a five-step checklist you can run through in about fifteen minutes.
1. Put the iPad on a stand at chest height
Hand-holding is how you end up with crooked photos and tired arms. A tabletop or floor stand keeps the camera steady and at a comfortable height for most guests. Tape a small mark on the floor where people should stand so everyone ends up in frame, even the one in the giant inflatable dinosaur suit.
2. Light the faces, not the cobwebs
Halloween rooms are dark on purpose, and cameras hate that. Put one lamp in front of the booth, pointing at where faces will be. A warm bulb keeps the mood, and you can leave the purple lights and fog on behind the guests. Take a test photo and adjust until you can see everyone’s makeup.
3. Pick a 2×2 grid or a classic strip
ZillaBooth takes four photos in a row after a countdown and gives you one finished picture. You can choose a 2×2 grid or a classic 1×4 strip. A grid works well for groups because everyone fits in each frame. A strip feels more old-school and suits couples and pairs. Both layouts are free, with no watermark and no account.
4. Add a spooky overlay with your party name
With Pro, you can put your own PNG overlay on every picture, such as a cobweb border with the party name and the date. You design it once in any graphics tool and load it in. Our post on designing overlays for non-designers explains how to keep text readable. If you would rather skip this step, the plain grid still looks great.
5. Decide how guests take it home
Some people want a print for the fridge, and some want a copy on their phone. Printing works on every tier through AirPrint, so if you have an AirPrint printer on your Wi-Fi, guests can print. Guests can also share the picture straight from the iPad, which is handy for the friend who left early.
A few extra tips
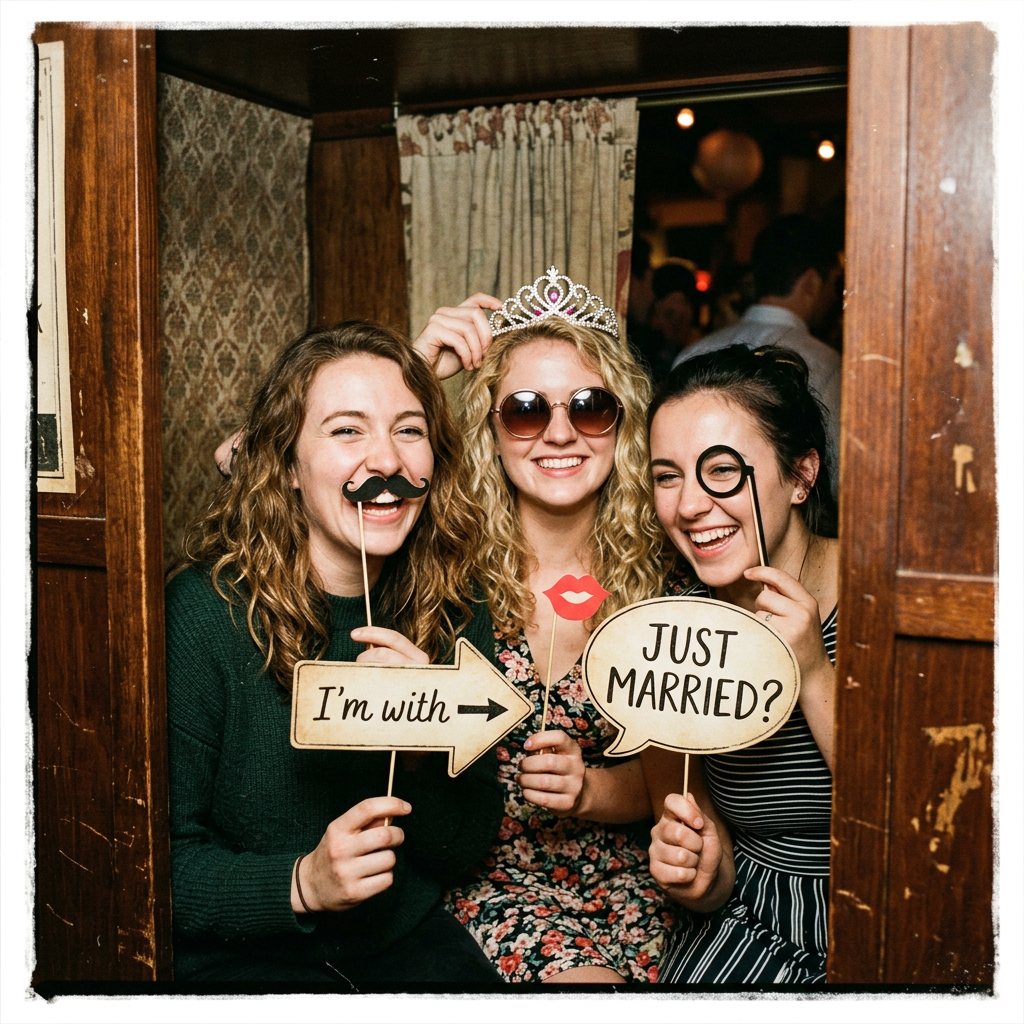
Keep a small basket of props near the stand. Simple things work: plastic fangs, a witch hat, a cardboard sign.
Do a full run-through before the first guest arrives. Take a strip with the host and fix anything that looks off.
Plug the iPad in. Four-photo sessions all night add up, and a dead screen at 10 pm is a sad ending.
Put a small sign by the stand that says “Tap to start”.
Where to go from here
If you are planning a larger party, the event photo booth app page shows how the same setup scales to a venue. If you only need a simple setup for the family or a few friends, the Pocket upgrade adds adjustable timers and flash control.
The anticipation, the pastel palette, the tiny shoes…nothing quite matches the delicate joy and excitement of a baby shower or gender reveal party. It’s an event centered entirely on hope, love, and the imminent arrival of a new family member. While cake and presents are staples, the modern host is always looking for a way to transform a sweet gathering into an unforgettable, interactive experience that provides lasting memories.
Enter the photo booth, reimagined.
No longer a simple box for silly selfies, the modern photo booth is an immersive memory-making machine. For baby showers and gender reveals, it becomes the emotional and creative centerpiece, offering two indispensable features: the instantaneous celebration of the big news via custom overlays, and the profound, deeply personal collection of wisdom and well wishes from every single guest. This is how you elevate your photo booth offering from a party favor to a priceless keepsake.
The Moment of Truth: Gender Reveal Overlays
The gender reveal is the crescendo of the event, and the photo booth is the perfect vehicle to amplify and capture this high-energy moment.
Forget the messy confetti cannons and colored smoke. The most elegant, instantly shareable, and mistake-proof way to announce the baby’s sex is through a dynamic, pre-programmed photo booth overlay. This feature is not just about aesthetics; it is about instant emotional reinforcement and social sharing.
Setting Up the Magic
The key to a successful gender reveal booth is the “reveal.” There are two primary methods your booth can employ to deliver this shock and awe:1. The Instant Print Reveal:This method is perfect for a gender reveal where the host wants to print out physical keepsakes immediately. The booth operator or a trusted friend is pre-loaded with two identical event templates…one for “It’s a Boy!” (blue or boy-themed graphics) and one for “It’s a Girl!” (pink or girl-themed graphics).
Pre-Reveal Setup: The default active template is a gender-neutral design that simply says, “We’re Celebrating!” or “Guess Who’s Coming?”
The Moment: After the traditional reveal (or as the final surprise), the operator discreetly switches the photo booth software to the corresponding “Boy” or “Girl” template.
The Result: Guests step up to the booth after the announcement. Their photos are instantly framed by a beautiful, celebratory overlay that locks in the news: “It’s a Boy, Noah is Coming!” or “It’s a Girl, Welcome Baby Lily!” Every printout is now a permanent, personalized announcement that guests take home.2. The Digital Overlays for Shareable Content:In the age of Instagram Stories and TikTok, the primary goal is often rapid, branded content sharing. This approach uses digital overlays for social media distribution.
Pre-Designed Graphics: Create stunning “It’s a Boy” and “It’s a Girl” digital frames and photo overlays. These should be clean, legible, and optimized for mobile viewing.
Seamless Integration: The photo booth software should be set up to email the photos to guests immediately after the session. Crucially, the final image processing can include the reveal graphic.
The Power of the Photo Strip: Even better, design a custom photo strip template where the first three photos are gender-neutral poses, and the final fourth photo is the big reveal…”We’re Having a Girl!” The excitement builds right on the strip itself, turning a simple photo into a narrative announcement.
By offering this level of customization, your photo booth becomes the official, elegant announcement platform, not just a sideline activity.
The Priceless Gift: Capturing Advice for the Parents
While the gender reveal is the party’s climax, the collection of guest advice is its heart. This feature transforms the photo booth from an ephemeral entertainment device into a generational time capsule. New parents are often overwhelmed, and receiving heartfelt, personalized advice from their loved ones is a treasure. The photo booth is uniquely positioned to capture this wisdom because it is interactive, private, and fun.
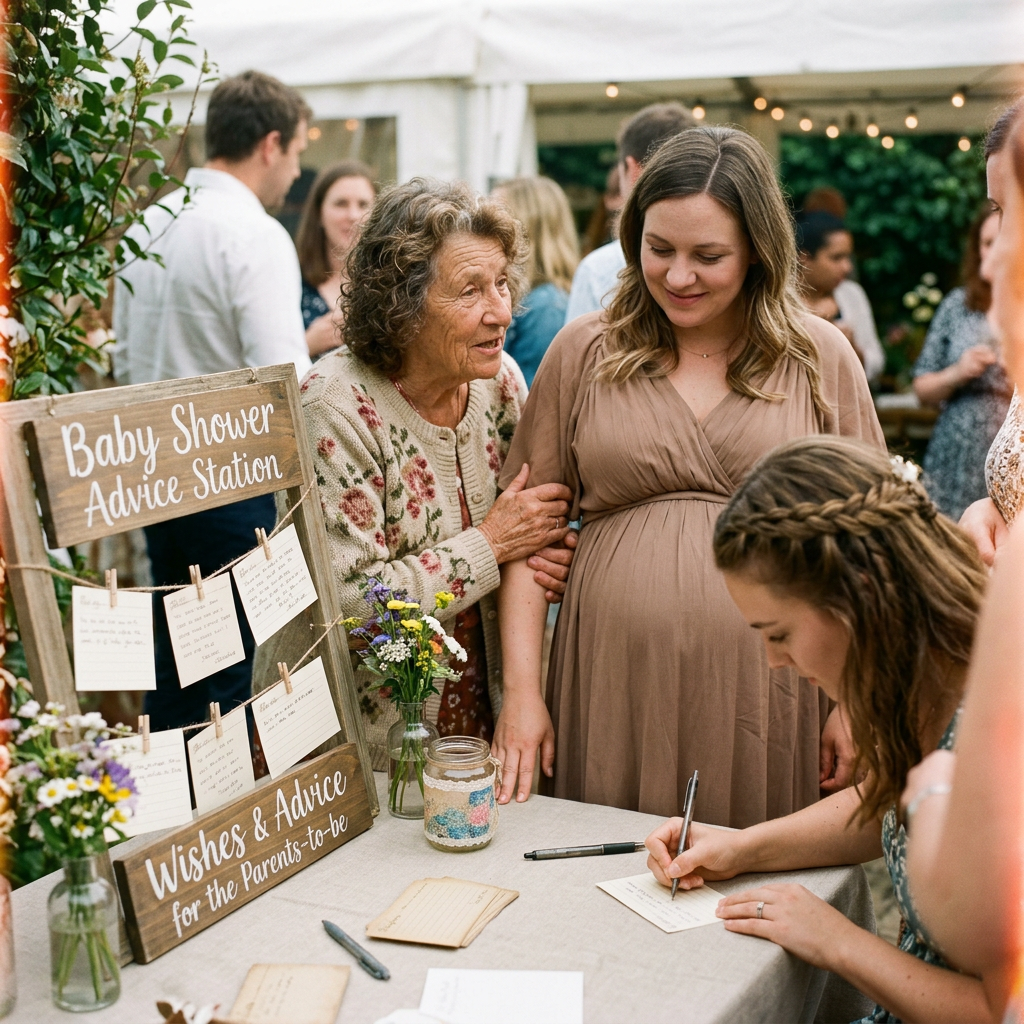
There are two powerful ways to utilize the booth for collecting advice:1. Advice Boards (The Digital Time Capsule)ZillaBooth takes photos, not video, so have guests write their advice on a small whiteboard or card and hold it up in the shot. Every photo becomes a piece of advice the parents can keep.
The Prompt: Instead of letting guests ramble, put a printed prompt card next to the booth to guide them. Examples include:
“What is one piece of advice you wish you’d been given as a new parent?”
“What’s your secret to surviving the first six months?”
“A special wish or promise to the new baby.”
Setting the Mood: Provide a comfortable spot and soft, warm light, so faces and handwriting are easy to see.
The Delivery: Turn on auto-save so every photo is kept on the booth iPad, then AirDrop or share the set with the parents. Call it “Wisdom for the Weary.” This is a gift they will look back on for years.2. Print Templates with an Advice Section (The Physical Keepsake)If the event is focused on printed memories, you can integrate the advice directly into the physical keepsake.
Custom Template Design: Design a large-format print template (e.g., 4×6 or 5×7 postcard) with a dedicated, blank section clearly labeled “Words of Wisdom” or “Dad’s Advice / Mom’s Advice.”
The Workflow: The guest takes their photo, and when the print emerges, they immediately take it to a nearby “Advice Station” equipped with fine-tip metallic markers. They write their advice directly onto the print, giving the parents a beautiful, tangible photo and a handwritten note in one item.
The Collection: Provide a beautiful, custom-designed scrapbook or memory box where guests can place their finished photo/advice cards. The resulting album is a curated, physical record of everyone who attended and what they contributed, both photographically and emotionally.
Elevating the Experience: Props, Themes, and Backdrops
A baby shower or gender reveal photo booth should feel gentle, playful, and cohesive with the party’s theme.
Themed Props
Avoid generic, dusty prop boxes. Focus on thematic, high-quality items:
Baby Essentials: Oversized novelty pacifiers, “Mom-to-Be” and “Dad-to-Be” glasses, tiny knit booties on sticks, and baby bonnets.
Verbal Props: Speech bubbles with phrases like “Team Boy,” “Team Girl,” “Tired Already,” “Due Date: [Blank],” and “I Predict a Nap.”
Nostalgia: Wooden blocks spelling out “BABY,” classic storybooks, or even tiny, framed pictures of the parents as babies.
Backdrop Brilliance
The backdrop sets the entire mood and is critical for ensuring the final photos look professional.
Classic & Clean: A white, light gray, or blush velvet backdrop provides a clean, soft canvas for the pastel colors of the event to pop.
Thematic: A wall of faux floral arrangements in pinks, blues, and whites; a backdrop made of hanging baby clothes (onesies, socks); or a mural of hot air balloons and clouds.
Interactive: Consider a chalkboard or whiteboard backdrop where guests can write their guess for the baby’s name or weight before they take their photo.
Technical Deep Dive: The Operator’s Advantage
For the photo booth operator, the Baby Shower package requires meticulous planning to ensure the high emotional stakes of the event are met with flawless execution.1. Template Management:
You must be able to switch templates instantly. If using a software program, pre-load all necessary templates and assign hotkeys or simple on-screen buttons for quick switching between “Neutral,” “Boy,” and “Girl” designs. Test the template change process multiple times before the event. A delay can ruin the “reveal” moment.
Lighting for Softness:
Unlike party booths that demand high energy, a baby shower booth thrives on soft light. Use a large, diffused softbox or a beauty dish to create a flattering, gentle light that minimizes harsh shadows. The goal is “glow,” not “paparazzi flash.”
The Advice Workflow:
Keep markers, cards, and a small whiteboard by the booth, and wipe the board between guests. Turn on auto-save so every shot stays on the iPad. A Bluetooth shutter remote helps guests who are holding a cocktail or juggling a plate of appetizers.
The Attendant’s Role:
Your attendant for a baby shower should be your most empathetic and encouraging team member. Their role is to gently guide guests:
Encourage the shy ones to write a message.
Explain the “advice card” printout process.
Ensure that the children pose nicely and that the prints are handled with care as they go into the memory album.
The attendant is the keeper of the memory, not just the equipment.The Business Case: Why This Package Sells
A baby shower/gender reveal package is a premium offering that commands a higher rate than a standard party rental because it delivers a priceless heirloom rather than just entertainment.
Pitching the Value:
Framing: Market the package as the “Heirloom Memory Package” or “First Family Album Booth.”
Deliverables: Highlight the tangible outputs: a curated photo album with handwritten notes, a set of advice photos from every guest, and personalized, themed prints.
Client Pain Points: Address the parent’s anxiety about remembering everything. “Let us handle capturing every smile and every piece of loving wisdom, so you can just enjoy your special day.”
By mastering the seamless integration of custom gender reveal overlays with the deeply personal feature of guest advice capture, your photo booth service becomes an indispensable part of the joyous journey into parenthood. It’s more than a picture; it’s the first chapter in the baby’s story, told through the faces and voices of everyone who loves them. This dedication to crafting a meaningful, interactive keepsake ensures your business will be the first name on the list for every future celebration.
The allure of vintage is undeniable. There’s something captivating about stepping back in time…a fascination that extends beyond history books and into our celebrations, parties, and, most importantly, our photography. Whether you are hosting a Roaring Twenties jazz night, a Victorian tea, or a mid-century rockabilly rave, the right accessories transform a good theme into an unforgettable experience.
But here is the common problem: authentic, high-quality vintage props are either incredibly expensive or too fragile for a photo booth full of enthusiastic guests. That’s where the DIY approach saves the day. By crafting your own accessories, you can achieve that perfect, era-specific look with materials that are durable, customizable, and budget-friendly. This guide provides step-by-step instructions for creating three iconic, history-celebrating props…the must-have “Mustache on a Stick,” the timeless “Cloche Hat,” and the glamorous “Flapper Feather Headband”…all designed to be high-impact elements when viewed through the lens of a high-resolution camera setup, perfect for your next ZillaBooth session.
Why DIY Props? The ZillaBooth Difference
When you take a photo with a dedicated camera system like ZillaBooth, the high-definition capture and controlled lighting mean every detail counts. A store-bought prop often looks cheap or flat under a powerful flash. A handmade prop, however, carries a distinct texture and depth that translates beautifully to print and digital display. We are not just making props; we are creating tactile storytelling elements that enhance the visual narrative of your event.
Project 1: The Distinguished Gentleman’s Mustaches on Sticks
The mustache on a stick is the quintessential photo booth prop. It’s simple, universally recognizable, and instantly hilarious. The key to making it look vintage and high-quality lies in the material selection and the detailing.
Materials You Will Need: – Sheets of craft felt (Black, dark brown, and a deep charcoal gray…choose high-quality, thick felt for stiffness).
– Wooden dowels or bamboo skewers (approx. 10-12 inches long).
– Hot glue gun and extra glue sticks.
– Sharp fabric scissors.
– Free mustache templates (printable templates for styles like the Handlebar, Chevron, Walrus, and Toothbrush).Step-by-Step Crafting Guide:1. Prepare the Templates: Search online for free printable mustache templates. Print them out and cut the shapes from cardstock. The stiffness of the cardstock will allow you to trace the shapes more accurately. For a truly authentic vintage feel, select styles from the late 19th century through the 1920s.
2. Cut the Felt Layers: Place your cardstock templates onto the felt. Use a chalk pencil or a fine-tipped marker to trace the outline. You will need to cut two identical pieces of felt for every single mustache. Cutting two layers and gluing them together is the secret to creating a prop that is stiff, durable, and won’t flop over in front of the camera. Cut the felt shapes carefully with sharp scissors to ensure clean, crisp edges that define the style of the mustache.
3. Construct the Prop: Heat up your hot glue gun. Lay one felt piece flat, then run a line of hot glue directly down the center. Immediately place the tip of the wooden dowel (or skewer) onto the glue line, extending the dowel down to the bottom edge of the felt. Add another thin layer of glue over the portion of the dowel that is sitting on the felt.
4. Final Assembly: Quickly take the second identical felt piece and align it perfectly over the first piece, sandwiching the dowel and the glue in between. Press firmly across the entire mustache. This bonding process must be fast while the glue is hot. Once dried, you should have a firm, dual-layered prop that holds its shape beautifully.
5. Finishing Touches: While not necessary, you can lightly mist the felt mustaches with a fabric stiffener spray to give them extra resilience against moisture and handling.Project 2: The Roaring Twenties Cloche Hat (Simplified DIY)
The cloche hat, French for “bell,” was the height of fashion in the 1920s. Characterized by its close-fitting crown and small, downward-sloping brim, it is surprisingly easy to replicate for prop use without getting into complex millinery. This is a minimal-sew or no-sew project.
Materials You Will Need: – A large piece of stiff, dark felt (wool blend or heavy synthetic is best), or a simple, cheap felt beanie.
– A large, round mixing bowl (the bowl must be slightly smaller than the head size you want).
– Fabric stiffener spray (or a mixture of cornstarch and water).
– Ribbons (velvet or grosgrain ribbon, about 1-2 inches wide, to wrap the crown).
– Embellishments (a small fabric flower, a cluster of beads, or a simple feather).
– Hot glue gun or strong fabric glue.Step-by-Step Crafting Guide:1. Prep and Shaping (The Crown): If you are using a flat piece of felt, you will need to shape the dome of the hat. A simple way is to use the mixing bowl as a form. Drape the felt over the inverted bowl. The goal is to get the felt to conform to the rounded shape.
* The Stiffening Method: Once draped, spray the exposed felt heavily with fabric stiffener (or brush on your cornstarch/water mixture). Let it dry completely. The felt will hold the dome shape of the bowl. Alternatively, for a no-stiffener method, purchase a ready-made, inexpensive felt beanie and simply fold and glue the brim inward and upward to create the downward slope of the cloche.
2. Creating the Cloche Edge: The defining feature of the cloche is its deep, downward slope, which often came right down over the eyebrows.
* For Shaped Felt: Once the felt is dry and stiff, cut a circular piece large enough to cover the top of the head form and extend 2-3 inches past the base of the bowl. You can then gently fold this excess felt downward and inward, securing the shape with tiny dabs of glue on the inside. You are creating the “bell” shape.
* For Beanie: Pull the beanie onto a foam head or the mixing bowl. Pull the edge down and pin it so it sits at a slightly unnatural, deep angle…this is the cloche look. Secure the fold with fabric glue or a few quick stitches.
3. Adding the Signature Band: In the 1920s, the ribbon band was essential and was often decorated. Cut a length of ribbon long enough to wrap around the base of your newly shaped felt hat. Secure the ribbon band with hot glue. Make sure the seam where the ribbon meets is neat, as this is where your embellishment will go.
4. The Embellishment: Glue your chosen embellishment…the fabric flower, beadwork, or feather…directly over the ribbon seam. This instantly elevates the prop from a plain hat to a period-accurate accessory. The high-contrast lighting of the ZillaBooth will pick up the textures of the ribbon and the sparkle of the beads, ensuring the prop stands out in the final image.Project 3: The Classic Flapper Feather Headband
For a prop that is pure glamour and requires almost no skill, the feather headband is a perfect choice, embodying the spirit of Art Deco exuberance.
Materials You Will Need: – A length of black, gold, or silver elastic or sequined ribbon (long enough to wrap around the head).
– A large, single-plume ostrich or peacock feather (these are inexpensive at craft stores).
– Rhinestones, costume jewels, or a small brooch.
– Hot glue gun.Step-by-Step Crafting Guide:1. Measure and Cut the Band: Measure the elastic or ribbon to fit comfortably around a typical adult head. Glue the ends together to form a seamless loop. If you are using plain ribbon, you can glue a line of rhinestones to the front center to create a focal point.
2. Attach the Focal Point: The feather must be placed high on the side of the head, near the temple. Use a generous amount of hot glue to secure the stem of the feather directly to the ribbon or elastic band. Hold it firmly until the glue sets.
3. Conceal and Finish: Glue your brooch or cluster of jewels/rhinestones directly over the base of the feather stem. This covers the messy glue connection and adds the essential sparkle that defines the flapper era. The high shine of the rhinestones will catch the light perfectly in the photo booth.Prop Use and ZillaBooth Tips
A well-made prop needs to be used correctly to maximize its impact in the final photo. When directing guests or preparing for your own photo session, remember the unique qualities of the props you’ve created: – Mustaches: Encourage users to hold the mustache slightly away from the face, letting the light cast a slight shadow for a dramatic, editorial look. The prop should frame the mouth, not hide it.
– Cloche Hat: Since the hat is designed to sit low, instruct users to tilt their head back slightly to ensure their eyes are visible and not completely obscured by the brim. This pose instantly mimics the posture of the 1920s.
– Headbands: The feather should be positioned so that it breaks the silhouette of the head. In group photos, this adds dynamic vertical variation.The beauty of these DIY vintage props is that they introduce an element of intentional, handcrafted imperfection that contrasts wonderfully with the crisp, clean output of a professional photo booth like ZillaBooth. They are not merely accessories; they are conversation pieces that capture the fun, history, and craft behind your themed celebration. So gather your supplies, fire up that glue gun, and start crafting the history you want to celebrate…one perfectly styled, ready-for-its-close-up prop at a time.
Weddings today are experiencing a silent revolution. It’s not about the cut of the dress or the size of the guest list; it’s about conscience. Modern couples, deeply aware of their environmental impact, are demanding that their special day aligns with their values, leading to a massive, irreversible pivot toward eco-friendly and sustainable practices. From locally sourced catering and upcycled décor to carbon offset programs, sustainability has moved from a niche preference to a core pillar of wedding planning.
The goal is no longer just a beautiful memory, but a beautiful impact . In this context, every element of the celebration is scrutinized for its environmental footprint…and that includes one of the most beloved party staples: the photo booth. For years, the traditional photo booth, with its endless rolls of glossy paper, was a major, often overlooked source of waste. It’s a relic of an analog age clashing with a nature-forward, digital future. But now, that’s changing, thanks to smart technology designed to bring the fun without the footprint.
The shift is more than just a passing trend; it’s a demographic imperative. Millennials and Gen Z couples, who collectively drive the majority of current wedding planning, have grown up with climate change as a constant headline. They are skeptical of consumerism and driven by a desire for experiences over material possessions. This translates into wedding choices that prioritize responsible sourcing and minimal waste. They are asking hard questions of their vendors: Where does your food come from?
Can these flowers be composted? What happens to the leftover materials? This deep dive into ethics has created a new, defined aesthetic: the “nature-forward” design. This design embraces natural textures, uses living greenery instead of cut flowers where possible, favors raw, unbleached, or recycled materials, and often incorporates digital technology to replace physical paper. This philosophy states that true luxury is clean, conscious, and waste-free. A sustainable wedding isn’t a compromise; it’s a higher standard.
To understand the solution, we must first understand the scale of the problem posed by traditional photo booths. A typical wedding hosts around 120-150 guests. Over the course of a four-hour reception, that booth is running almost non-stop. If even half of those guests take two sets of photos…one for themselves and one for a guest book…that could easily result in 200-300 glossy, 2×6 inch photo strips printed. Multiplied across the hundreds of thousands of weddings held globally each year, the paper and ink waste is staggering.
The paper itself is often thermal photo paper or paper coated in chemicals to achieve that high-gloss finish, making it difficult, if not impossible, to recycle through standard municipal recycling streams. It ends up directly in a landfill. The plastic ink cartridges, thermal ribbons, and spare rolls of paper that are tossed at the end of the night further exacerbate the issue.
This isn’t just about a few strips of paper; it’s about supporting a linear, wasteful production model…a model that is fundamentally incompatible with the principles of a “green” or “nature-forward” celebration. The irony is stark: a moment of ephemeral fun leaves behind a physical waste product that will last for generations. The industry desperately needed a revolutionary approach.
Enter the next generation of event technology, exemplified by the ZillaBooth. This is where the commitment to sustainability meets cutting-edge convenience. The core innovation of the ZillaBooth model is simple: digital sharing is the default. Instead of a printing press, the booth is a high-resolution capture and distribution system.
Here is how ZillaBooth entirely removes the paper waste stream from the equation:
Instant Digital Delivery: Instead of waiting for a printer, guests get their photos in seconds, by email or straight from the share sheet with AirDrop. The entire process takes seconds. This immediate gratification is a massive upgrade over watching a thermal printer slowly process a strip. It respects the guests’ time and their desire for immediate, shareable content.
No Physical Materials Required: Because the booth is designed for digital capture and delivery, it eliminates the need for paper stock, thermal ribbons, ink cartridges, and the machinery required to store and power the printer. The reduction in physical logistics also lowers the shipping and transport carbon footprint associated with supplying these materials. A paperless booth is a simpler, lighter, and more energy-efficient setup overall.
Sustainable Guest Book Alternative: The traditional wedding guest book, often filled with glued-in photo strips, is replaced by a digital album. Turn on auto-save, and every collage is kept on the booth iPad, ready to share with the couple. This provides the couple with a clean, high-resolution, shareable archive of their wedding memories, rather than a clunky, paper-based artifact that often sits untouched on a shelf. The digital album is easily searchable, shareable with family members across the globe, and permanently archived…a far more robust and enduring record than its physical counterpart.
This fundamental shift from a ‘print-first’ to a ‘digital-first’ mentality is the most impactful single step a photo booth company can take towards true environmental responsibility. It ensures the memory is preserved, but the Earth is not burdened. The choice is a deliberate, conscious pivot away from the extractive model of event entertainment.
The choice of a digital photo booth like ZillaBooth extends far beyond the practical benefit of waste reduction; it actively supports and complements the “nature-forward” aesthetic that couples are striving for. The very nature of digital technology is clean, minimalist, and non-intrusive. A “nature-forward” design is characterized by intentionality and a rejection of unnecessary clutter.
The ZillaBooth’s sleek, modern design fits seamlessly into this environment. Unlike bulky, printer-housing traditional booths, the ZillaBooth setup can be minimalist…perhaps a simple, attractive pedestal and an elegant backdrop made of recycled wood, living moss, or sustainably sourced linens. The booth itself becomes a subtle, high-tech piece of furniture rather than a disruptive mechanical box.
Furthermore, the cost savings realized by not having to stock and maintain expensive, single-use photo paper can be redirected into other truly sustainable elements of the wedding. Imagine reallocating that budget toward:
Local, In-Season Florals: Investing in a local flower farm that uses no pesticides, instead of importing refrigerated, air-freighted flowers. This choice cuts down on transportation emissions and supports local economies, embodying the “nature-forward” ethos.
Compostable Linens and Serving Ware: Ensuring that any necessary disposable items (like cocktail napkins or tasting plates) are 100% compostable. This reduces the trash volume exponentially, making the event truly low-impact.
Vendor Choice: Selecting a caterer who is zero-waste or a venue with a robust recycling and composting program. Every dollar spent on the wedding is a vote for the couple’s values.
By choosing ZillaBooth, the couple is making a high-impact, visible choice that frees up resources to further deepen their commitment to an authentically nature-forward day, where every detail, from the menu to the entertainment, speaks the same language of consciousness and care for the planet. It’s an easy win that has a cascading positive effect on the entire event’s sustainability profile.
While sustainability is the moral driver, the guest experience is the ultimate measure of any entertainment choice. Switching to a digital-only photo booth not only reduces impact but also significantly upgrades the souvenir guests receive.
Superior Quality and Versatility: A printed photo strip is low-resolution, chemically-processed, and easily damaged. A ZillaBooth digital file is a high-resolution image. This is an infinitely more valuable keepsake. Guests can print it later at their leisure, upload it to any social media platform instantly, or use it as a custom phone background. The high-resolution file is perfect for printing on actual archival paper years down the road, if desired, giving the guest control over the final product.
Instant Gratification and Shareability: In the age of social media, the moment is ephemeral but the desire to share is immediate. Traditional booths force guests to wait for the printer, often leading to queues and missed opportunities. The ZillaBooth delivers the file instantly to their pocket, allowing for immediate sharing on Instagram, TikTok, or a private group chat. The wedding gets an instant, positive digital footprint, organically amplifying the celebration.
No Clutter: Guests love the idea of a physical keepsake, but how many paper strips truly survive the night, let alone the journey home? Many are lost, crumpled, or discarded almost immediately. By providing a digital file, the couple is giving their guests a meaningful, high-quality, zero-clutter memory. It’s a gift that aligns with a more minimalist lifestyle, perfectly complementing the modern couple’s ethos. This is a crucial element of the ZillaBooth value proposition: better fun, better souvenir, zero guilt.
For event planners and venues, partnering with a company like ZillaBooth is a simple, high-visibility way to signal a commitment to sustainability without sacrificing luxury or quality. It simplifies logistics and streamlines the vendor approval process, as there are no heavy consumables to manage, store, or dispose of. The operational efficiency is a hidden green bonus…less waste management means less staff time and fewer resources dedicated to cleanup.
In a competitive market, being able to offer a truly zero-waste entertainment option is a powerful marketing differentiator. The choice isn’t between fun and earth-friendly; it’s about choosing the most innovative, future-proof option. The traditional photo booth is now a symbol of inefficiency; the digital booth is a symbol of progress and mindful celebration.
The wedding industry is at an inflection point. Couples are no longer content with simply achieving an aesthetic; they want to embed their values into the very fabric of their day. The shift toward sustainable weddings is not a passing trend but the new normal, driven by a desire for a “nature-forward” world, where beautiful design and ethical choices go hand-in-hand.
By choosing a digitally focused wedding photo booth like ZillaBooth, modern couples are making a simple yet profound choice: to eliminate hundreds of pieces of single-use, non-recyclable waste while simultaneously enhancing the guest experience with superior, instantly shareable digital memories. It’s a powerful example of how smart, modern technology can solve an old problem, allowing the party to be as green, clean, and joyous as the couple’s vision for their future together. Sustainability doesn’t silence the music; it just finds a better way to capture the dance. It’s time to print memories, not paper.
The post highlights inexpensive photo booth props that can help guests take playful, shareable photos. It focuses on budget-friendly wearables, signs, and inflatables such as oversized sunglasses, feather boas, letterboards, speech bubbles, and giant frames.
It also suggests avoiding costly rental equipment by using an iPad with the ZillaBooth app to create a self-serve photo booth guests run themselves, with Guided Access and the iPad plugged in (Pro adds Hide Settings).
Great Photos Start With Great Props
You don’t need to spend a fortune to get your guests laughing and posing. The secret to a hilarious, highly shareable photo booth is a great prop table. Skip the expensive rental add-ons and hit up Amazon or your local dollar store for these budget-friendly hits.
Wearables & Accessories
Oversized Sunglasses: Heart-shaped, pixelated “deal with it” glasses, or giant stars.
Feather Boas: A classic. Buy a multi-color pack so guests can mix and match.
Giant Picture Frames: An inflatable gold baroque frame guests can hold up.
Ready to Set Up Your Booth?
Now that you have your props, you need the camera! Don’t spend a fortune renting a machine. Download ZillaBooth, mount your iPad on a stand, and turn it into a self-serve photo booth guests run themselves, with Guided Access and the iPad plugged in (Pro adds Hide Settings).
After dinner and dancing, the post suggests low-cost ways to keep wedding guests entertained, including lawn games, table trivia, scavenger hunts, an audio guestbook, late-night snacks, and the shoe game. It also highlights a DIY iPad photo booth as a budget-friendly option.
The piece says photo booths offer strong value because they can be customized and automated while saving money compared with rentals.
Keep the Party Moving (Without the Premium Price Tag)
The food is eaten, the speeches are done, and the dance floor is open. But not everyone loves to dance. To keep the energy high all night, you need alternative entertainment that won’t blow your already-stretched wedding budget.
Budget-Friendly Wedding Entertainment Ideas
Lawn Games: If you have an outdoor space, giant Jenga, cornhole, or croquet are massive crowd-pleasers.
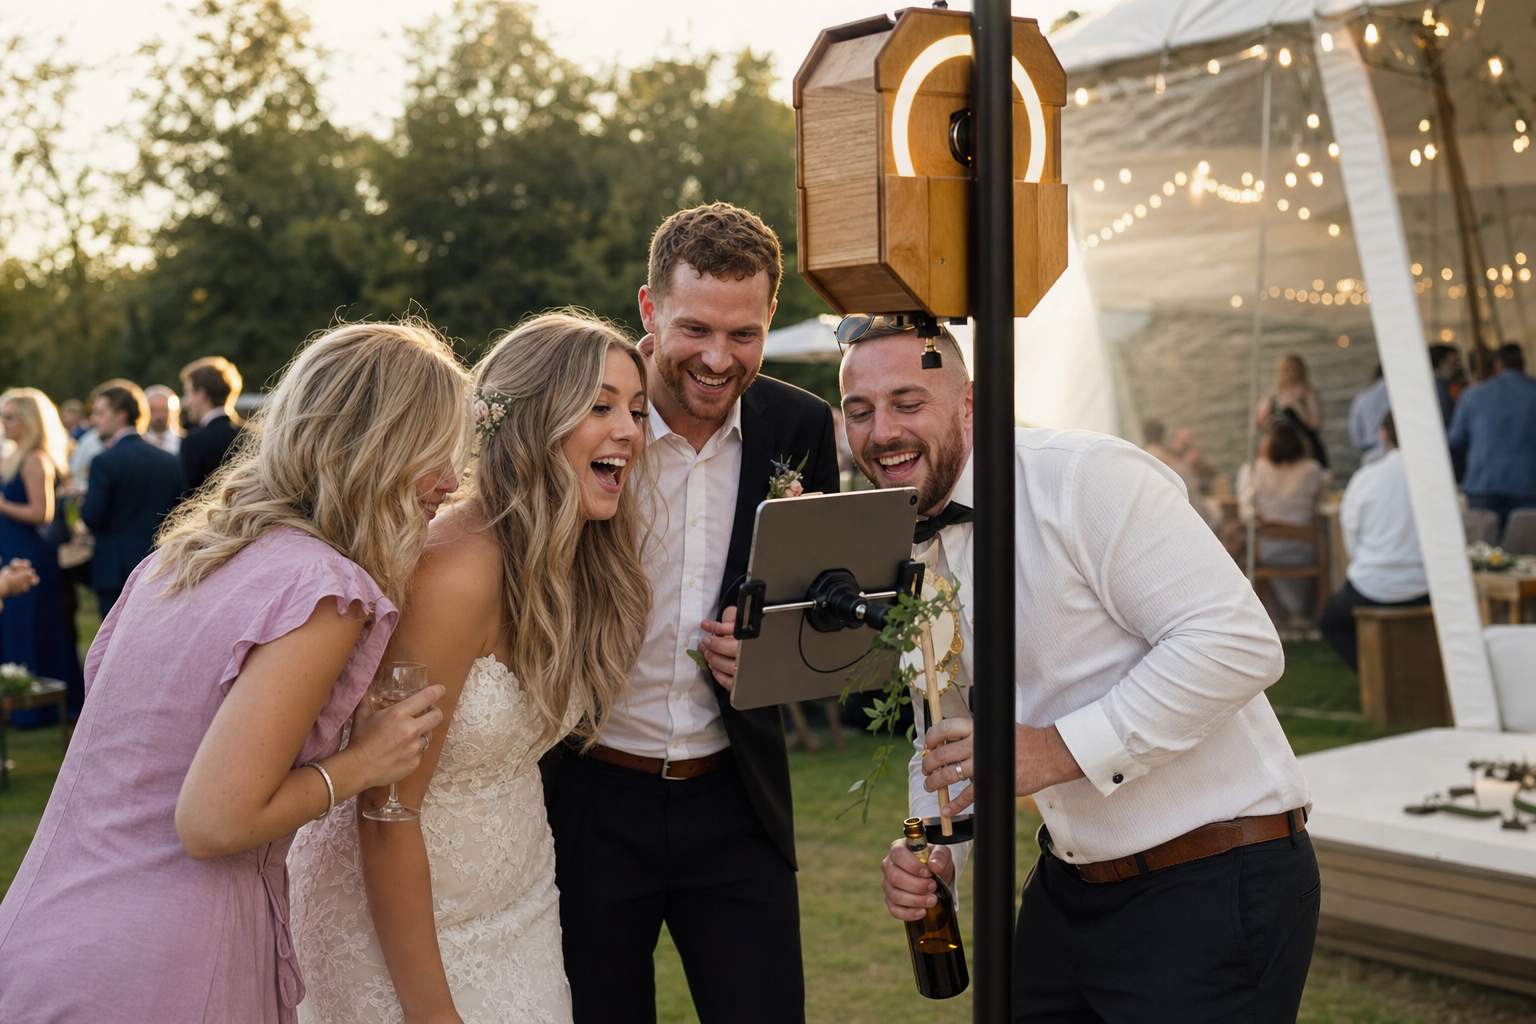
A DIY iPad Photo Booth: Skip the pricey rental. Set an iPad on a ring light stand, download a photo booth app, and let guests email themselves photos instantly. (Bonus: You get a digital copy of every photo taken!)
Table Trivia: Create a custom trivia card about the couple for guests to fill out during dinner.
Disposable Camera Scavenger Hunt: Leave a list of “moments to capture” on the tables and let guests play photographer.
Audio Guestbook: Buy a vintage phone that records audio messages instead of a traditional pen-and-paper guestbook.
Late Night Snack Station: A DIY s’mores bar or a popcorn station keeps guests fueled and entertained.
Shoe Game: A quick, 10-minute game where the couple answers funny questions by raising each other’s shoes.
The Best ROI for Wedding Entertainment
Nothing gets guests laughing quite like a photo booth. With ZillaBooth, you can add custom wedding overlays, automate the camera, and save hundreds of dollars for your honeymoon.
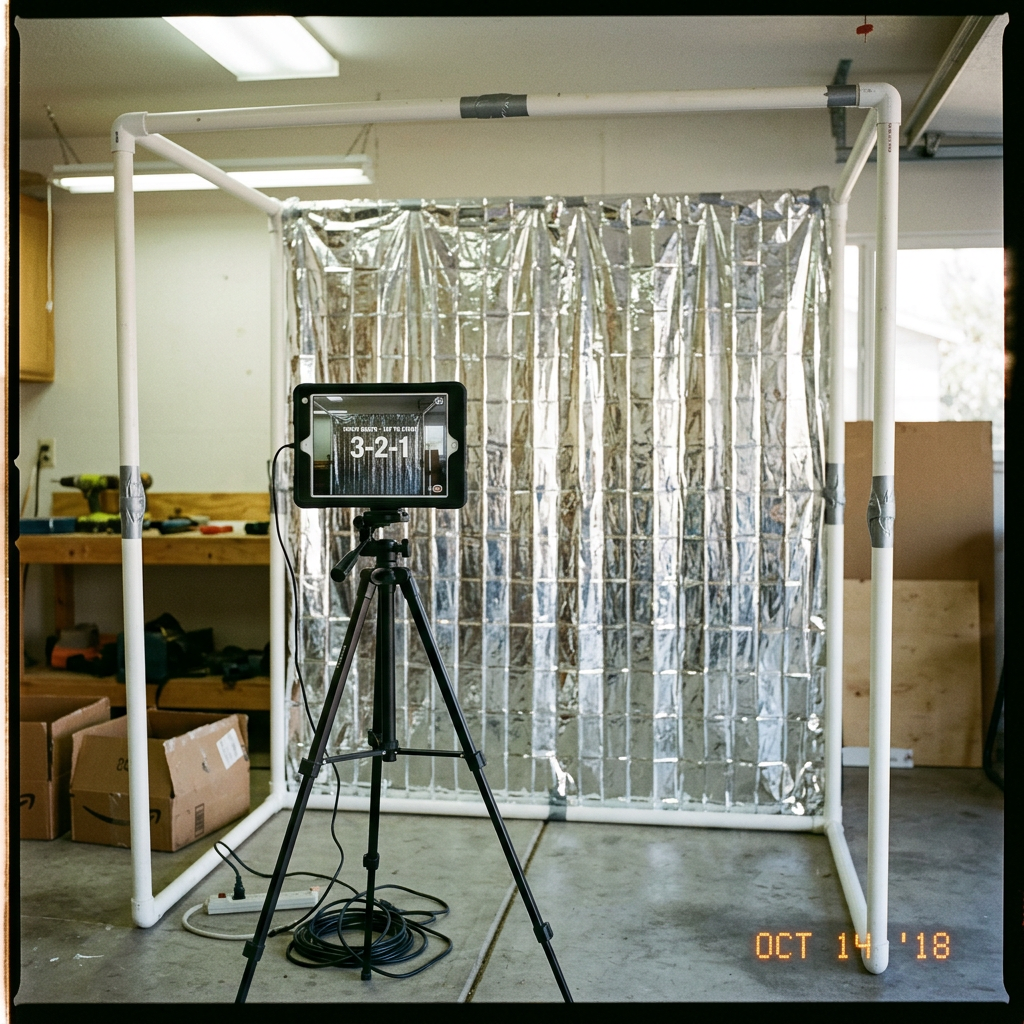
A budget-friendly photo booth backdrop can be built with a simple PVC pipe frame and inexpensive materials. The post suggests using foil fringe curtains, sequin fabric, or balloon garlands to create a themed background.
It also notes that a phone or iPad on a tripod can be used with the ZillaBooth app to let guests take photos throughout the event.
Set the Scene on a Budget
A plain white wall isn’t going to cut it. A dedicated backdrop tells your guests exactly where the photo booth is and sets the visual theme for your event. Building one yourself is surprisingly easy and cheap.
The Frame: PVC Pipe is Your Best Friend
You don’t need to buy an expensive photography stand. A quick trip to the hardware store for some 1-inch PVC pipes and connector joints is all you need. You can build a sturdy 7×7 foot frame for under $25. It’s lightweight, easy to assemble on-site, and breaks down for storage.
3 Cheap & Easy Backdrop Ideas
Foil Fringe Curtains: The ultimate party hack. Tape 3 or 4 metallic fringe curtains to your top pipe. They cost about $10 a pack and look incredibly vibrant on camera.
Sequin Fabric Panels: Buy a cheap sequin tablecloth online and drape it over your frame. It catches the ring light beautifully and gives a premium, Hollywood feel.
Balloon Garlands: Buy a DIY balloon arch kit. Attach it to one corner of your frame and let it cascade down the side for a modern, organic look.
Capture the Magic
Once your backdrop is glowing, put it to use! Download ZillaBooth on your iPhone or iPad, set it on a tripod, and let your guests capture memories all night long.
Your designer sent a beautiful logo file. Your booth still outputs plain collages. Graphic overlays brand every share and print without requiring a design degree—or a last-minute Photoshop marathon.
Available in ZillaBooth Pro.
The problem
Event branding lives on step-and-repeats and bar menus, but booth output often ships unmarked. Post-event editing does not scale when hundreds of collages roll through a busy night. Operators need overlays baked into capture so every takeaway carries sponsor logos, wedding monograms, or campaign art automatically.
Why it matters
Apply PNG graphic overlays to every collage automatically
Brand shares and prints without manual post-processing
Support sponsor deliverables with consistent logo placement
Let non-designers use pre-made assets from clients or templates
Pair with iPad kiosk layout for a fully polished guest-facing experience
Who it’s for
PNG overlays serve ZillaBooth Pro users and brand-conscious hosts: corporate experiential teams, wedding planners with monogram assets, venue marketers running sponsored booths, and booth businesses promising branded deliverables.
Real-world moments
A corporate activation bakes sponsor logos into every collage, so every share, email and print carries them
A wedding applies monogram art to strips for guest book and take-home prints
A retail launch uses campaign artwork on shares going to social feeds same-night
How ZillaBooth delivers
ZillaBooth Pro’s PNG overlay support renders your graphic assets onto finished collages as part of the capture pipeline. Combined with full-screen iPad layout, Simple Printing, and Simple Email Sharing, overlays complete the pro booth look guests associate with rental-quality experiences.
Brand the collage once—every guest takeaway follows.
The days of harshly lit, sterile-looking event spaces are over. A major, undeniable shift has taken place in the event industry, particularly in weddings and milestone celebrations: the rise of the atmospheric, low-light ceremony and reception. This aesthetic, characterized by hundreds of flickering candles, string lights, dramatic uplighting, and strategically placed spot lamps, creates an air of romance, intimacy, and sophisticated moodiness that guests adore. It’s a photographer’s dream for ambiance, but it can quickly become a photo booth operator’s nightmare.
If you’re running a DIY photo booth like ZillaBooth…a system celebrated for its portability and professional-grade results…you know that great photos rely on one thing above all else: great lighting. When you introduce a powerful, non-diffused light source like a standard camera flash into a carefully curated low-light environment, you risk blowing out the atmosphere. However, if you rely on the venue’s dim lighting, you’ll end up with dark, grainy, blurry, and frankly unusable photos.
The good news? You don’t have to choose between a moody ambiance and delivering stellar photo booth strips. By understanding the fundamentals of lighting control and leveraging specific tools with your ZillaBooth, you can conquer any dark reception hall and turn the low-light setting into an artistic advantage. We’re going to break down two essential, yet distinct, strategies for achieving flawless results: the consistent, soft glow of the ring light and the high-contrast drama of a forced flash.
Strategy 1: The Ring Light … Simple, Soft, and Effective
For operators seeking a classic, flattering, and instantly recognizable photo booth look, pairing your ZillaBooth with a dedicated, high-quality ring light is the best strategy. The ring light offers a consistent, diffuse, and shadow-minimizing light source that is perfect for low-light conditions because it adds light without destroying the existing mood.
Selecting the Right Ring Light
Not all ring lights are created equal. When operating in a low-light venue, you need control and power. Look for a model that meets these specifications:
Large Diameter (18-20 inches): A larger light source is a softer light source. A wider diameter ensures the light wraps around the subject’s face, reducing harsh shadows and creating the signature, attractive circular catchlights in the eyes.
Adjustable Color Temperature (Bi-Color): This is non-negotiable for working in moody venues. Low-light spaces often use warm (amber/yellow) tungsten or LED lighting (typically 2700K-3500K). To prevent your photo booth subjects from looking blue or cold, you need to match the ambient warmth. A bi-color ring light allows you to dial in the color temperature from cool white (daylight, ~5500K) all the way down to a warm tungsten glow (~3200K). Match the light to the venue’s color scheme for a cohesive, professional look.
Variable Dimming: Being able to adjust the brightness from 10% to 100% is crucial. In a very dark room, you may need it at 80% or higher. If the venue has some existing light, you might only need 30% to serve as a flattering fill light.
Setting Up the Ring Light with ZillaBooth
Integrating the ring light with the ZillaBooth is straightforward and results in a beautiful, consistent product. * Mounting: If your ZillaBooth stand supports it, mount the ring light directly around the camera lens. This ensures the light is perfectly centered for that iconic, shadowless look. If it requires a separate stand, position the ring light as close as possible to the lens axis.
The closer the light is to the camera, the softer the final image will appear. * Dialing In the Power: The key to using a ring light in a low-light venue is consistency . Once you’ve set the color temperature to match the venue’s warmth, take a few test shots. Increase the power until the subject’s face is brightly and evenly illuminated, but stop before the light begins to “spill” too heavily onto the background, which would destroy the dark, moody ambiance. The goal is to isolate the subject.
Pro Tip: The Power of Proximity
Remember the inverse square law of light: light falls off rapidly as the distance from the source increases. By positioning the ZillaBooth and ring light system a comfortable distance from the background (say, 5-8 feet), the ring light will brilliantly illuminate the subjects while the background remains in the relative darkness, enhancing the cozy, dramatic feel of the low-light venue. The soft, even light of the ring light is the best way to guarantee flattering, high-quality images while respecting the intentional darkness of the room.
Strategy 2: Flash On … High-Contrast Drama
While the ring light offers soft consistency, there are times when you need raw, uncompromising power, especially if you want to capture the dynamic energy of a packed, dark dance floor or if you encounter a space that is so dark that a ring light alone introduces too much noise or motion blur. This is where ZillaBooth’s flash earns its keep. It’s on by default, and Pocket (included with Pro) lets you switch between Auto, On and Off.
Understanding the Forced Flash Aesthetic
In auto-mode, a standard camera flash tries to balance the flash with the dim ambient light, which often results in a slow shutter speed. Slow shutter speeds in a photo booth environment guarantee motion blur…ruined photos. Setting ZillaBooth’s flash to On makes it fire on every shot, whatever the room light. This accomplishes two critical things:
It freezes motion: A powerful, brief flash allows the camera to use a fast shutter speed (e.g., 1/160th of a second), which completely eliminates motion blur from dancing or moving guests. The subject is frozen perfectly in time.
It creates high contrast: By forcing a fast, powerful, and undiffused flash, you create a dramatic, high-contrast look often called the “paparazzi aesthetic” or “editorial flash.” The subject is intensely illuminated, while the rest of the dark room falls away into deep, black shadows. This aesthetic perfectly complements the drama of a low-light venue.
How to Use ZillaBooth’s Flash Setting
The core principle is to take the flash function out of automatic control. * Find the Setting: Open ZillaBooth Settings and find the flash option (flash control comes with Pocket and Pro).
Set It to On: Turn the flash on so it fires with every single shot. ZillaBooth still sets the exposure for you.
Let Exposure Take Care of Itself: ZillaBooth handles shutter speed and ISO automatically, so there’s nothing to dial in. With the flash as the main light, the camera can keep your subject sharp on its own.
Pro Tip: The Drag the Shutter Technique (Advanced)
If you want to capture some of the beautiful ambient background light (like those string lights or candles) while still freezing the subject, photographers use a technique called “dragging the shutter.” ZillaBooth sets exposure automatically, so you can’t drag the shutter by hand, but you can get close.
Keep the flash on and leave some of the venue’s string lights or candles in the background.
In a dim room, the camera may keep the shutter open a little longer on its own (results vary by device), so the flash freezes your guests while a bit of that warm background light glows through. The result is a dynamic, high-energy photo…a sharp subject with a moody, artistic, slightly blurred backdrop. This is a highly professional technique that works wonders in dark spaces.
Bonus Tips for Flawless Dark Venue Booths
Mastering the light is only part of the equation; placement and preparation are equally important when dealing with the challenge of low-light venues. * Background Management: In a dark venue, the background can be a messy distraction. If you’re not using a dedicated backdrop, place the ZillaBooth against a dark, featureless wall or an area where the lighting is particularly sparse. This lets your lighting strategy (whether ring light or forced flash) isolate the subjects and allow the rest of the room to fade away, enhancing the portrait-like quality of the photos.
Avoid Competing Light Sources: Position the photo booth away from any venue spotlights, aggressively bright exit signs, or large windows. These competing light sources can confuse the camera and create wildly inconsistent exposures in your shots. You want your controlled light source to be the only significant light source on your subject.
Use the Prop Tray Strategically: Glitter, sequins, and reflective surfaces are your friends when working with direct light. Encourage the use of shiny props. The ring light or the forced flash will bounce aggressively off these materials, creating an explosive, dynamic effect that adds visual energy to the photo, which is especially important in an otherwise dark setting.
Lens Maintenance: Dust or smudges on the camera lens are invisible in bright light but become glaringly obvious when a powerful flash or ring light hits the glass. Before the event and periodically throughout, give your lens a quick wipe with a microfiber cloth. A clean lens ensures maximum light transmission and crystal-clear results.The modern low-light event is an aesthetic challenge, but it’s also a powerful opportunity. By implementing the soft, consistent light of a high-quality ring light or the dramatic, sharp contrast of a forced flash, you transform the ZillaBooth from a simple camera system into a sophisticated lighting tool. You no longer have to compromise the beauty of the venue for the quality of the photo…you can leverage the darkness to make your guests truly stand out. Go forth and master the light, even when there is almost none.
The number is staggering, isn’t it? Thirty-six thousand dollars. That’s the average price tag for a wedding in the United States today, and for many couples, that figure is less a dream budget and more a nightmare down payment on a second mortgage. It represents a level of financial commitment that can feel overwhelming, pushing couples to choose between the wedding they’ve always envisioned and the financial security they need for their future.
But what if the choice didn’t have to be so absolute? What if you could host a high-impact, memory-filled celebration that feels like a $36,000 event, but costs a fraction of the price?
The core challenge with the average wedding budget is that it’s bloated by what we can call the “Vendor Premium”…the cost associated with outsourcing every single detail to a professional who charges not just for their time, but for the inherent hassle, insurance, transport, and the sheer privilege of being a wedding supplier. These costs accumulate in every category, but they hit hardest in areas that are easily replaceable by modern, DIY-friendly technology.
A modern couple understands that they don’t have to follow the old playbook. They recognize that their generation is the most digitally savvy, creative, and resource-aware generation to ever plan a wedding. They are masters of the side-hustle, the online tutorial, and the app-based solution. The secret to slashing that massive average budget isn’t about cutting corners; it’s about making high-impact swaps. It’s about identifying services that are overpriced because they carry the “wedding tax,” and replacing them with equally or more effective technological alternatives.
Think about what truly makes a wedding memorable. It’s the atmosphere, the quality time with loved ones, the personal touches, and the candid, unscripted moments of joy. It is rarely the specific model of the chair, the weight of the paper stock on the menu card, or the brand of the photo booth machine parked in the corner. If you can use smart, affordable technology to achieve the same emotional result, you have not cut the experience; you have simply slashed the overhead.
The Overlooked Budget Killer: Experience Rentals
Let’s dissect where this budget bloat often occurs. Catering, venue, and photography are usually the big three, and while those offer some savings opportunities, the biggest, fastest, and most painless savings come from the experiential add-ons. These are the items that deliver huge fun and value, but that vendors charge exorbitant fees for, simply because they are part of a curated ‘package.’
Take, for instance, the classic photo booth. A photo booth rental is a beloved wedding staple. It gives guests something fun to do, it encourages candid silliness, and it generates physical or digital souvenirs. For a standard four-hour rental on a Saturday night, couples routinely pay anywhere from $800 to $1,500. This fee covers the machine’s transport, the attendant’s hourly wage, printing paper, and the company’s profit margin. For a mere four hours of fun, you are committing a four-figure sum.
This is a classic example of a high-impact item with an artificially inflated cost. You are not paying $1,000+ for the technology; you are paying $1,000+ for the vendor’s logistics and time. The truth is, the technology required to capture a fun, instant-sharing photo strip is now sitting in the hands of almost every guest at your wedding, and certainly, it’s readily available through easy-to-use, powerful software. This is where modern couples must become ruthless budget surgeons, replacing the outdated rental model with the superior DIY tech solution.
Introducing Your $1,000-Slasher: ZillaBooth
The most powerful way to slash the $36,000 budget is to replace a high-cost, high-impact item with a low-cost, equally high-impact DIY tool. Meet ZillaBooth, the perfect example of how technology can deliver the full experience without the crippling price tag.
ZillaBooth is not a physical rental machine; it’s an application that turns an iPhone or iPad into a photo booth. The cost is close to nothing: the core app is free, Pocket is a one-time purchase, and Pro (your own overlay, email delivery, printing, kiosk tools) is a monthly or yearly subscription. You can see current pricing in the app.
Now, let’s look at the math. By choosing ZillaBooth instead of the average $1,000+ rental booth, you have instantly freed up nearly a thousand dollars. This is not some small, insignificant saving; this is a significant, four-figure reallocation of funds.
The key to this swap is realizing that you are not sacrificing quality or experience. In many ways, the DIY tech option is actually superior:1. Unlimited Time and Use: Traditional booths are rented for a fixed period (e.g., 7 PM to 11 PM). With ZillaBooth on a simple stand, the fun never has to stop. It can run from the cocktail hour straight through to the last dance. There is no hourly rate: Pocket is a one-time purchase, and one month of Pro covers the whole wedding.
Zero Attendant Hassle: You eliminate the need for a vendor attendant. Setup is as simple as launching an app on a tablet. Your maid of honor or a tech-savvy friend can set it up once. With Pro and Apple’s Guided Access, it resets between guests and keeps Settings hidden. With Guided Access or Single App Mode on, the screen stays on all event. Set Auto-Lock to Never (Settings → Display & Brightness) and keep the iPad plugged in. Skipping the attendant alone saves you hundreds in labor costs.
Instant Digital Access & Full Control: With a legacy vendor, you usually wait days or weeks for the digital gallery. With a DIY app, the photos are captured instantly, and with auto-save on (Pocket or Pro), every collage lands in your own photo library. You decide if, when, and how they are shared.
Customization and Personalization: The $1,000+ rental booth will offer you a few templates. A DIY app often allows for more bespoke design options, letting you add a custom overlay with your names, date, or monogram (ZillaBooth Pro) that matches your wedding theme.This single swap…from a $1,000+ rental to a DIY tech solution with a simple Pro subscription…is the prototype for smart, budget-slashing wedding planning. It proves that a great wedding is built on great moments, not on exorbitant vendor bills. The value of a candid, goofy photo strip is the same whether it was created by a booth rig that can run into the thousands or an app with a monthly or yearly Pro subscription.Reallocating the Savings: Investing in the Experience
The real beauty of this method is the ability to reallocate the funds to areas that will truly enhance the wedding or, even better, your future as a couple.
The money you save can be the difference between: * Upgraded Catering: Taking the money and shifting it to your food and beverage budget can allow you to upgrade from a basic chicken or fish entrée to a premium cut, or add an extra signature cocktail that guests will genuinely remember. Food is often the most talked-about part of a wedding, and this saving directly elevates that core experience.
The Honeymoon Fund: A $1,000 saving can cover one of the flight tickets to your dream honeymoon destination, or pay for three to four nights of luxury accommodations. Instead of paying for a vendor to sit next to a machine for four hours, you are paying for an experience that lasts a lifetime.
Financial Future: Perhaps the smartest move is reallocating the funds entirely out of the wedding. That $1,000 can go straight into a down payment savings account, a retirement fund, or pay off a chunk of existing debt. When you position the low-cost ZillaBooth as a substitute for a high-cost luxury service, you are essentially diverting a significant portion of your wedding budget into your marriage’s financial foundation. You are prioritizing life over event.Beyond the Booth: A Tech-First Wedding Mindset
Once you embrace the philosophy of high-impact DIY tech, you’ll find opportunities everywhere to cut costs and boost personal control. The photo booth is just the beginning.1. Digital Invitations and RSVPs: The average cost of paper stationery (save-the-dates, invitations, RSVP cards, postage) can easily exceed $1,500 for a moderate guest list. Utilizing elegant digital wedding websites and online RSVP management tools can eliminate most of this cost entirely, saving another four figures while improving organization and tracking.
The DIY DJ Solution: Hiring a professional DJ can cost upwards of $2,000. For a couple who is extremely organized and has a firm grasp of their desired musical flow, using a high-quality streaming service or an AI-powered music app can replace the DJ for a fraction of the cost. A dedicated sound system rental, paired with a meticulously curated playlist, delivers the same dance floor impact.
Coordination Software: Instead of paying a full-service planner an exorbitant fee, couples can manage their own logistics using comprehensive, low-cost or free planning software, focusing on hiring a day-of coordinator only to manage final execution, saving thousands.The average $36,000 wedding budget is a historical anchor tied to outdated industry practices. Today’s couples don’t have to accept it. By adopting a mindset that prioritizes smart technology and DIY execution for high-impact services, they can host a spectacular, meaningful wedding while ensuring that their financial future as a couple is not compromised. The goal is to move money away from vendor overhead and towards life experiences…a concept brilliantly exemplified by the choice between a $1,000+ rental booth and an app with a monthly or yearly Pro subscription. Your wedding day is an investment, and the smart planner chooses to invest in memories and the future, not just in rentals. Start with the photo booth, and watch that average spend figure plummet.
The modern micro-wedding is an exercise in intentionality. It is not merely a smaller version of a large-scale event, nor is it a simple cost-cutting measure. Instead, it represents a profound shift in focus, prioritizing quality over quantity, intimacy over spectacle, and deeply personalized experiences over generic extravagance. When a couple consciously decides to pare their guest list down to 50, 30, or even 10, they are making a powerful statement: every element, from the menu to the music, must feel curated, personal, and reflective of the genuine connection they share with each person in attendance.
This focus on intimacy, however, creates a unique logistical challenge, particularly when it comes to capturing the memories. A micro-wedding feels less like a grand event and more like the most beautifully planned, elegant family dinner of a lifetime. The atmosphere is warm, conversational, and deeply personal. Into this setting, how do you introduce the necessary elements of traditional celebration…especially photography…without shattering the intimate bubble the couple has so carefully created?
This is where the conventional, full-service photo booth, complete with a dedicated attendant, falters. While these booths are excellent for large parties, the presence of a contracted stranger…the booth operator…can feel intrusive and out of place among a tight-knit group of immediate family and closest friends. The high-end, customizable, self-run photo booth emerges as the perfect, elegant solution, providing a fun, high-quality, and deeply personalized memory-capture experience that enhances, rather than disrupts, the wedding’s unique atmosphere.
The Micro-Wedding Photography Conundrum
To appreciate the value of a self-run photo booth, one must first understand the paradox of micro-wedding photography. Couples are still investing heavily in a primary wedding photographer. This professional is vital for capturing the ceremony, the portraits, and the major moments of the day. But during the reception…when the structured events give way to organic conversation, dancing, and heartfelt toasts…even the most discreet photographer will naturally pull back. Their lens, though essential, can feel like a continuous, formal reminder that the event is being documented.
When guests are few, the photographer’s presence is magnified. There is no crowd to melt into. In this scenario, asking the main photographer to double as a fun, candid photo booth operator is neither practical nor fair, as it distracts them from their primary documentary role. The challenge is clear: how to provide a designated, fun, and high-quality space for playful, uninhibited photographs that guests can control, without introducing yet another service vendor…a stranger…into the already intimate circle.
The Self-Run Photo Booth: Quality Meets Comfort
The modern, self-run photo booth is not the cheap, flimsy contraption of a decade ago. It is a sleek, professional-grade kiosk, often housing a high-resolution DSLR camera, studio-quality ring light or flash setup, and an intuitive touchscreen interface. Its key feature is the complete absence of an attendant.1. Eliminating the Intruder Factor: This is the most crucial benefit.
With no attendant, the photo booth becomes a private, self-contained play zone. Guests…who are largely family and lifelong friends…feel completely uninhibited. They control the pace, the poses, and the props. The dynamic shifts from “I am being photographed by a vendor” to “I am having fun with my loved ones.” The resulting images are demonstrably more authentic, goofy, and emotionally resonant because the psychological barrier of a stranger’s gaze has been completely removed. For an intimate gathering, comfort and psychological safety are the ultimate luxuries.
Unmatched Customization and High-End Output: Micro-weddings demand high-end finishes, and the modern photo booth delivers. Customization is not an afterthought; it is built into the system.
Bespoke Digital Design: The couple can work with the vendor to design a custom print template that matches their wedding invitations and decor perfectly. This includes personalized color palettes, fonts, and a custom monogram or hashtag at the bottom of every print strip. Even the digital “Tap to Start” screen can be personalized with a photo of the couple, ensuring a cohesive aesthetic that aligns with the rest of the high-end event design.
Studio-Grade Lighting: A professional ring light or strobe flash setup is designed to make everyone look their best, providing the flattering, even light that elevates the images above simple smartphone snaps. This addresses the demand for a “high-end experience”…it’s a luxury souvenir, not a quick snapshot.
Premium Physical Prints: The final product is often a 4×6 or classic strip printed on high-gloss, archival-quality paper using a dye-sublimation printer. These prints are immediately available, providing guests with a tangible, personalized wedding favor that doubles as a spontaneous memory of the night.
The Perfect Guest Book Activity: In a small group setting, guests have the time and attention span to be thoughtful about a guest book. A photo booth transforms the guest book from a simple signature collection into a vibrant, visual keepsake. An easy trick: print each strip twice…one for the guest to keep, and one to be placed immediately into a customized scrapbook alongside a handwritten message. This creates a one-of-a-kind, authentic artifact of the evening, compiled by the guests themselves in real-time.
A Focused Center of Entertainment: In a micro-wedding, the entertainment must be engaging without being overbearing. A photo booth provides a dedicated activity center that guests can visit and revisit throughout the evening without pressure. It’s an icebreaker for guests who may only know the couple, and a focal point for the existing friendships. The “self-run” nature encourages collaboration as guests figure out the best poses and timing together, further building on the communal and intimate atmosphere.Making the Self-Run Booth Work
For a couple planning a micro-wedding, implementing this high-end photo booth experience involves a few key steps to maximize its success and ensure it feels like a seamless extension of their personalized event: * Curate the Props: Ditch the dollar-store feather boas and oversized glasses. For a high-end feel, props should be carefully chosen to match the couple’s aesthetic. Think small, tasteful signage, floral headpieces that match the decor, or unique vintage masks. The quality of the props is directly tied to the perceived quality of the entire experience.
Optimal Placement: The booth should be strategically placed in a semi-private, but accessible, corner of the venue. It should be close enough to the main party to draw guests in, but slightly secluded to encourage the uninhibited behavior that makes for great photos. A lovely, non-intrusive backdrop…like a wall of greenery or a sleek velvet curtain…should be chosen to complement the venue.
Simple Instructions: Since there is no attendant, clear, elegant signage is essential. A simple sign that reads “Tap to Start” and explains the guest book process is all that is needed to keep the experience running smoothly and ensure every guest understands how to operate the high-tech equipment.The self-run photo booth is more than just a novelty; it is a thoughtful, intentional choice for the modern, intimate wedding. It successfully navigates the complex requirements of a micro-wedding by delivering a professional, luxury-grade souvenir while simultaneously protecting and enhancing the deep sense of comfort, privacy, and personal connection that is the very foundation of the intimate celebration. It proves that the biggest fun often comes in the smallest, most personal packages, and that sometimes, the best memories are created when the camera is in the hands of a friend, not a stranger.
Digital shares are nice. A physical strip in hand is the moment guests grin and wave it at friends across the room. Simple Printing gives guests a one-tap Print button, so they get that instant takeaway without a volunteer chained to the printer.
Available in ZillaBooth Pro.
The problem
Manual print workflows break down under volume: wrong printer selected, queue stalls, guests walk away before pickup. Operators lose the magic moment when digital-only booths forget that booths are tactile experiences. You need reliable printing that guests can start themselves and that keeps pace with the line.
Why it matters
Guests tap Print (or Send & Print) and the collage goes straight to your printer
Deliver instant physical takeaways guests expect from pro booths
Reduce manual operator steps during high-traffic events
Pair it with the Confirmation Animation: an emoji celebration rains across the screen the moment a guest taps Print or Send & Print
Works with AirPrint printers, plus supported DNP dye-sub printers through WCM-Plus
Who it’s for
Simple Printing is core to ZillaBooth Pro workflows: wedding booth businesses, corporate experiential teams, venues offering print-inclusive packages, and hosts who want rental-style takeaways without rental pricing.
Real-world moments
A wedding booth prints a strip whenever a guest taps Print, for the guest book table and take-home favors
A trade show activation pairs lead capture with instant printed collages
A holiday party prints 2×2 grids while guests share digitally in parallel
How ZillaBooth delivers
With ZillaBooth Pro, Simple Printing (Settings → Pro → Simple Printing) sends the finished collage to your chosen AirPrint printer the moment a guest taps Print or Send & Print—no manual export step between guests. Combined with overlays, Simple Email Sharing, and the Confirmation Animation, it recreates the full pro booth deliverable loop on iPad hardware you control.
The best booth moment is the one guests hold in their hand.
Any AirPrint printer on the same Wi-Fi network as your iPad or iPhone. DNP dye-sub printers (DS620A, DS820A, QW410, DS-RX1HS, DS40, DS80) work through DNP’s WCM-Plus; see the DNP + WCM-Plus guide.
Can guests skip printing if they only want digital?
Yes. In a print-only booth, guests just tap Print. With email turned on, they choose Send (email only) or Send & Print.
Do printed collages include my overlay?
Yes. Overlays render into finished output before print jobs queue.
Which tier includes Simple Printing?
ZillaBooth Pro is a monthly or yearly subscription, and you can see current pricing in the app. It sits alongside the iPad kiosk tools and the other event features.
The distance between “Broadway” and “your backyard” once measured not just geography, but a vast and unbridgeable chasm of access, cost, and expertise. This is the story of how photography…the single most powerful tool for capturing and curating human life…has been thoroughly democratized, moving from a monumental, fixed destination to a feature as fluid and personal as the breath in your lungs.
In 1925, the idea of instantaneous, portable image-making was a future so distant it was science fiction. If you wanted a professional portrait, a memory fixed for posterity, or a casual photo booth snap with a friend, you undertook a pilgrimage. You went to the dedicated space, the photo studio, the kinetoscope parlor, or the specialized booth…the commercial, cultural ‘Broadway’ of image capture.
That experience was defined by its friction. The process was expensive, reserved for special occasions, and required a surrender of agency. You dressed for the event. You waited your turn.
You were positioned by a professional who understood the temperamental chemistry and the unforgiving physics of light and shadow. The resulting picture was a precious artifact, a heavy cardstock portrait or a handful of grainy, monochromatic photobooth strips, meant for an album, a locket, or a mantelpiece. It was a formal contract with history, carefully negotiated and rarely executed. The financial and time investment meant that the common experience of life…the mundane, the silly, the spontaneous, the ugly…was deemed unworthy of documentation. A photograph was an investment, a performance, and a luxury.
This high barrier to entry created a cultural monopoly on visual storytelling. The narrative of the era was predominantly captured by those with resources, equipment, and training: journalists, artists, and the wealthy. The visual historical record of the early 20th century is, by necessity, a curated, elevated, and sometimes stiflingly formal one. The average person’s life existed mostly in memory, not on paper. The booth was stationary, the technology was complex, and the power remained concentrated.
The first crack in this monolithic structure came not from digital technology, but from ingenious simplification. The introduction of roll film cameras…the Kodak Brownie being the most famous evangelist…began to pull the practice out of the studio and into the sun. The tagline, “You press the button, we do the rest,” was a revolutionary declaration of photographic independence. It severed the photographer from the chemist, placing the ability to capture the image in the hands of the public while the complex, darkroom work remained with the professionals.
This made photography a leisure activity rather than a profession . People began taking pictures of holidays, family gatherings, and everyday scenes. The aesthetic shifted from formal portraiture to the candid snap, embracing the slightly blurry, slightly off-kilter perspective of the amateur. But even then, the friction remained significant: the cost of film, the limit of twelve or twenty-four exposures, the anxious wait for development, and the final cost of the prints. The booth had been moved from Broadway to the living room, but it was still a finite resource.
The true, cataclysmic shift, the one that fully unlatched the booth and placed it in the pocket of every global citizen, was the advent of digital technology and, crucially, the smartphone. This eliminated all remaining forms of friction simultaneously. It was a quadruple-whammy of democratization: cost, time, skill, and sharing.
First, the cost per picture dropped to zero. There is no film, no development fee, and essentially infinite storage capacity. This single change…the total removal of economic consequence for hitting the shutter button…was the engine of the modern visual age. It encouraged a philosophy of documentation that is fundamentally different from the past. Why take one picture when you can take fifty? Why save the camera for a birthday when you can use it to capture the pattern of morning shadows on your coffee cup? The photograph became a throwaway note, a fleeting text message, an experimental draft.
Second, the skill barrier collapsed. Sophisticated algorithms now manage light, focus, color balance, and exposure automatically, often producing technically superior images to those taken by all but the most dedicated professional of fifty years ago. The modern camera is not a tool you operate; it is a smart partner you simply point. With a tap, you can edit, crop, and filter the image, bypassing years of darkroom expertise and Adobe Photoshop mastery. The photographer, the developer, the editor, and the publisher are all now one and the same person, armed with a single device.
Third, the mobility and time factor achieved totality. The camera is no longer a dedicated device left in a drawer, but a fused extension of the self, carried in the pocket at all times. The opportunity to capture a moment is instantaneous and unmissable. That pivotal moment, that perfect intersection of light and emotion, is no longer lost because the photographer was blocks away from the nearest booth, or fumbling with a film canister. The booth is always, constantly, right there, waiting.
Finally, sharing became instant and global. The digital image is born connected. It does not exist merely as a physical object; it exists as a data stream capable of transmission to millions of people in a fraction of a second. The physical distance between “my backyard” and “your backyard” has been obliterated, replaced by the immediacy of the Instagram feed, the TikTok video, and the FaceTime call. The photograph has evolved from a precious artifact to a language of communication, a primary verb in the syntax of global digital culture.
The ramifications of this shift are profound and complex. On one hand, the accessibility has led to an explosion of human history and creativity. We have an unprecedented record of the collective human experience…from high political drama to the intimate moments of family life, all contributed by billions of independent witnesses.
Subcultures, protests, personal joys, and mundane reality are all recorded, archived, and shared. This democratization has given voice to countless communities and perspectives previously absent from the official, professionally curated visual record. The power of the image as a tool for political change, emotional connection, and self-definition has never been higher.
On the other hand, this total accessibility has led to a counter-cultural reaction. When every picture is technically perfect and instantly available, the value of perfection diminishes. The infinite access has created a new kind of friction…the cultural friction of authenticity. When every image is filtered, posed, and algorithmically enhanced, there arises a craving for the grit and reality that defined the friction-filled photography of the past.
The rise of trends that deliberately mimic the flaws of early photography…the harsh, unflattering direct flash, the grainy, disposable camera aesthetic, the ‘lo-fi’ digital noise…is not a rejection of the technology in our pocket. It is a rebellion against its perfection . It is a nostalgic longing for the raw, unplanned honesty that came as a necessary side effect of the technical limitations of the 1925 ‘Broadway’ experience. We deliberately reintroduce friction to prove an image is ‘real.’
The journey from Broadway to your backyard is more than a technological success story; it is a profound cultural transformation. The photography booth has been unshackled, its walls dissolved, its processes internalized by a chip and an algorithm. The picture has evolved from a luxury good to a universal utility.
It is no longer an object we occasionally seek out, but a power we wield constantly. The greatest achievement of the modern camera is not that it takes beautiful pictures, but that it has become an invisible extension of human sight…a limitless, ever-present device that has made the visual memory of the world instantly accessible to everyone, everywhere. The booth is truly in your pocket, and with it, the power to define and share your own history, moment by moment.