Tag: Photo Strip Design

  • Why the “Photo Strip” is the Ultimate Souvenir

    Why the “Photo Strip” is the Ultimate Souvenir

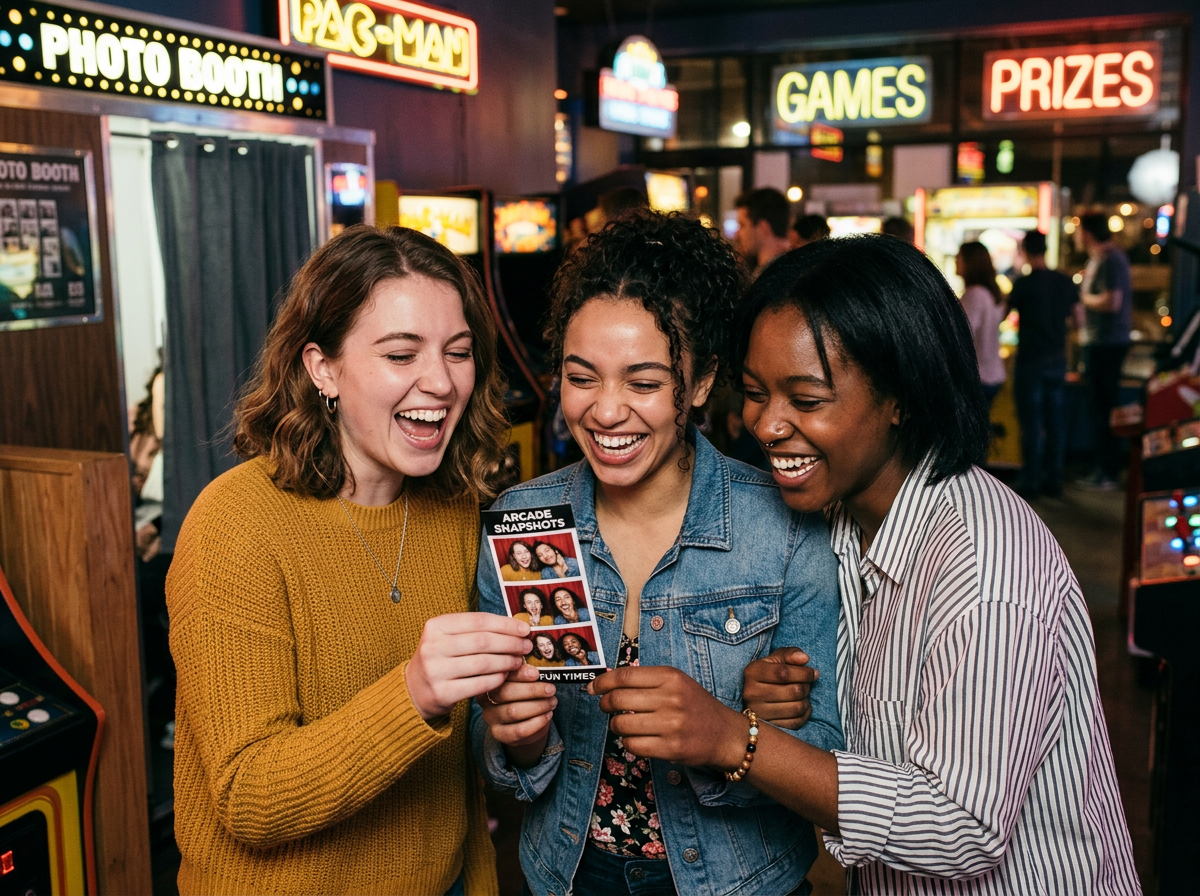
    In a world where millions of photos are snapped, edited, and uploaded every minute, where every memory is immediately archived in the intangible cloud, we are all searching for something real. Something that can be held, pinned to a fridge, tucked into a wallet, or found years later, faded and softened, inside an old book. We are looking for the definitive, physical artifact of a good time, and no format in photography is more powerful, more nostalgic, and more perfectly designed for this task than the humble, four-picture, 1×4 photo strip.

    It’s more than just a picture; it’s a story told in four sequential, unedited frames. This slender, unassuming ribbon of paper is, without question, the ultimate souvenir. Its enduring legacy is a fascinating case study in how physical constraints can create a far more valuable and lasting emotional experience than limitless digital freedom ever could.

    The enduring charm of the photo strip is rooted in the tradition of the photo booth…an almost sacred space of forced intimacy and creative spontaneity. The classic photo booth was a theatrical stage: a curtain drawn, a small bench shared, and a non-negotiable timer ticking down. You were committed. There was no preview, no retake, and no deleting the unflattering blink or the sudden burst of laughter. The rigid sequence of the flash was the conductor of the performance, forcing collaboration, encouraging silliness, and most importantly, capturing an unpolished, authentic moment that exists outside the tyranny of the perfectly curated Instagram grid.

    Think about the photos that matter most to you…they’re rarely the ones taken with careful planning and ideal lighting. They are the artifacts of a spontaneous decision, a shared joke, or a late-night moment of genuine connection. The photo strip excels at bottling this raw, unedited energy.

    The format itself…a vertical cascade of four distinct images…lends itself to narrative. It doesn’t just capture a scene; it captures a sequence. Frame one might be the serious attempt, frame two the beginning of the giggle, frame three the full-blown, head-tossed-back laugh, and frame four the sheepish, exhausted smile. This tiny, sequential gallery is a micro-story about a single shared event, and the physical act of running it through your fingers is a direct portal back to the sounds, smells, and feelings of that night.

    Moreover, the photo strip is designed to be shared, to be divided. The famous perforation marks running down the center are an intrinsic part of its value. Once the strip is developed, the ritual of tearing it in two…splitting the tangible memory…is an act of sealing a friendship, a date, or a moment in time. One half goes with you, the other with the person you shared the experience with. It is an immediate, physical memento of a shared experience, a twin talisman that connects you, regardless of the miles or years that follow. The digital equivalent…sharing an album link…simply cannot compete with the physical resonance of carrying a slightly crinkled, pocket-warmed strip of photos.

    But how do we reconcile this powerful analog legacy with the modern digital event? In a world of high-resolution cameras and instant sharing, how can we recreate that specific, beautiful texture of a classic photo strip without resorting to a grainy, low-quality filter?

    This is where the power of modern innovation meets the reverence for classic design, and it’s why a professional solution like ZillaBooth Pro is an absolute game-changer. The developers behind ZillaBooth Pro understood that the aesthetic appeal of the photo booth is inseparable from the physical dimensions of its output. They recognized that people don’t just want four photos side-by-side; they want the 1×4 strip…the exact, proportional format that is instantly recognizable and emotionally resonant.

    ZillaBooth Pro has engineered its export capabilities to honor this legacy. The application is built on the philosophy that modern technology should enhance, not erase, tradition. While ZillaBooth Pro’s camera engine captures stunning, high-quality images, its ultimate power lies in its ability to deliver the photos in the exact, classic 1×4 strip format.

    The importance of the “export in this exact classic format” feature cannot be overstated. This isn’t a digital mockup; it’s a dedicated rendering that perfectly replicates the dimensions and layout of the traditional photo booth strip, ready for high-quality printing.

    What this means for the user is authenticity. When you print a photo strip exported from ZillaBooth Pro, it feels right. It has the slender verticality, the perfect spacing between the pictures, and the visual weight that makes it a true heirloom. This feature ensures that:1. Print Quality is Maintained: By exporting to the precise classic format, ZillaBooth Pro ensures that when the file is sent to a high-quality printer, the resulting strip is a professional-grade physical product…not a low-resolution afterthought.
    2. The Narrative is Preserved: The sequential, story-telling aspect of the strip is kept intact, honoring the unedited, four-frame timeline.
    3. Maximum Nostalgia Achieved: For many, the 1×4 strip isn’t just a photo format, it’s the photo format. ZillaBooth Pro gives users the ability to tap directly into that powerful cultural memory and reproduce it flawlessly.The direct flash trend and the rise of digital cameras that deliberately mimic the aesthetic of early 2000s photography prove that we are culturally hungry for authenticity, grit, and nostalgia. The photo strip is the ultimate expression of this desire. It’s a piece of physical history, a collaborative work of art, and a powerful narrative arc compressed into a sliver of paper.

    In an age defined by the scroll, the swipe, and the fleeting digital presence, the 1×4 photo strip represents the permanent, the tactile, and the real. It is a genuine piece of material culture from the moments that matter, and thanks to applications like ZillaBooth Pro, this enduring, iconic format is not just surviving…it’s thriving. It reminds us that the best souvenirs are not always the most expensive, but the ones that carry the most weight of a spontaneous, shared, and perfectly unpolished moment.
  • Visual Storytelling: The 4-Frame Narrative

    Visual Storytelling: The 4-Frame Narrative

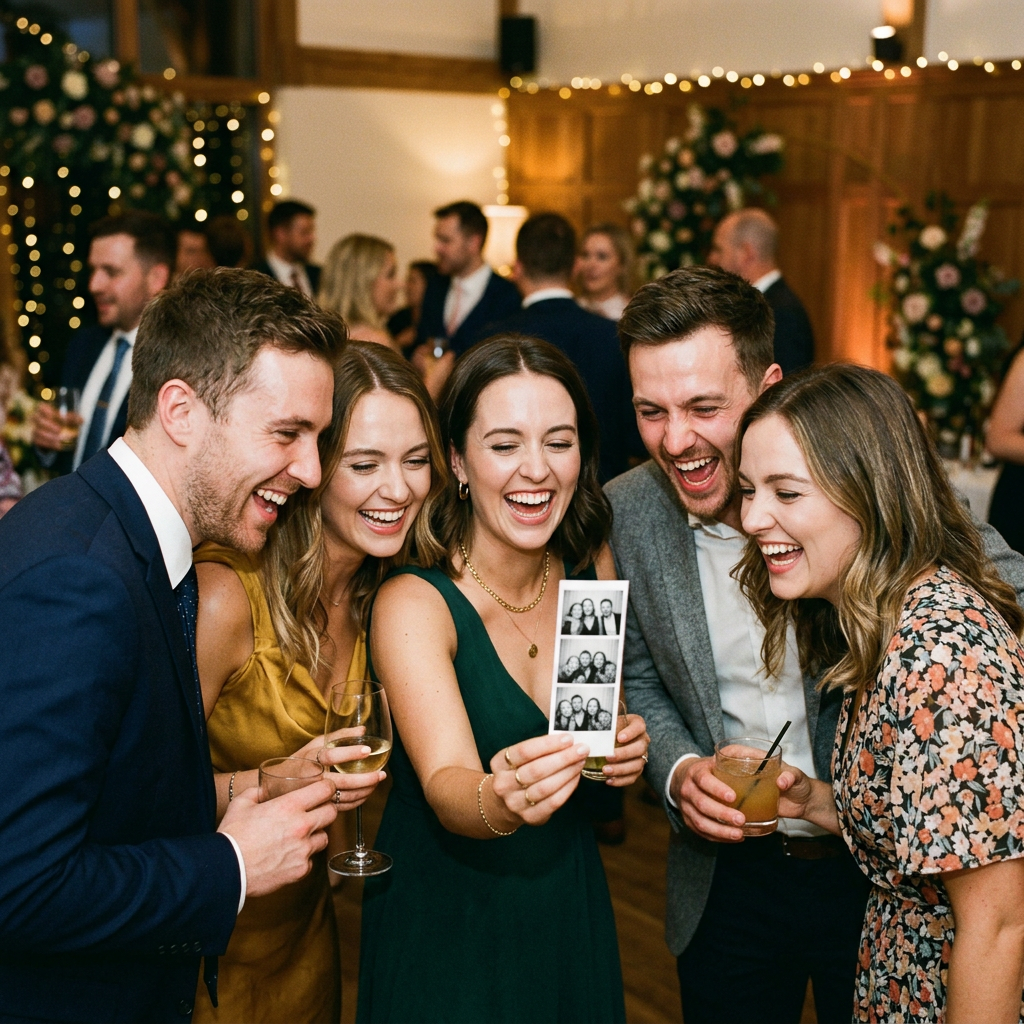
    The modern wedding is no longer just a ceremony; it’s an experience. Today’s couples are curating full, immersive narratives, turning their special day into a multi-sensory story their guests can actively participate in, not just observe. From themed decor to interactive stations, the goal is to create memories that feel immediate, raw, and deeply personal.

    But what happens when the lights come up and the dance floor clears? How do you distill a night-long, elaborate narrative into a single, tangible keepsake?

    Enter the ZillaBooth photo strip.

    For decades, the photo booth has been a wedding staple, but the traditional four-frame strip is vastly undervalued as a storytelling tool. It’s not just a place to snap silly selfies; it is a four-panel canvas…a miniature storyboard…that can capture a complete, compelling narrative arc in a matter of seconds. It offers a unique challenge: tell an immersive story using nothing but four perfectly timed frames.

    This guide will teach you, the junior writer and the enthusiastic guest, how to transform the ZillaBooth strip from a sequence of random poses into a powerful, four-act story. Mastering this technique allows guests to leave the wedding not just with a photo, but with a physical record of a micro-performance, a piece of the night’s immersive narrative that will be treasured long after the vows.

    The Four-Frame Story Arc: Your Narrative Blueprint

    Think of the four frames not as individual snapshots, but as the rising and falling action of a classic short story. Each frame has a distinct, mandatory role in the narrative. By adhering to this structure, you guarantee a payoff, a beginning, middle, and end that makes the strip feel complete and satisfying.

    Analog film photograph of section 1 related to Visual Storytelling: The 4-Frame Narrative

    Frame 1: The Inciting Incident (The Setup)

    This is your establishing shot, the “Once upon a time…” moment. The purpose of Frame 1 is to set the scene, introduce the character(s), and hint at the action to come. It should be relatively static, yet full of intention. You are loading the gun for the next three shots. What to do: * Introduce the Prop: Hold a mustache, a sign, or a silly hat, but do not use it yet. Look at it with curiosity, or hold it up to the camera like a silent declaration.

    Analog film photograph of section 2 related to Visual Storytelling: The 4-Frame Narrative
    • Establish Tension: Two people look at each other with a serious, anticipatory, or even slightly bored expression. The lack of action is the setup.
    • The Silent Cue: One person points to the other or looks off-camera as if about to begin a task. The focus is on the “before” moment.

    Frame 2: The Rising Action (The Reaction/The Turn)

    This is where the story gets its momentum. Something must happen between Frame 1 and Frame 2. This is often the quickest frame, a blur of motion, a moment of profound realization, or a quick change of state. The action begins, or the subject reacts to the action that has just started. This frame is the key pivot point. What to do: * The Quick Change: The prop from Frame 1 is now partially on, or an aggressive change of pose/expression has taken place. The person who was looking bored is now actively engaging.

    Analog film photograph of section 3 related to Visual Storytelling: The 4-Frame Narrative
    • The Visual Dialogue: If it’s a two-person strip, the action starts on one person and the other person has a clear, shocked, or amused reaction. This turn elevates the story from simple posing to genuine interaction.
    • The Build-Up: If the climax is a huge kiss, Frame 2 is the dramatic lean-in, the lips-not-quite-touching moment. It’s the moment of maximum anticipation before the payoff.

    Frame 3: The Climax (The Peak Moment/The Punchline)

    This is the moment the whole strip has been building toward. It must be the most visually dynamic, emotionally charged, and satisfying shot. This frame represents the peak of the action, the visual punchline, or the grand emotional fulfillment of the miniature story. It should leave no doubt as to the story’s main point. What to do: * The Full Transformation: The prop is fully in use, the pose is at its most exaggerated, or the initial tension is completely broken. The energy must be at 100%.

    Analog film photograph of section 4 related to Visual Storytelling: The 4-Frame Narrative
    • The Shared Emotion: This is the perfect moment for a shared, uninhibited belly laugh, a full, dramatic dip-and-kiss, or a triumphant high-five/fist bump that takes up the frame. It must be a moment of full release.
    • The Visual Statement: If the story is about love, this is the most affectionate kiss or hug. If it’s about silliness, this is the most ridiculous, tongue-out, eyes-crossed face possible. Go big or go home.

    Frame 4: The Resolution (The Aftermath)

    The story is over, the climax has passed, and the tension has been resolved. The final frame serves as a cool-down, a shared look of satisfaction, exhaustion, or simply the acknowledgment that a story has just been successfully told. It’s the visual equivalent of the curtain closing, letting the audience know the performance is complete. The key is to drop the energy from Frame 3, but not the connection. What to do: * The Satisfied Smirk: Look directly at the camera with a look of “We did it” or “You just saw that.” A shared, knowing glance.

    Analog film photograph of section 5 related to Visual Storytelling: The 4-Frame Narrative
    • The Exit: The subjects slightly back out of the frame, giving a small wave or a thumbs-up as a visual sign-off.
    • The Embrace: A quiet, affectionate lean on one another, suggesting comfort and resolution after the high-energy climax. The mood is relaxed, happy, and conclusive.

    Case Study: The Proposal Re-enactment

    The suggestion to use the ZillaBooth strip to re-enact “The Proposal” is a perfect demonstration of a powerful, mini-narrative that uses the four-frame structure flawlessly. Here is a step-by-step breakdown of how a guest couple could capture this timeless story in under a minute, creating a treasured memento of the event:

    The Goal: To capture the emotional arc of a proposal…the setup, the shock, the acceptance, and the triumph…using only expressions and body language.

    Frame 1: The Setup * Action: Person A kneels awkwardly (or dramatically) on one knee in the booth, perhaps holding a prop like a small paper ring or a champagne cork. Person B stands over them with a look of mild confusion or intense anticipation. The atmosphere is tense.


    * Narrative Role: Establishes the core dramatic situation (the proposal) before the action begins. The tension is palpable. This frame provides all the necessary context.

    Frame 2: The Rising Action/The Question * Action: Person A is still kneeling, but now dramatically presenting the prop to Person B. Person B’s hands fly up to their mouth or their eyes widen in a sudden, theatrical moment of shock or realization. The action is fully underway.


    * Narrative Role: The question has been asked, and the reaction is immediate. The story accelerates, heightening the emotional stakes and making the viewer anticipate the answer.

    Frame 3: The Climax/The Acceptance * Action: Person B (who was shocked) is now lunging forward, dramatically hugging Person A (who is still attempting to kneel, or has risen for the embrace). It’s a chaotic, loving, all-encompassing embrace.


    * Narrative Role: The peak of the emotion. The answer is “Yes!” The physical explosion of love confirms the story’s happy outcome. This frame should feel the most crowded, joyful, and visually intense.

    Frame 4: The Resolution/The Triumph * Action: Person A and Person B stand side-by-side, holding up their hands in a celebratory gesture. Person A shows a proud fist pump or a confident, satisfied smile. Person B shows off the imaginary ring (or the prop) with an exaggerated, happy smirk directly to the camera.


    * Narrative Role: The story is complete. The tension is resolved into shared joy and success. It’s the final, triumphant sign-off, confirming that their “immersive story” has a happy ending. This frame grounds the emotional explosion of the previous shot.

    Advanced Pro-Tips for Storytelling in the Booth

    Once you understand the four-frame blueprint, you can elevate your booth performance from good to editorial-quality content. The secret is to use the constraints of the booth…the speed, the small space, and the props…as narrative tools.1. Props as Plot Devices, Not Decorations
    Don’t just wear the feather boa; use it to drive the plot. For example, the boa could be the prize in a dramatic conflict: *

    Frame 1: Two people are looking at the same feather boa, both reaching for it.


    *

    Frame 2: They are having a comical tug-of-war over it (conflict).


    *

    Frame 3: One person successfully wears it like a trophy, giving a triumphant, “I win!” face (climax/victory).


    *

    Frame 4: The winner is preening into the camera while the loser is slumped in the corner with a mock pout (resolution/consequence). The prop is a core character in the story.2. The Power of the Gaze

    Since there is no verbal dialogue, your eye line is the dialogue. Direct your gaze to tell the viewer where the focus is and how the relationship between the subjects is shifting: * Start Frame 1 looking at each other (establishing the relationship or anticipation). * Shift Frame 2 looking at the action/prop (reaction to the inciting incident).

    * Frame 3, the climax, should be a quick look at the camera to share the moment with the “audience” (the machine/the person holding the strip). * End Frame 4 looking back at each other (the shared secret/completion).3. Mastering the Temporal Jump The most common mistake is to try and pose.

    You must act . The machine is taking pictures very quickly, often with a slight delay. Use this time lag to your advantage. Between Frame 1 and 2, commit to a quick, dramatic shift of body language and expression. This rapid change is what makes the strip feel like a genuine, unfolding narrative instead of four separate portraits. A great four-frame strip feels like a flipbook, with smooth, intentional transitions. The best storytellers in the booth are those who are already preparing for Frame 3 while Frame 2 is still being taken…always plan your next move.

    1. Creating Themed Mini-Series
      Encourage guests to pick a single character or persona…The Villain, The Hero, The Diva…and commit to telling a full four-frame story based on that character. A collection of these mini-narratives from the same booth becomes an authentic, multi-perspective view of the wedding’s “immersive story,” far more compelling than a scrapbook of random, uncontextualized smiles. The wedding album becomes a collection of tiny, perfect, themed plays.

    2. The Value of Imperfection
      Do not try to be technically perfect. A slightly blurry Frame 2 because you were mid-action (mid-lean, mid-toss) adds authenticity and movement to the story. It shows the raw, immediate action. The small, confined space of the ZillaBooth and the harsh flash lighting are your friends, forcing you to focus on the expressive performance. Let the environment work for the narrative, not against it. The light will often cast deep, dramatic shadows, which you can use to amplify the dramatic tension of your story.In an age where every moment is captured, filtered, and uploaded to the cloud, the physical ZillaBooth strip offers a powerful, tactile rebellion. It’s an immediate, unfiltered, non-editable piece of tangible art. When you and your guests step into that booth, you’re not just taking photos; you’re writing a script, directing a scene, and leaving the wedding with a tiny, perfect, and completely unique four-act play that memorializes the joy and narrative experience of the day. Master the structure, and you master the story. Go forth and narrate! (1110 words)

    ❤️

  • Graduation Parties: The “Class of 2026” Strip

    Graduation Parties: The “Class of 2026” Strip

    The season of caps, gowns, and confetti is upon us. For photo booth businesses, the months leading up to and immediately following June represent the Super Bowl of seasonal bookings. But with every party vying for attention, how do you ensure your photo booth stands out and captures the moment in a way that feels uniquely tailored to the graduating class?

    The answer lies in a simple, nostalgic, and powerful piece of design: the dedicated “Class of 2026” photo strip. This isn’t just about throwing a logo on a template; it’s about engineering the perfect, shareable artifact that turns a fleeting party moment into a timeless memento of one of the most significant milestones in a young person’s life. Focusing on this specific seasonal content…the 1×4 strip format coupled with a customized “Class of…” overlay…is the key to unlocking premium bookings and generating buzz that lasts long after the final diploma is signed.

    The 1×4 Strip: A Nostalgic Artifact
    To truly understand the power of the “Class of 2026” strip, we must first appreciate the format. While 4×6 prints offer a larger canvas, the 1×4 photo strip is the format of choice for graduation. It is the quintessential, universally recognized artifact of the photo booth experience. This narrow, vertically oriented design is inherently nostalgic, harkening back to classic, coin-operated booths in arcades and malls. For a generation obsessed with authentic, lo-fi aesthetics, the strip feels real, tactile, and collectible.

    Crucially, the 1×4 strip is perfect for sharing. It fits neatly into wallets, is easily taped to lockers or bulletin boards, and, most importantly in a modern context, its vertical composition translates perfectly to Instagram Stories and TikTok uploads.

    Analog film photograph of section 1 related to Graduation Parties: The

    When designing the “Class of 2026” strip, you are not just selling a printout; you are selling a piece of memorabilia that is inherently optimized for physical preservation and digital virality. The goal is to create a design so iconic that every single graduate and guest wants one, dramatically increasing print volume and social media exposure for your brand. This tangible piece of nostalgia elevates your service from a rental to a memory-maker, justifying a premium price point in your graduation packages.

    Designing the Signature “Class of 2026” Overlay
    The design is where the magic happens. A successful graduation overlay is not busy; it is bold, clean, and immediately recognizable. It needs to convey the spirit of achievement without cluttering the four precious photo frames. The design process must be deliberate and highly personalized.

    The Year: The “Class of 2026” graphic is the single most important element. It should be the largest, most prominent piece of text, placed either at the very top or bottom of the strip, utilizing a strong, high-contrast typeface.

    This isn’t the time for subtle script fonts; think high school varsity jackets, collegiate banners, or classic yearbook titles. Using a strong sans-serif or a bold, athletic-style font grounds the design in an academic context and ensures it reads clearly in the high-contrast environment of a flash photograph. The year must dominate the strip’s header or footer, acting as the main visual anchor.

    Color Palette: The primary rule is to align with the school’s colors. If the party is for a graduate from “Northwood High” whose colors are royal blue and gold, the overlay must use royal blue and gold. This deepens the personalization and sense of belonging.

    Analog film photograph of section 2 related to Graduation Parties: The

    Offer at least two variations: one with a white or light background and one with a dark background to ensure maximum visibility against various photo backgrounds. Furthermore, consider a subtle metallic texture for the gold or silver elements, if the school’s colors include them, to simulate the look of a class ring or foil printing. This level of color coordination is what separates a professional service from a generic rental and demonstrates your commitment to a truly bespoke experience.

    The Crest/Mascot Integration (Permission Required): If possible and permitted, a subtle inclusion of a school crest or mascot graphic can be a powerful addition. It is crucial to respect intellectual property and branding guidelines, so ensure the client provides authorization or use generic, school-themed icons (like a simple graduation cap or diploma icon) in the school colors. A simple, elegant banner shape or a small graphic element to frame the year works wonders. This graphic should be rendered in a monochromatic version of the main accent color to avoid visual chaos. Simplicity in this area guarantees sophistication.

    Placement and Bleed: Remember the print and cut process. Ensure no essential text is too close to the strip’s edges, respecting the bleed area (usually about 1/8 inch margin).

    Place the primary title (“Class of 2026”) in the header section above the photo windows, and perhaps a subtle line of celebratory text or the graduate’s name (“Congrats, Alex!”) in the footer section below the fourth photo. The space between the photo frames can also be utilized for subtle, repeating pattern elements (like tiny stars or confetti) in the school’s accent color, tying the entire design together without taking attention away from the photos themselves.

    Technical Execution in Photo Booth Software
    Implementing this seasonal strip design is a technical process that requires precision within your photo booth software (e.g., ZillaBooth Pro, or similar professional-grade applications). Precision in these steps is what ensures the print quality matches the design intention.

    Analog film photograph of section 3 related to Graduation Parties: The

    Template Creation: Begin by creating a custom 1×4 template. This typically means setting the final print size to 2 inches wide by 6 inches tall (or 50mm x 150mm) and dividing the space into four equal photo slots, leaving designated header and footer space for the overlay. Crucially, set the template to print two strips per 4×6 sheet of paper. This practice, known as “two-up,” is the most cost-effective and standard way to run a dye-sublimation photo booth for strips, as it maximizes your prints per roll and minimizes waste.

    Overlay File Format: The overlay graphic should be exported as a high-resolution PNG file with a transparent background. Transparency is non-negotiable; it allows the photo booth software to layer the graphic perfectly over the captured images without obscuring them. The resolution should be high enough (typically 300 DPI) to look crisp on a dye-sublimation printer. Never use JPGs, which do not support true transparency and will leave a white box around your text.

    Color Management: Ensure the color profile used in your design software (e.g., sRGB or Adobe RGB) matches the profile of your photo booth’s printer. This is critical for achieving accurate school colors. A subtle shift in hue from digital to print can destroy the customized look you’ve worked hard to create. Always run a test strip using the printer and media intended for the event to calibrate for true color output. If the colors are slightly off, adjust the HSL (Hue, Saturation, Lightness) within your design file until the printed output is perfect.

    Flash Settings for Impact: While not strictly part of the design, the best way to make the colors of the overlay pop is to use controlled lighting. Use a fill light or a softbox to illuminate the subjects brightly. This ensures the colors of the graduate’s attire and the custom overlay stand out sharply against the photo background. Harsh shadows diminish the celebratory feel of the strip. Aim for a well-lit, even exposure that makes the subjects and the overlay look vibrant and clean, a contrast to the high-contrast “paparazzi” aesthetic often used for other types of events.

    The Graduation Party Guest Experience
    The strip design is the lure, but the experience is the hook. A great “Class of 2026” strip should inspire a great set of photos. The environment and the props are the supporting cast for your custom strip.

    Analog film photograph of section 4 related to Graduation Parties: The

    Prop Selection: Curate props specifically for graduation. Beyond the standard novelty items, include: – Oversized, novelty graduation caps and tassels in the school colors.

    • Faux diplomas tied with school-colored ribbons.
    • Speech bubbles with graduation-themed phrases: “Future is Bright,” “Hired!,” “I Did It!,” and of course, “2026.”
    • Signage for their future school (if attending college/trade school) or job title.
    • A small, dry-erase board where guests can write messages to the graduate, which are then captured in one of the strip’s four frames. This turns the strip into a personalized guest book entry.Themed Backdrop: Pair the 1×4 strip with a highly thematic backdrop. A sequined backdrop in a school color, a simple step-and-repeat featuring the school’s name, or a custom-printed banner that says “Congrats Class of 2026” provides a clean, impactful canvas for the strip. Avoid overly busy or patterned backdrops, which compete with the detailed overlay and the subjects. The backdrop should complement the custom strip, not clash with it.

    Guest Flow and Album Station: Designate a clear “Strip Album Station.” Provide the client with a specialized scrapbook (often a simple black, archival photo album) and metallic pens. Instruct guests to take a strip, place one copy in the album, and leave a brief message for the graduate. This maximizes the value of the unlimited prints, provides the host with an instant, personalized keepsake, and keeps the photo booth busy all night.

    Digital Integration: Integrate a text/email sharing feature that sends a digital copy of the 1×4 strip instantly. The digital version is what gets shared immediately, amplifying the strip’s reach and acting as organic marketing for your service. Ensure the digital version also carries your subtle company branding (a small logo or watermark) on the bottom corner. A branded hashtag for the event, such as #AlexsGrad2026, should be prominently displayed on the booth’s screen.

    Maximizing Bookings: Marketing the Seasonal Strip
    For the photo booth operator, the “Class of 2026” strip is a powerful, time-sensitive product you can use to secure bookings now. Graduation is a defined, non-negotiable window, so your marketing must be timely and targeted.

    Analog film photograph of section 5 related to Graduation Parties: The

    Lead with the Customization: Do not advertise a generic photo booth. Advertise the “The Ultimate 2026 Graduation Photo Booth Package.” Your marketing materials…website banner, Instagram posts, and flyers…must feature a high-quality mock-up of the specific “Class of 2026” strip. This visual proof of personalization is what closes the deal. Highlight the fact that the design is completely complimentary with a premium package, making the custom strip feel like a valuable bonus.

    Create Tiered Packages: The custom strip should be the core differentiator that drives clients to your mid-to-high tier packages. – Bronze Package: Standard booth, standard props, one generic overlay design.

    • Silver Package: Includes the custom “Class of 2026” color-matched overlay, specialized graduation props, unlimited prints of the 1×4 strip.
    • Gold Package: All of Silver, plus a custom-designed backdrop, a dedicated guest photo album station with a professional attendant to manage it, and a digital gallery link delivered within 24 hours. The custom strip is the “value-add” that allows you to charge significantly more for the Silver and Gold packages.Time-Sensitive Offers: Run an “Early Bird Graduation Booking” special. Offer a discount or a free upgrade (like the custom backdrop) for clients who book and secure their date before a specific deadline, such as April 1st. This capitalizes on the seasonal rush and encourages faster commitment. Frame the limited availability of high-demand May and June dates as a reason to book early, reinforcing the need to secure the “Class of 2026” custom experience before your calendar fills.

    Conclusion: Beyond the Party Ultimately, the 1×4 “Class of 2026” photo strip is more than a piece of printed media; it is a repository of emotion. High school and college graduation is a moment of intense transition…a mix of excitement for the future and sadness for what is ending. The photo strip captures the friends, family, and relationships that defined the past chapter.

    When the graduate looks back at the strip a decade from now, they will not just see a picture; they will see the joy of their accomplishment, the faces of their closest companions, and the precise, vibrant style of the year 2026. By dedicating time and precision to crafting this specific seasonal content, you are offering a service that transcends mere entertainment. You are providing a meaningful, durable, and highly personalized piece of cultural history for a generation ready to step into its future. Make the 1×4 strip their defining artifact.

  • The 2×2 Grid: Why the Classic Layout Never Dies

    The 2×2 Grid: Why the Classic Layout Never Dies

    The human brain is wired for story. We seek structure, we crave progression, and we find satisfaction in a complete arc, no matter how small. This fundamental truth is the secret sauce behind the enduring success of the 2×2 photo grid…the layout that sits at the very heart of the ZillaBooth experience. It’s more than just a template; it’s a canvas for a four-act play, a psychological framework that transforms spontaneous laughter into a carefully constructed, unforgettable micro-narrative.

    Why does the 2×2 format feel so right, so classic, and so consistently engaging? The answer lies in its perfect balance of constraint and freedom. By restricting users to just four frames, the 2×2 grid forces a sense of deliberate, though often unconscious, storytelling. It asks you, and your friends, to engage in a rapid-fire sequence of emotional shifts that capture a dynamic moment rather than a static pose. It’s the difference between a single portrait and a complete short film.

    The Psychology of the Four-Shot Sequence

    The magic of the 2×2 is the inherent rhythm it establishes, a rhythm that guides users through a natural psychological progression of expression. The sequence is not random; it’s a journey from initial self-consciousness to uninhibited joy, a quick, safe space to shed social filters.

    Act I: The Setup (Pose 1: The Smile) The first frame is the moment of calibration. The red light blinks, the flash is imminent, and users typically default to their “camera-ready” face. This is the pose designed for public consumption, the one you might use for a professional headshot or a polite social media post. As suggested, Pose 1 is almost always a “Smile.” It’s the initial, slightly formal, and conscious acknowledgment of the camera. Psychologically, this pose serves as the setup. It establishes the characters (the people in the booth) and the setting (the start of the experience). It’s the baseline from which all subsequent spontaneity will be measured. It says, “We are here, and we are ready.” It is the moment where the guard is highest, and the expression is most curated.

    Act II: The Transition (Pose 2: The Idea) The second shot is critical. Having established the baseline, the internal pressure to “do something different” mounts, and the creative collaboration begins. This is where the first idea is tested. Perhaps it’s a quick head tilt, a funny hand gesture, or the introduction of a prop. This pose marks the transition from formality to engagement. It’s often the shot of collaboration…a glance shared, a whisper exchanged, or a synchronized movement that shows the group is beginning to loosen up and play off each other. The constraint of the timer accelerates this process; there’s no time for deliberation, only instinctive reaction. This shot is generally less polished than Pose 1 but is still somewhat intentional.

    Act III: The Peak (Pose 3: The Wacky) The third frame is the emotional and expressive climax of the 2×2 narrative. By this point, the initial stiffness is gone. The laughter from the silliness of Pose 2 often bleeds directly into this shot, resulting in genuine, unforced expressions. This is the point of no return…the moment when the conscious effort to “look good” is completely abandoned in favor of pure, unadulterated fun. It’s often the wackiest pose…a shout, a surprised face, an over-the-top expression of joy or mock terror. Psychologically, the rapid succession of flashes has acted like a mini-meditation, pushing the rational mind aside and allowing the subconscious, playful self to emerge. It’s a shot of catharsis, the release of pent-up inhibition that the entire booth experience is designed to facilitate.

    Act IV: The Punchline (Pose 4: The Silly) The final frame, the “Silly” pose, is the resolution, the punchline that completes the arc. It serves as a bookend to the formal Smile of Pose 1. The contrast between the two is the entire story. If Pose 1 was the polite introduction, Pose 4 is the ridiculous, intimate farewell. Often, this pose is a reflection of the group’s final, exhausted burst of collective humor. It might be a collective slump, a final exaggerated cross-eye, or the ultimate non-sequitur…a totally random, unexpected gesture. The transition from Pose 1 (Smile/Controlled) to Pose 4 (Silly/Uncontrolled) is the entire narrative tension and release. This shot locks in the memory of the experience as one that started well and ended with a bang of unforgettable silliness. It ensures that the final take-away is one of genuine, shared happiness.

    The Geometry of Enduring Design

    Analog film photograph of section 1 related to The 2x2 Grid: Why the Classic Layout Never Dies

    The 2×2 grid also works because of its inherent visual stability. In design, symmetry and structure are profoundly comforting. The perfect square format, with its four equal quadrants, is inherently balanced and aesthetically pleasing. * Balance: The four shots offer immediate visual symmetry, making the final strip easy to scan, share, and appreciate.

    • Containment: The grid acts as a clear frame for the mini-story, ensuring that the four disparate moments are unified as a single, coherent whole.
    • Readability: Unlike a single long strip of four vertical photos, the 2×2 provides a compact, square artifact that maximizes visual information in a small space, perfect for printing, sharing online, or tucking into a wallet.The cultural resonance of the 2×2 also plays a major part. While many modern photo booths default to long strips, the 2×2 square often evokes the vintage, passport-style photos of a bygone era. It has a slightly more “editorial” feel, like a contact sheet or a storyboard, lending an air of importance to the captured moments. It is a nod to the past, modernized for the instant sharing of the present.

    ZillaBooth’s Commitment to Narrative

    Analog film photograph of section 2 related to The 2x2 Grid: Why the Classic Layout Never Dies

    For ZillaBooth, the 2×2 grid is non-negotiable…it is the company’s core mechanical and philosophical difference. We understand that in a world saturated with digital photos, what people truly value is not just a picture, but an experience that yields a story. The 2×2 layout is the primary tool for encouraging that story. We don’t just sell technology; we facilitate the creation of those four-frame narratives.

    By building our interface and timing around this format, ZillaBooth intentionally engineers moments of genuine human connection. The rapid pace and the limited number of frames are designed to bypass the ‘perfect pose’ instinct that dominates smartphone photography. In a ZillaBooth, you don’t have time to review, delete, and retake a hundred shots. You have four chances to capture the arc of the moment, and that creative constraint is the source of the magic. It ensures that the resulting artifact is authentic, slightly chaotic, and utterly unique to the people in the frame.

    Analog film photograph of section 3 related to The 2x2 Grid: Why the Classic Layout Never Dies

    The 2×2 grid is a masterclass in behavioral design. It uses a simple, geometric structure to elicit a complex, yet predictable, emotional journey.

    It takes users from a self-aware “Smile” to a celebratory “Silly” pose, and in doing so, it captures the complete, beautiful spectrum of a few seconds of human interaction. This is why the classic layout never dies: it perfectly mirrors our fundamental need to tell a story and to experience a full range of emotion, all contained within the neat, perfect boundaries of four little squares. It’s an exercise in spontaneity, a document of joy, and the most compelling storytelling format we have.

  • Printing Station Setup: The “Share & Print” Workflow

    Printing Station Setup: The “Share & Print” Workflow

    The “Share & Print” Workflow: Achieving Instant Photo Gratification

    In the fast-paced world of photo booth events, nothing satisfies a guest more than the instant gratification of a printed photo strip they can hold in their hands just moments after they strike a pose. For photo booth operators and event hosts, however, setting up a reliable, high-speed printing station can often feel like a complex wiring and software nightmare. But it doesn’t have to be.

    Guests enjoying a DIY photo booth at an event — section 1

    We’re introducing the “Share & Print” Workflow…the definitive guide to establishing a bulletproof printing station using ZillaBooth Party’s powerful “Auto-Print” feature, seamlessly integrated with the ubiquitous simplicity of Apple’s AirPrint technology. This combination strips away the complexity, ensuring your guests get their prints instantly, every single time.

    Understanding the “Instant Gratification” Goal

    The primary goal of the “Share & Print” Workflow is speed and reliability. Guests should never have to wait more than 30 seconds for a print. Achieving this requires eliminating bottlenecks…namely, complex driver installations, USB cable management, and manual print queuing.

    The traditional photo booth setup often involves a computer tethered via USB to a dedicated dye-sublimation printer. While reliable, this locks the operator to a single workstation. The “Share & Print” workflow liberates your host device (iPad, iPhone, or Mac running ZillaBooth Party) by turning the entire process wireless and automatic. Once a session is complete, ZillaBooth’s “Auto-Print” initiates the command, and AirPrint handles the communication…the photo simply appears.

    The ZillaBooth Party “Auto-Print” Advantage

    ZillaBooth Party’s “Auto-Print” feature is the brain of this operation. By checking a single box within the app’s settings, you tell the system to immediately send the final layout (whether it’s a photo strip, 4×6 print, or collage) to the designated printer after the session countdown is complete.

    Key functionalities of “Auto-Print”: * Zero Operator Intervention: No one needs to press “Print” after the photo is taken.

    • Session-Specific Control: You can set the number of copies to print for each session, ensuring every person in the frame gets a copy.
    • Fail-Safe Queuing: If the printer is busy or offline momentarily, ZillaBooth Party manages a print queue, automatically retrying the print job until it is successful, preventing lost memories.
    Diagram illustrating a photo booth workflow for Printing Station Setup: The

    Why AirPrint is Essential for Simplicity

    AirPrint is Apple’s native network printing technology. It is a communication protocol that allows Apple devices to find and print to compatible printers over a Wi-Fi network without requiring any driver installation or configuration. In the context of a live event, this is a monumental time-saver and a massive boost to reliability.

    Guests enjoying a DIY photo booth at an event — section 3

    Because ZillaBooth Party runs on an Apple device (iPad or iPhone), an AirPrint-compatible printer instantly becomes a plug-and-play solution. There are no finicky drivers to install, no operating system compatibility issues, and no dedicated print server software needed. It’s a pure, clean, network-based transaction.

    Hardware Deep Dive: Recommendations for Reliability

    The “Share & Print” Workflow hinges on three core pieces of hardware: the Host Device, the Printer, and the Network.1. The Host Device (Running ZillaBooth Party):

      * **Recommendation:** An iPad Pro or late-model iPhone. These devices have robust Wi-Fi chips that ensure stable network connections for AirPrint jobs. They also handle ZillaBooth Party’s high-resolution image processing with ease. 

    1. The AirPrint-Compatible Printer:
      This is the most critical and often the most confusing choice. For a true “instant gratification” station, you need a balance of speed, quality, and consumables cost.
      • The Gold Standard (Dye-Sublimation): For professional photo booth use, a dye-sublimation (dye-sub) printer is non-negotiable. They offer water-resistant, durable prints that emerge completely dry, and they are blisteringly fast (often 8-15 seconds per 4×6 print).
        • Top Models: DNP DS620A or the Sinfonia CS2.
        • AirPrint Caveat: Most high-end dye-sub printers are not natively AirPrint compatible. To integrate them into the “Share & Print” Workflow, you will need a small, inexpensive print server device or a Raspberry Pi to act as a bridge and expose the printer as an AirPrint device on the network (a relatively simple process we detail in advanced tutorials).
        • The Simple/Budget Option (Inkjet): For small, casual events or budget-conscious setups, a high-quality, AirPrint-certified inkjet photo printer is the simplest choice.
          • Top Models: Canon PIXMA Pro or specific Epson Expression models.
          • Advantage: Truly native AirPrint support, plug-and-play.
          • Disadvantage: Slower print speed, consumable ink/paper costs are higher per print, and prints are less durable than dye-sub prints.
          • The Network Setup:
            Reliability is paramount, meaning you should never rely on the venue’s public Wi-Fi.
            • Recommendation: Dedicated Wireless Access Point (WAP): Purchase a small, travel-sized wireless router (e.g., a GL.iNet router). This device creates a private, isolated, high-speed Wi-Fi network dedicated only to your photo booth equipment.
              • Setup: The WAP broadcasts a private network (e.g., “ZillaBooth Network”). Your iPad and your AirPrint-compatible printer both connect to this network. This eliminates interference from guest phones, venue networks, and other potential Wi-Fi clutter. It is the single biggest factor in ensuring 100% AirPrint reliability.Step-by-Step Tutorial: Setting Up the “Auto-Print” Workflow

    Once your hardware is assembled, setting up the seamless workflow takes less than ten minutes.

    Step 1: Printer and Network Initialization1. Connect the Printer: Power on your printer. If it is a native AirPrint device, follow its manual to connect it to your dedicated WAP network. If you are using a non-native dye-sub printer, connect your AirPrint bridge/server device (e.g., Raspberry Pi or dedicated server) to the WAP network and connect the printer to the bridge via USB. 2. Connect the Host Device: Connect your iPad/iPhone running ZillaBooth Party to the exact same dedicated WAP network.Step 2: ZillaBooth Party Configuration1. Open ZillaBooth Party: Launch the app and go to the event setup or global settings menu. 2. Select Printer: Navigate to the Printing section. The app should automatically detect any AirPrint-enabled printers on the network. Select your desired printer from the list (e.g., “DNP AirPrint Bridge” or “Canon PIXMA”). 3. Activate “Auto-Print”: In the same menu, find the “Auto-Print” toggle and switch it ON. 4. Set Copies: Set the default number of copies for the session (e.g., ‘2’ for a photo strip to ensure the guest gets one copy and the host gets one for a memory book).Step 3: Final Test Run1. Start a Session: Begin a photo session in ZillaBooth Party. 2. Complete the Countdown: Pose for the pictures and let the session complete. 3. Monitor the Queue: As soon as the final layout is generated, you should see a pop-up confirmation that the print job has been sent via AirPrint. 4. Instant Gratification: The print job immediately transfers to the printer, and the photo should emerge in seconds.

    Troubleshooting and Advanced Tips

    The Print Job Fails to Send: The overwhelming majority of AirPrint issues stem from the network. * The Fix: Double-check that your iPad/iPhone and your AirPrint-enabled printer/bridge are connected to the same dedicated Wi-Fi network. Restarting the WAP, the printer, and the iPad in that order often clears transient network errors. My Dye-Sub Printer Isn’t AirPrint Compatible: This is the most common professional hurdle.

    * The Fix: You need a network bridge solution. Small, low-cost micro-computers like a Raspberry Pi can be configured as a CUPS (Common Unix Printing System) server, which can then be exposed on the network as a universal AirPrint device. There are also commercial, plug-and-play AirPrint server devices available specifically for dye-sub printers. Best Practices for High-Volume Events: * Pre-Print Calibration: Before every event, run 5-10 test prints to confirm color, cut, and network stability.

    • Manage Consumables: Always have spare paper and ribbon/ink on hand. With “Auto-Print” running, you’ll be printing more than you think.
    • Printer Placement: Place the printer close to the host device (within 20 feet) and ensure line-of-sight to your dedicated WAP for maximum signal strength and speed.By combining the hands-off reliability of ZillaBooth Party’s “Auto-Print” with the driverless simplicity of AirPrint and a dedicated network, you transform your photo booth operation. You move from a complicated wired mess to a sleek, wireless “Share & Print” machine that delivers on the promise of instant photo gratification, ensuring delighted guests and a smooth, stress-free event for you.
  • The Science of the Strip: Why 4 Photos?

    The Science of the Strip: Why 4 Photos?

    The most common tools for visual storytelling…from the cinematic masterpiece to the humble social media carousel…often rely on a complex, multi-layered structure. We’re taught about the three-act play, the twelve-step hero’s journey, or the endless scroll of a feed. Yet, one of the most powerful, oldest, and universally understood visual narrative formats operates on a deceptively simple number: four.

    Think about the classic photo booth strip. Four small squares, captured in quick succession. Think about the most iconic newspaper comic strips, which almost universally adhere to four panels. Think about the emerging dominance of the four-image Instagram carousel or the quad-split video on platforms like TikTok, forcing a miniature narrative to play out in a constrained space.

    Why does this specific structure, this quartet of frames, hold such a profound and magnetic appeal? The answer lies not just in visual design, but in the elemental structure of storytelling itself. Four is the precise number of steps required to execute a complete, satisfying narrative arc: Introduction, Action, Climax, and Resolution. It is the narrative minimum, a perfect, self-contained loop that ensures emotional engagement and instant comprehension. Master this four-frame science, and you master the art of the miniature epic.Frame One: The Introduction (The Setup)

    The purpose of the first frame is simple: establish context. This is the “Once upon a time” of the strip. It must clearly define the setting, the subject, and the initial state of the story. The viewer needs to know who we are looking at and where they are. This frame sets the tone and the baseline from which all subsequent drama will deviate.

    Analog film photograph of section 1 related to The Science of the Strip: Why 4 Photos?

    Visually, this frame should prioritize clarity and space. It is often a wider shot, or a composition that clearly illustrates the environment. If your subject is a person, Frame One is their baseline expression…calm, expectant, or perhaps slightly bored. This establishes a “normal” state. For example, in a photo strip about eating a giant ice cream cone, Frame One is the subject standing with the perfectly intact, untouched cone, a look of pure anticipation on their face.

    The viewer’s mind immediately files this away: “Okay, this is the beginning. This is how things stand before the change.” Without this necessary initial setup, the next frames…the action…will lack the contrast required to feel like a story. The first frame is the anchor; it gives weight to the movement that is about to follow.

    It manages expectations and subtly promises that the next three frames will deliver a shift from this initial stasis. It is the quiet before the storm, the still moment that makes the subsequent movement kinetic. Its success is measured by how effectively it lays the foundational layer of reality for the story to be built upon.Frame Two: The Action (The Rising Tension)

    The second frame is where the story truly begins to move. Having established the “who” and “where,” Frame Two introduces the “what.” This is the catalyst, the complication, or the movement toward a goal. This frame creates tension because it is a direct deviation from the established norm of Frame One. The visual shift should be undeniable.

    Analog film photograph of section 2 related to The Science of the Strip: Why 4 Photos?

    In the narrative arc, this is the rising action. It’s the moment the character begins the task, or the problem makes itself known. Returning to the ice cream example, Frame Two is the moment the subject takes the first, massive bite, or perhaps the moment the cone begins to melt slightly, dripping over their hand. This is not the point of maximum drama, but the point of escalating drama. It’s the commitment shot. The expression on the subject’s face often shifts here…from anticipation to engagement, effort, or perhaps mild concern.

    Frame Two is crucial because it ensures the story isn’t just a collection of moments; it’s a process. It moves the subject from a passive state (being with the ice cream) to an active state (interacting with the ice cream). For a comic strip, this is the dialogue panel that reveals the conflict.

    For a fashion strip, this might be the moment a model begins a dramatic turn or interaction with a prop. It must confirm the promise of movement made by Frame One and set the stage for the inevitable climax. The visual language here is all about momentum, indicating that things are progressing and building toward an inescapable conclusion, heightening the sense of forward propulsion.Frame Three: The Climax (The Peak Moment)

    The third frame is the narrative apex…the reason the strip exists. This is the moment of maximum release, the punchline, the peak emotion, or the critical event. If the viewer remembers only one frame, it should be Frame Three. In the traditional three-act structure, the climax occurs at the end of Act Two or the beginning of Act Three. By placing it in the third of four frames, the structure acknowledges the narrative necessity of a brief, final conclusion.

    Analog film photograph of section 3 related to The Science of the Strip: Why 4 Photos?

    Visually, Frame Three should be the most dramatic, highest-energy, or most impactful image. In the photo booth, this is often the most exaggerated pose: the eyes crossed, the dramatic laugh, the sudden hug, or the full-face expression of delight or distress.

    Following our ice cream narrative, Frame Three is the glorious, messy peak: the cone has collapsed, the ice cream is smeared all over their face, and the subject is reacting with either pure, ecstatic joy or frustrated, messy surrender. The composition often benefits from being a tight, close-up shot, focusing exclusively on the intense reaction or the dramatic result of the action initiated in Frame Two.

    The chaos, the emotion, the visual noise…it all peaks here. Frame Three is the explosive release of the tension built across the first two frames. It is the moment where the story’s core thesis…the struggle, the joy, the transformation…is delivered with maximum force. Without a powerful Frame Three, the entire strip falls flat, lacking the necessary payoff that the setup frames promised. It must be visually and emotionally the loudest beat in the sequence.Frame Four: The Resolution (The Aftermath)

    The final frame serves to gently lower the viewer back to reality and provide closure. This is the “happily ever after” or, more often, the “lesson learned.” It is the moment of reflection and conclusion, ensuring the narrative loop is fully closed. After the high energy of the climax, Frame Four offers a necessary emotional and visual cool-down.

    Analog film photograph of section 4 related to The Science of the Strip: Why 4 Photos?

    Its visual aesthetic is often a return to calm, mirroring Frame One but with a crucial difference: the subject or scene has been fundamentally changed by the action. For the ice cream strip, Frame Four is the aftermath. The ice cream is gone (or mostly gone). The subject is looking tired but satisfied, perhaps wiping their face, or simply offering a knowing, post-chaos smile to the camera. It’s a moment of reflection and consequence.

    It doesn’t need to be high energy; its power comes from its quiet acknowledgment of what just occurred. Frame Four provides the necessary emotional safety for the viewer, letting them know the adventure is over. It validates the climax.

    The strip might end with a punchline, a knowing glance, or a return to the initial pose but with a subtle new detail…a smudge on the cheek, a changed backdrop, or a lingering expression of contentment. This final frame is what elevates the sequence from a mere series of snapshots into a coherent story, allowing the viewer to process the narrative and internalize the emotional journey. It’s the final punctuation mark…the period at the end of a perfectly formed sentence.The Science of the Quartet: Practical Application

    Understanding the four-frame narrative arc is incredibly useful for any content creator working in constrained media. The success of this structure lies in its forced economy. Since you only have four chances, every single frame must carry maximum narrative load.

    Analog film photograph of section 5 related to The Science of the Strip: Why 4 Photos?

    1. The Pacing is Non-Negotiable:

    You cannot linger in the introduction (Frame 1) or the action (Frame 2). These must be brief, crisp setups. Similarly, the climax must be instantaneous. This forced brevity is why the four-frame strip feels so dynamic. It’s a hyper-compressed drama, designed for an attention economy where speed of comprehension is paramount. The viewer must grasp the whole story in less than five seconds.

    2. Visual Contrast is Key: The transition between frames must be visually clear to signal the change in narrative stage. – Frame 1 to Frame 2: Change in posture or introduction of a new element (e.g., subject moves from sitting to standing). – Frame 2 to Frame 3: The most dramatic contrast. Often a change from an action-in-progress to the ultimate, messy result (e.g., from pouring liquid to spilling liquid).

    – Frame 3 to Frame 4: A distinct drop in energy. A move from a tight close-up back to a medium shot, or from an exaggerated expression back to a muted, reflective one. 3. Medium Agnostic Magic: This principle works across all mediums that rely on sequential imagery: – Photography: A social media photo dump should be organized to follow this structure. The first photo sets the scene (the venue), the second introduces the activity (the dancing), the third is the chaotic peak (the group selfie with confetti), and the fourth is the reflective morning-after shot (the coffee).

    – Graphic Design/Presentation: When explaining a concept, use the four-frame structure: Frame 1…Problem Statement, Frame 2…Proposed Solution, Frame 3…The Result (Data/Outcome), Frame 4…Conclusion/Next Steps. This ensures maximum clarity and narrative drive in professional communication. – Video: Even in a short video, the first second should be the Introduction, the next two seconds the Action, the fourth second the Climax, and the final second the Resolution. The narrative integrity of a short clip is fundamentally dependent on hitting these four beats quickly and clearly.The enduring power of the four-frame strip is a testament to the fact that complexity is not required for depth. It proves that the most relatable stories are often the most concise.

    By forcing a creator to distill their story down to its four essential pillars…the establishment of the world, the introduction of the struggle, the moment of ultimate impact, and the final breath of conclusion…the structure eliminates all narrative fat, leaving behind a sequence of pure, unadulterated storytelling. It is a powerful constraint, but one that yields the most satisfying and perfectly paced miniature epic every single time. It is, quite simply, the most efficient narrative engine ever designed. The universality of this arc, from ancient friezes to modern digital strips, confirms its position as the ultimate guide to instant, powerful communication. When you only have a moment to connect with an audience, four frames are not a limitation…they are the perfect, infallible law of narrative physics. The magic is not in adding more, but in knowing precisely what to include in the perfect, powerful quartet.