Category: ZillaBooth Features & Tips

ZillaBooth app features, product updates, and how-to tips for overlays, QR sharing, AirPrint, Guided Access, SMTP, and more.

  • Introducing ZillaBooth 3.0: Professional Photo Booth Features Made Simple

    Introducing ZillaBooth 3.0: Professional Photo Booth Features Made Simple

    ZillaBooth 3.0 is officially here. This major update brings a mature, feature-complete experience designed for event professionals, venue operators, and casual hosts who need a reliable, self-running photo booth.

    We built ZillaBooth with a focus on stability and ease of use. Whether you are managing a high-traffic brand activation or setting up an iPad at a wedding reception, ZillaBooth 3.0 turns your hardware into a polished kiosk that works while you host. The booth runs itself, so you can run the event.

    Here is an overview of the new professional tools, our three user tiers, and the engineering that makes ZillaBooth the smart choice for your next event.

    What’s New in Version 3.0?

    Version 3.0 introduces a suite of powerful, thoughtfully engineered features designed to give operators complete control and peace of mind during live events.

    • USB External Camera Support: For professional setups, you can now connect UVC-compliant USB webcams and DSLR cameras to your iPad. This provides a DSLR connection option with a clean, high-quality feed, giving you consistent framing independent of the iPad’s built-in camera.
    • Event Readiness Dashboard: Ensure your hardware is ready before the doors open. The new live dashboard lets you proactively verify your battery, thermal state, storage capacity, and printer connectivity in one place.
    • Ambient Device Status Alerts: Subtle live status chips on the iPad camera screen keep operators informed of low battery, overheating, or printer issues without interrupting the guest flow.
    • Bluetooth Remote Shutter: Trigger photo captures seamlessly using standard Bluetooth remotes, volume buttons, or the new iPhone Camera Control button. It utilizes a unified shutter path to ensure flawless hands-free attendant operation.
    • Custom Save Locations: Professional workflows require flexibility. You can now save individual photos and finished collages directly to external drives, Files folders, or iCloud Drive for instant editor access and same-night handoffs.
    • Attention-Grabbing Shutter Button: Designed for unattended setups, an optional animated particle halo or swirling emoji ring around the iPad shutter helps draw guests in and maximize engagement.

    Three Tiers Designed for Different Users

    Rather than a one-size-fits-all approach, ZillaBooth is structured into three distinct tiers tailored to different types of users and use cases. With the 3.0 release, we are officially renaming our one-time purchase tier to Pocket to better reflect its intended use.

    Core (Free)

    ZillaBooth Core is designed for casual use and testing. It remains completely free to download, requires no account or login, and produces clean collages with zero watermarks.

    • Classic Collages: Capture exactly four photos in sequence to automatically generate a 2×2 grid or 1×4 vertical strip.
    • Automated Flow: Simple automatic countdown timers and full-screen flash for consistent illumination.
    • Instant Sharing: Share or save your collage instantly using the native iOS share sheet.

    Pocket (One-Time Purchase)

    Designed for casual users and content creators who want a customizable photo booth experience right in their pocket. While it works beautifully on an iPad, Pocket is primarily envisioned for iPhone users.

    • Custom Timing & Manual Capture: Adjust initial and between-photo countdowns, or switch to Manual Capture to take photos at a natural, human-paced rhythm.
    • Creative Aesthetics: Apply professional black-and-white filters and add customized border spacing and colors.
    • Automated Organization: Auto-save individual photos and collages directly to your library, and embed GPS metadata with geotagging.
    • Custom Share Messages: Pre-fill the iOS share sheet with your own custom caption or event hashtag.

    Pro (Monthly Subscription)

    The Pro tier is aimed directly at pros and DIY users running events, parties, and permanently installed photo booths. It leverages all the custom controls of Pocket and adds a complete suite of event-grade tools.

    • iPad Event Layout: Transform your iPad into a full-screen kiosk with an oversized shutter and dedicated collage review buttons.
    • Integrated SMTP Email: Guests receive their collages in seconds via your own email domain. A persistent BCC feature seamlessly integrates with your marketing lists.
    • Graphic Overlays: Import your own transparent PNG artwork for custom logos, borders, and brand themes. There is no proprietary template lock-in.
    • Auto-Print: Connect to any AirPrint-compatible venue printer to instantly deliver 4×6 physical keepsakes.
    • Booth Automation: Auto-Restart after idle periods, Keep Awake guidance, and a hidden settings button ensure your booth runs safely and independently all night.

    Why ZillaBooth?

    ZillaBooth 3.0 is built natively for iPhone and iPad using Apple’s AVFoundation framework. This ensures highly reliable captures, system-level performance, and an interface that feels instantly familiar to your staff and guests.

    Most importantly, ZillaBooth respects your professional workflow. We believe in zero proprietary lock-in: use the hardware you already own, the email infrastructure you trust, and the branding your clients demand.

    Download ZillaBooth 3.0 today and see how easy running a professional photo booth can be.

  • Designing Overlays for Non-Designers

    Designing Overlays for Non-Designers

    You don’t need a degree in graphic design or expensive Adobe software to create a beautiful, branded, professional overlay for a modern photo booth like ZillaBooth. As a non-designer, the task might seem intimidating…after all, you are creating a digital frame that has to perfectly fit a photo that hasn’t even been taken yet. But thanks to powerful, simple online tools, you can easily master this process. The secret weapon for this task is the transparent PNG file, and the best tool for the job is Canva.

    This comprehensive tutorial will walk you through, step-by-step, how to leverage Canva to design a stunning, high-resolution photo booth overlay that is guaranteed to meet ZillaBooth’s technical specifications, ensuring your logo, event name, or custom graphics look flawless on every single print and digital share.

    Understanding the “Overlay” Concept

    First, let’s clarify what an overlay is. In a physical photo booth, the pictures are printed directly onto the paper. In a modern digital photo booth, the process is layered. The camera takes the picture (Layer 1). Then, a digital frame, or overlay, is automatically placed on top of that photo (Layer 2) before it is printed or saved.

    Because the overlay is Layer 2, most of it needs to be completely invisible…or transparent…so the actual photo underneath can show through. Only the parts you want to be visible…like a border, a logo, or text…should be opaque. This invisible background is what makes a transparent PNG so critical. A standard JPEG file can’t do this; it would simply block out the entire picture with a white or colored rectangle.

    ZillaBooth’s Technical Blueprint: The Specs You Must Meet

    To ensure a perfect fit with the ZillaBooth system (or any professional photo booth), you must adhere to two non-negotiable specifications:1. Dimensions (Size): The physical or digital photo size determines your canvas size. For the purpose of this tutorial, we will use the most common rectangular print size: 4×6 inches. To maintain a high-quality, non-pixelated final image, ZillaBooth requires the overlay file to be a precise digital size: 1800 pixels wide by 1200 pixels high. If your ZillaBooth is set to a different ratio (like a square or 5×7), adjust these pixel dimensions proportionally, but the file size must be high-resolution (at least 300 DPI, which these pixel dimensions inherently achieve).
    2. Format (File Type): The file must be a PNG and it must have a transparent background. A JPEG will not work.The Tutorial: Creating Your Overlay in CanvaStep 1: Setting up Your Canvas (The Right Size)

    Open Canva and look for the “Create a design” button, usually in the top right corner. * Select “Custom size” from the dropdown menu.
    * Crucially, switch the unit of measurement from “px” (pixels) if it is set to “in” or “mm.”
    * Enter the required ZillaBooth dimensions: 1800 for the width and 1200 for the height.
    * Click “Create new design.”You now have a perfectly sized, blank canvas. This rectangle represents the final 4×6 photo that will be printed.Step 2: Defining the Safe Zone (Where the Photo Goes)

    Your primary design goal is to create a frame around a large empty space. This empty space is the “Safe Zone”…where the photo will actually appear. You must ensure your design elements do not spill into this zone, or they will cover people’s faces and ruin the picture. * Create a Placeholder: This step is only for design purposes and will be deleted later. Go to “Elements” on the left sidebar and select the “Square” shape.
    * Change the square’s color to a bright, contrasting color like hot pink or neon green. This is your temporary placeholder.
    * Resize the Placeholder: Drag the corners of the square to fill most of the canvas, leaving a clear border around the edge for your design. For a clean, modern look, leave approximately 150-200 pixels of border space on the top, bottom, and sides.
    * This large colored rectangle represents the area where the actual photo will be. The thin, clear border outside of it is the only space you can place your design elements.Step 3: Designing Your Border and Graphics

    Now that you’ve defined the Safe Zone with your placeholder, you can start building the actual overlay elements in the border area. * Add Text: Go to “Text” and add your event name, date, or a hashtag. Place this text neatly into the border area…for example, centered at the very top or in a corner. Ensure the text size is legible but doesn’t feel cramped.
    * Insert the Logo: Click “Uploads” and upload your company or event logo. Critical Tip: If you have a version of your logo that is already a transparent PNG, use that. If not, use Canva’s “Background Remover” tool on your uploaded logo image (requires Canva Pro). Place the logo strategically, such as in the bottom-right corner or centered below the photo area.
    * Add Decorative Elements: Use “Elements” to add simple decorative touches like thin lines, leaves, confetti, or a solid color block for a clean background. Ensure all of these elements are fully contained within the border space and do not overlap your bright placeholder square.
    * The Crucial Deletion: Once your design is finished, click on the brightly colored Safe Zone placeholder square and press the delete key. Your canvas should now look like your design elements floating on a blank white background. This blank white area is what will become transparent in the next step.Step 4: The Transparency Trick (Exporting as PNG)

    This is the most crucial step and the one that separates a successful overlay from a failed one. * Click the “Share” button in the top right corner of Canva.
    * Click “Download.”
    * In the file type dropdown menu, select “PNG.”
    * Directly beneath the file type selector, there is a very important checkbox labeled “Transparent background.” YOU MUST CHECK THIS BOX. Note: This feature is exclusive to Canva Pro (the paid subscription). If you do not have Canva Pro, you will need to find another tool or start a free trial. This is non-negotiable for a professional overlay.
    * Ensure the size is set to the default (1800 x 1200 px).
    * Click the “Download” button.The file you receive will be a high-resolution PNG where the area that was blank white in your Canva design is now completely transparent, allowing the photo booth picture to show through perfectly.

    Design Masterclass: Logo Placement and Framing Tips

    Creating a successful overlay goes beyond just the technical specifications…it’s about optimizing the design for the photo booth experience itself. As a non-designer, keep these four best practices in mind to create a polished, effective frame.1. Prioritize Face and Body Space (The “No-Go” Zone)

    The biggest mistake is placing design elements in the main picture area. Your job is to frame the experience, not obscure it. * Avoid the Center: Never put a large logo or graphic in the middle-bottom or middle-side of the frame. This is precisely where people’s torsos, shoulders, or hands will be. A logo placed there will look sloppy and block key parts of the photo.
    * The Corners are Your Friends: The top-left, top-right, bottom-left, and bottom-right corners are the safest real estate. Place the date and hashtag at the top, and your logo small and unobtrusive in the bottom corner. A simple, thin border around the entire Safe Zone is often the most elegant solution.
    * Test on a Mockup: Before finalizing, temporarily drag in a dummy photo of people (or a stock photo) into your Canva design, place it on the bottom layer, and ensure none of your design elements are covering faces, hands, or important action.2. The Power of Simplicity and Contrast

    Photo booth photos are often fast and busy. Your design should be simple and high-impact. * One or Two Key Elements: Don’t crowd the border. Focus on a single, clear logo and one line of text (like the event name). Visual clutter distracts from the people in the picture.
    * High Contrast Colors: Ensure your design colors stand out against the white/black of the typical photo booth background. If your event has dark lighting, use light colors like white or gold. If the event is in a bright space, dark, rich colors will pop. Do not use pastels or shades that are too close to skin tones.3. Strategic Logo Sizing and Consistency

    Your logo needs to be visible without dominating the frame. * Size it for Readability: A logo that is too small becomes blurry or unreadable when printed. Aim for a size where the logo is clearly identifiable, but never larger than about 1/8th of the total border space.
    * Brand Color Matching (Hex Codes): If you are working for a brand, you should know their exact color codes (Hex codes, e.g., #FF5733). In Canva, use the color picker to input these codes precisely. This ensures your overlay matches the client’s brand guidelines perfectly, adding a professional touch that even a junior writer can master.4. The Clean Frame vs. The Full Overlay

    Decide on your framing style upfront: * The Clean Frame: This is a simple, rectangular border that runs along the very edge of the Safe Zone. It’s safe, professional, and ensures maximum photo space. All design elements (logos, text) are placed on top of this border.
    * The Full Overlay: This style covers the entire background of the canvas with a solid color or pattern, except for the Safe Zone. This is useful if you want to create a full-bleed colored background for the final print (e.g., a solid gold frame). If you choose this, make sure the solid color is part of the PNG design, and the Safe Zone remains completely transparent.By following these technical steps in Canva…setting the exact ZillaBooth pixel dimensions, ensuring your logo is an uploaded transparent element, deleting the Safe Zone placeholder, and most importantly, checking the “Transparent background” box on export…you will have successfully created a professional, high-quality, and perfectly fitted photo booth overlay. You have bypassed the need for complex design software and achieved a flawless, branded result. Upload the final PNG file to your ZillaBooth interface, and watch your design elevate the entire event experience.

  • ZillaBooth QR Code Photo Delivery Setup

    ZillaBooth QR Code Photo Delivery Setup

    Want to let guests walk away from your photo booth with their photos without exchanging phone numbers, handing out USBs, or managing a complicated app? QR Code Image Delivery makes it effortless — guests scan a posted QR code, find their photo in a shared cloud gallery, and save it directly to their phone in seconds.

    The best part: this works with ZillaBooth right now, using features already built in. No app updates, no new subscriptions, no code. Just a 15-minute setup using free tools you likely already have.

    What is QR Code Image Delivery?

    QR Code Image Delivery is a setup — not a separate feature — that uses ZillaBooth’s built-in Simplified Sharing BCC field together with an IFTTT automation and a cloud storage folder (like Google Drive) to create a self-updating photo gallery guests can access by scanning a single QR code.

    Every time a guest completes a photo session and taps Share, ZillaBooth silently BCC’s a copy of the email — photo attachment included — to an IFTTT trigger address. IFTTT automatically deposits that photo into your cloud folder. Guests scan the QR code you’ve posted near the booth, open the gallery on their phone, and save their photo. No app to download. No account to create. No friction.

    What you’ll need

    Step 1 — Create your event’s Google Drive folder

    Start by creating a dedicated folder in your cloud storage provider (like Google Drive) for your event. Giving it a specific name (like Smith Wedding 2026 Photos) keeps it organized and ensures guests only see photos from their event.

    1. Open Google Drive and create a new folder for your event.
    2. Right-click the folder → Share → change access to “Anyone with the link can view.”
    3. Copy the shareable link — you’ll use it to generate your QR code in Step 4.

    Tip: Create a fresh folder and QR code for each event so guests only see photos from that day — not from previous sessions.

    Step 2 — Set up the IFTTT automation

    IFTTT (If This Then That) is a free automation platform that connects your apps and services. Here you’ll set it up to watch for incoming emails and automatically save any photo attachments to your Google Drive folder.

    1. Sign in at ifttt.com.
    2. Use the pre-built applet Save email attachments to Google Drive — it does exactly what you need.
    3. Click Connect and authorize both your email and Google Drive accounts when prompted.
    4. When configuring the action, set the Google Drive folder path to the event folder you created in Step 1.
    5. Save and enable the applet.
    6. Note your IFTTT trigger email address: trigger@applet.ifttt.com — this is the address you’ll enter in ZillaBooth.

    That’s the automation. Any email sent to trigger@applet.ifttt.com with a file attachment will have that attachment automatically uploaded to your specified Google Drive folder.

    Step 3 — Configure ZillaBooth’s BCC field

    1. Open ZillaBooth and navigate to your Simplified Sharing settings.
    2. In the BCC field, enter: trigger@applet.ifttt.com (or whatever your specific IFTTT trigger email address is)
    3. Save your settings.

    That’s it on the ZillaBooth side. From this point on, every time a guest completes a session and taps Share, ZillaBooth will silently BCC that email — and IFTTT will automatically deposit the photo into your Google Drive event folder.

    Step 4 — Generate and display your QR code

    1. Take the shareable Google Drive folder link you copied in Step 1.
    2. Paste it into a free QR code generator.
    3. Download the QR code image.
    4. Print it on a sign, postcard, table tent, or sticker — anywhere guests will see it near the booth.

    Suggested sign text: “Scan to get your photos! Your image will appear here within seconds of sharing.”

    Tip: Many QR code generators let you add a logo or custom colors. Drop in your event or company branding to make the sign look polished and professional.

    The guest experience

    Here’s what the flow looks like from a guest’s point of view:

    1. Guest takes photos at the ZillaBooth.
    2. Guest enters any email address at the sharing screen (their own, a placeholder, or a dummy — it doesn’t matter) and taps Share.
    3. The photo arrives in the Google Drive folder automatically via IFTTT — typically within seconds to about a minute.
    4. Guest scans the QR code posted near the booth, opens the folder on their phone, finds their photo, and saves it.

    The flow is familiar, zero-friction, and requires no app installation on the guest’s part.

    Tips and customization

    • One folder per event: Create a fresh Google Drive folder and a new QR code for each event so guests only see photos from their event — not previous ones.
    • Want it even faster? Upgrade to IFTTT Pro for near-real-time automation speeds. The free tier can have up to a 1-hour delay.
    • Not a Google Drive user? IFTTT also supports Dropbox, OneDrive, Box, and others. Swap in whatever cloud storage you already use — the ZillaBooth BCC configuration stays exactly the same.
    • Want branded QR codes? Tools like QRCode Monkey let you embed a logo and choose custom colors for a more polished look. For a streamlined, minimal QR code, we love using PEW’s Corner QR Code Generator.
    • Already use Make or Zapier? Both platforms support similar email-to-cloud-storage automations if you prefer them over IFTTT.

    A note on the sharing step

    For this flow to work, the guest does need to complete the Simplified Sharing step — entering an email and tapping Share. This is intentional: it’s the action that triggers ZillaBooth to send the BCC. In practice it takes only a few seconds, and many guests will enter their real email address anyway to receive a personal copy of their photo.

    Ready to set it up?

    Download ZillaBooth free and give your guests the effortless photo pickup experience they’ll remember.

  • The Future is Streamlined: Why ZillaBooth Wins

    The Future is Streamlined: Why ZillaBooth Wins

    This is the final piece in our three-month deep dive, and it’s time to bring everything we’ve discussed back to the bedrock principle that has defined ZillaBooth’s success since day one. We’ve covered market trends, reviewed feature comparisons, and dissected ROI metrics. But all of that data, all the competitive advantages, ultimately funnel into one single, powerful idea: a streamlined, focused photo booth experience that delivers less fiddling, more memories. This isn’t just a marketing slogan; it is the fundamental operating system for the future of event photography, and it is why ZillaBooth is pulling decisively ahead in a market clogged with over-engineered complexity.The Tyranny of the Unnecessary Feature

    Look around the photo booth landscape today. What do you see? You see a race to add more. More screens, more filters, more animation options, more confusing user interfaces, and more complicated setup procedures. The prevailing belief is that feature bloat equals value.

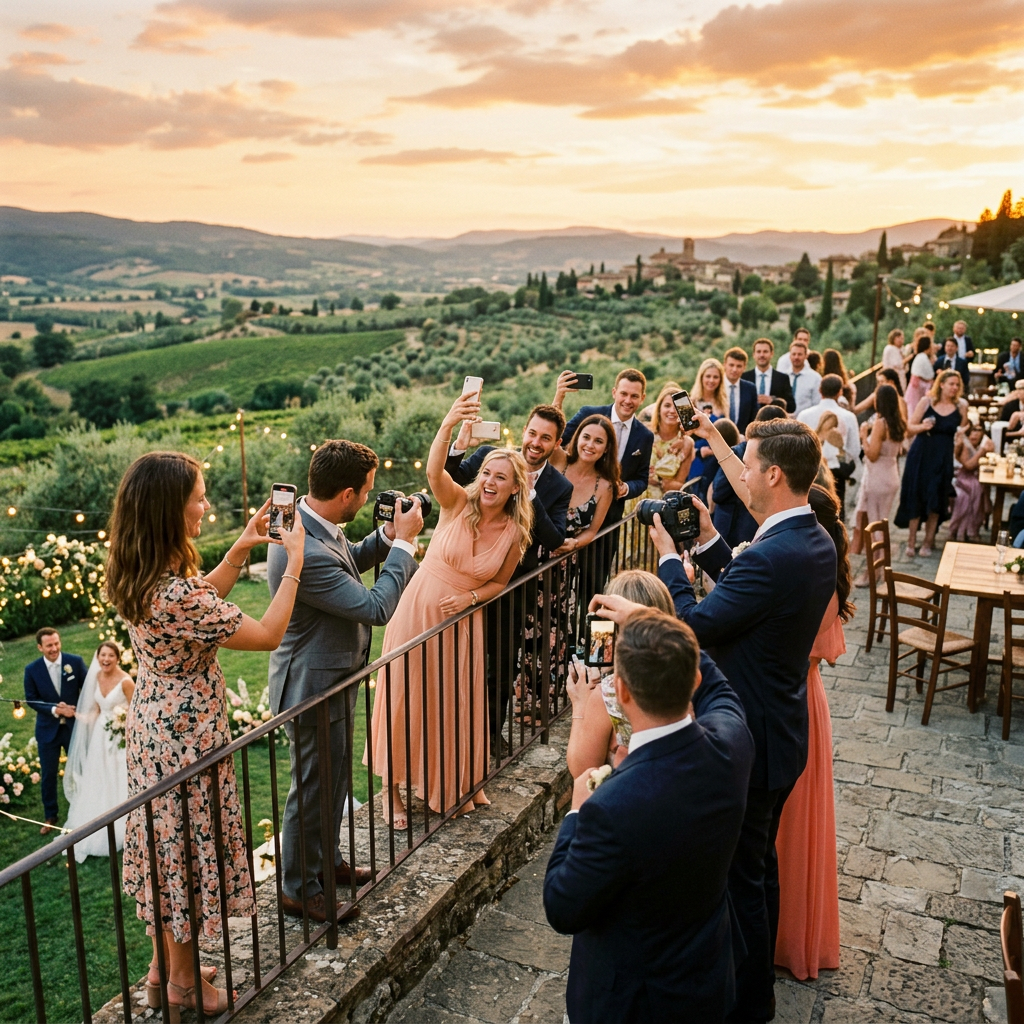
    This belief is a fundamental misunderstanding of human behavior at a high-energy event. When a guest steps up to a photo booth…at a wedding, a corporate gala, or a product launch…they are not looking for a complex editing suite. They are not looking to spend five minutes calibrating a bokeh effect or deciding between seven different sepia tones. They are looking for instant gratification, a moment of spontaneous fun, and a tangible, high-quality keepsake that encapsulates the joy of the event.

    The competitor’s model…the one that requires a guest to tap through six different menus just to start a four-photo strip…is a friction generator. Every extra button, every confusing setting, every delay in the start sequence introduces a moment of hesitation. This hesitation breaks the flow of the event, frustrates the guest, and, most importantly, pulls them out of the moment. They are no longer focused on their friends, their props, or the spontaneous energy of their pose; they are focused on operating the machine. That, in a single sentence, is the difference between a functional photo booth and a ZillaBooth.

    The operational side is just as critical. For the event professional or venue owner, complexity translates directly into operational overhead. A complicated system means more staff training, longer setup times, more potential points of failure, and more panicked calls to support because a feature that should be set once is suddenly defaulting to ‘off.’ When your business depends on rapid deployment and flawless execution, the last thing you need is a labyrinthine interface designed by engineers, not event specialists. The cost of “more features” is always paid in time, reliability, and ultimately, user frustration. The market is saturated with complicated, unreliable, and frankly, over-priced gimmicks that promise the world but only deliver confusion. ZillaBooth cuts through this noise by prioritizing the essential, proving that peak performance is achieved through purposeful constraint.ZillaBooth’s Core Philosophy: The Art of Subtraction

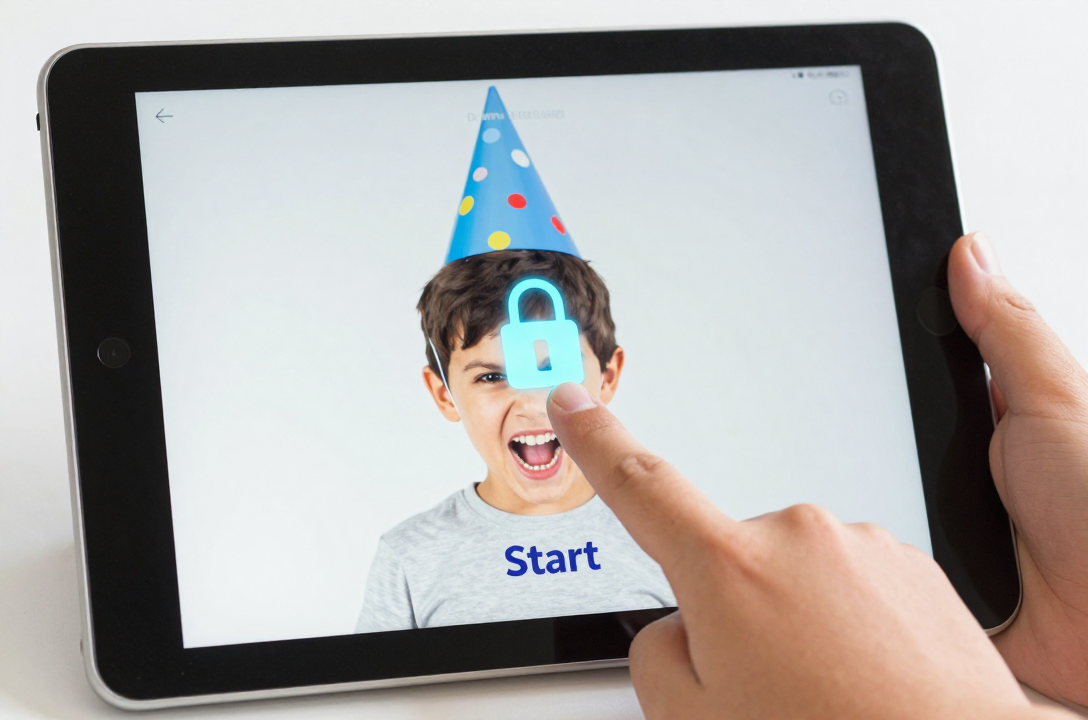
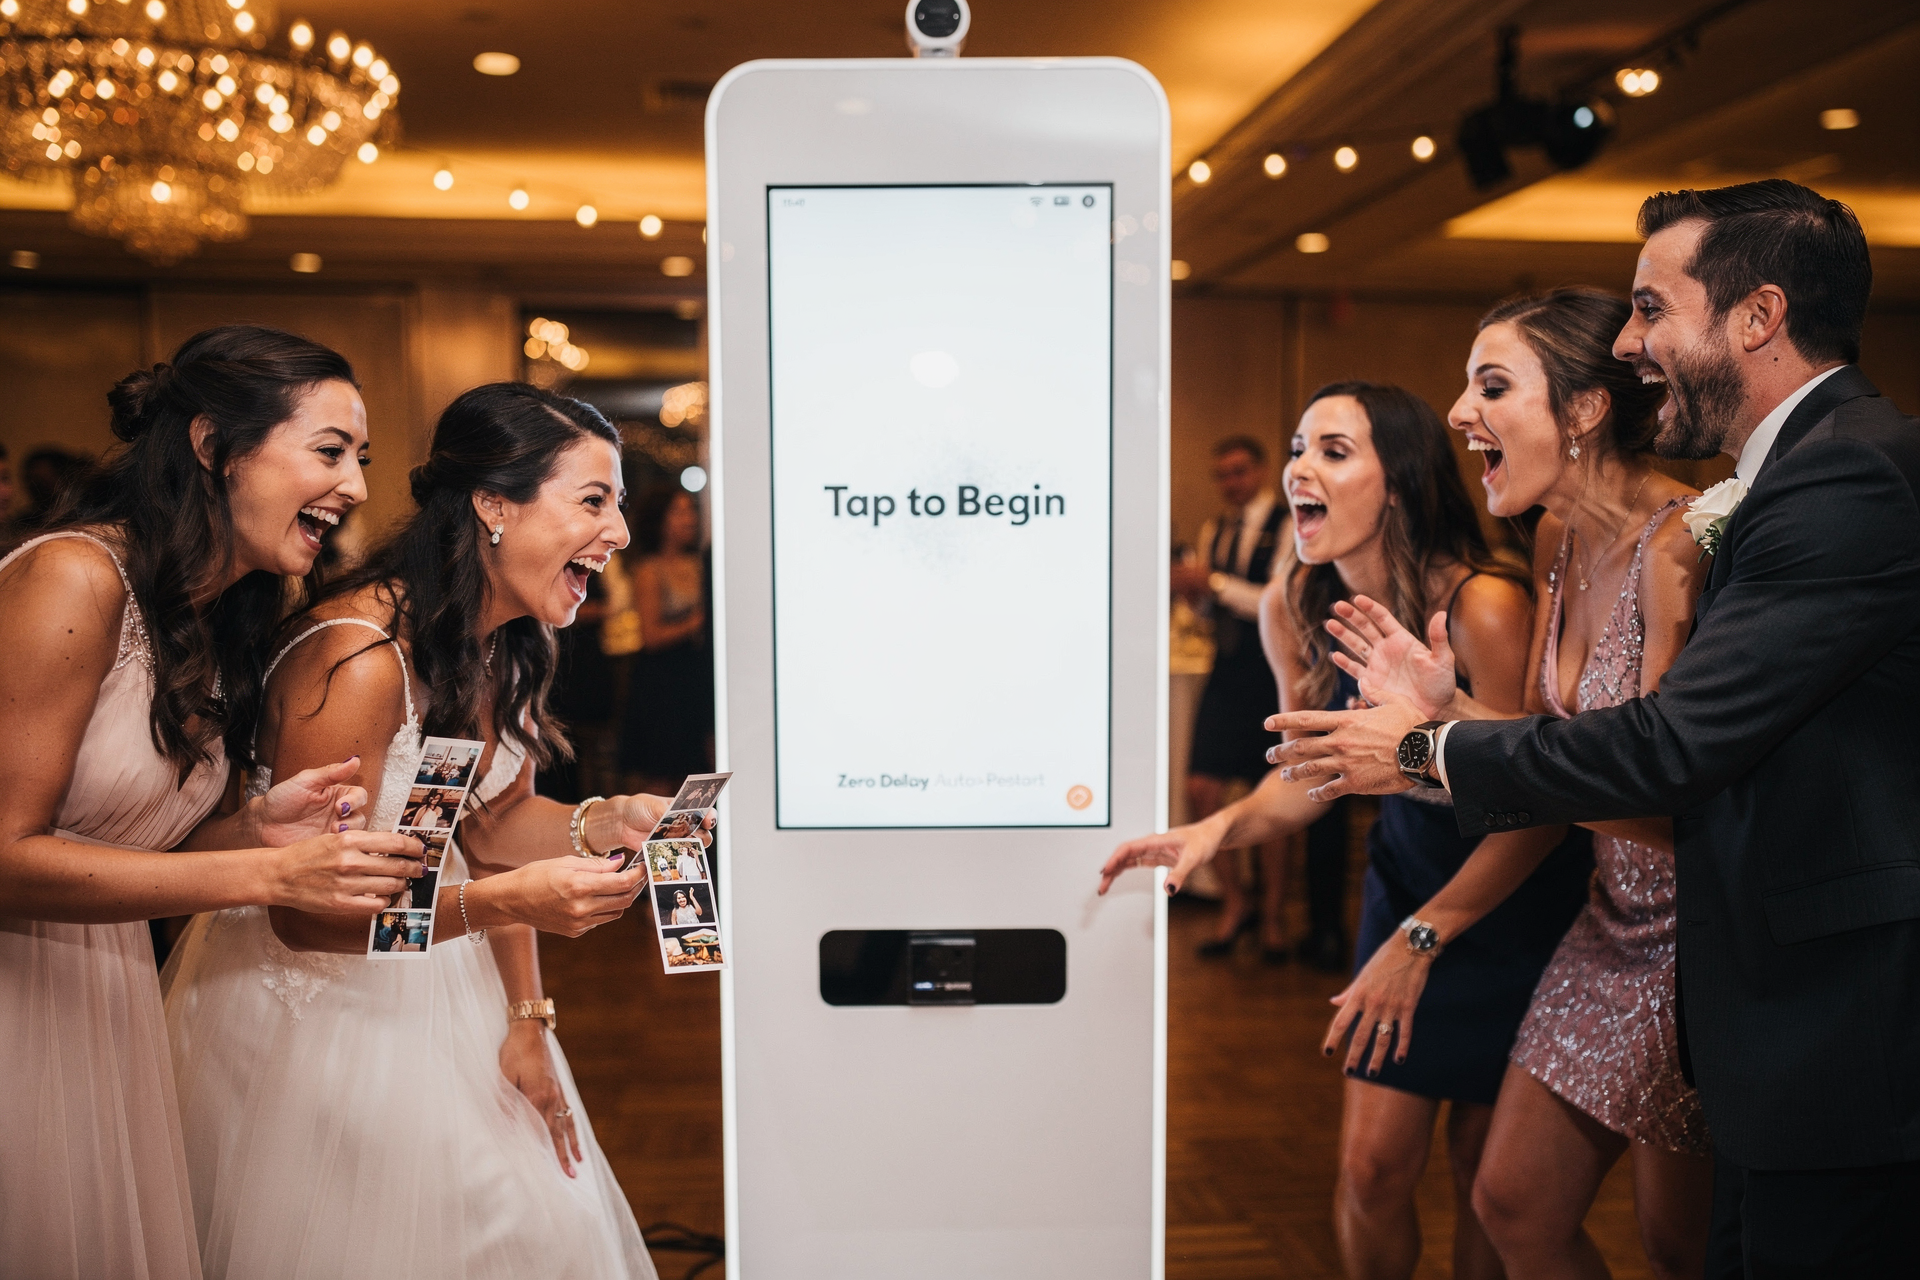
    ZillaBooth was built on a principle that runs counter to this feature-bloat trend: The most advanced technology is the technology you don’t have to think about. We adhere to an internal mantra: if a feature requires an instruction manual for a guest, it’s the wrong feature.

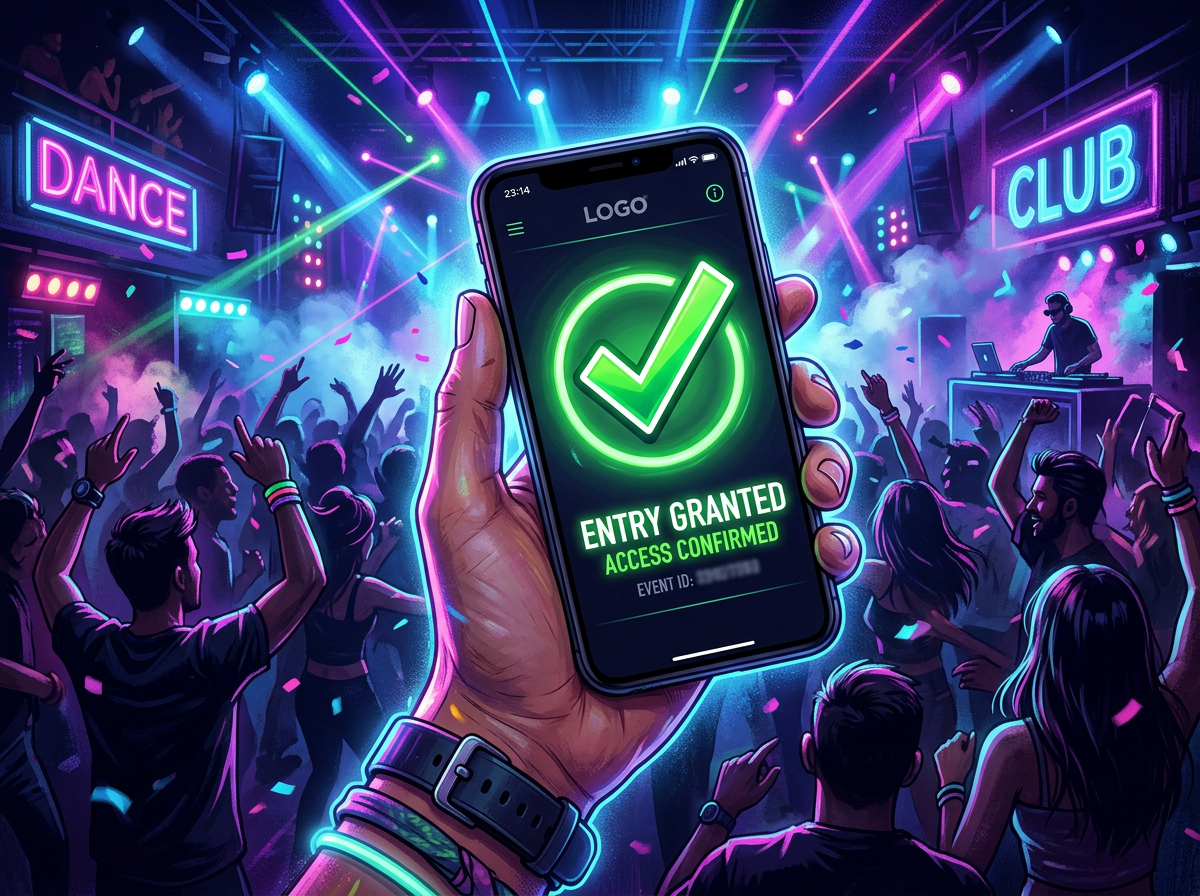
    We obsessively focus on what we call the “Three Pillars of Streamlining”:1. Zero-Friction UI: From the moment a guest approaches the screen, the path to taking a picture must be visible, intuitive, and immediate. Our interface isn’t designed to impress engineers with its depth; it’s designed to delight a tipsy wedding guest with its simplicity. One large, clearly labeled tap to start, clear visual countdowns, and a focus on the most universally popular, high-impact options only. Everything else…from file conversion to light balancing…runs automatically in the background, out of sight. The screen is a window to fun, not a control panel.

    1. Automated Professional Quality: The single greatest source of “fiddling” in other booths is the need for constant, manual camera and lighting adjustments. An operator shouldn’t have to be a professional lighting designer. ZillaBooth’s proprietary algorithm, which we’ve fine-tuned over years of event data spanning every imaginable venue type, automatically adjusts exposure, white balance, and flash power based on ambient light conditions. Whether the event is in a dimly lit cocktail lounge or a sun-drenched atrium, the system ensures a perfectly exposed, color-accurate photo strip every single time, without a single touch from the operator or the guest. This automation doesn’t just save time; it guarantees a consistent, professional result that reflects the premium ZillaBooth brand quality. It’s the equivalent of hiring an in-house photographer who never gets tired and never makes a mistake.

    2. The Fast-Track Memory Loop: The cycle from “start” to “photo delivery” is ruthlessly optimized for speed. Our internal processor is tuned for near-instant rendering of photo strips, GIFs, and videos, minimizing the wait time that can kill spontaneous energy. Quick sharing via QR code, SMS, or email is integrated seamlessly with our high-speed network components, meaning the guest receives their memory…and posts it to social media…while they are still buzzing from the experience. This rapid loop enhances the perceived value of the memory and maximizes the booth’s utility throughout the event, ensuring that every minute of rental time is used for memory creation, not for processing lag.We didn’t remove features for the sake of being minimalist. We removed complexity to enhance focus. By making the process transparent and instantaneous, we shift the entire focus of the user from the machine to the experience happening in front of the lens. The technology recedes, and the human interaction takes center stage.The Value of Focus: Capturing Authentic Memory

    The true victory of the streamlined approach is revealed in the final product: the memory itself.

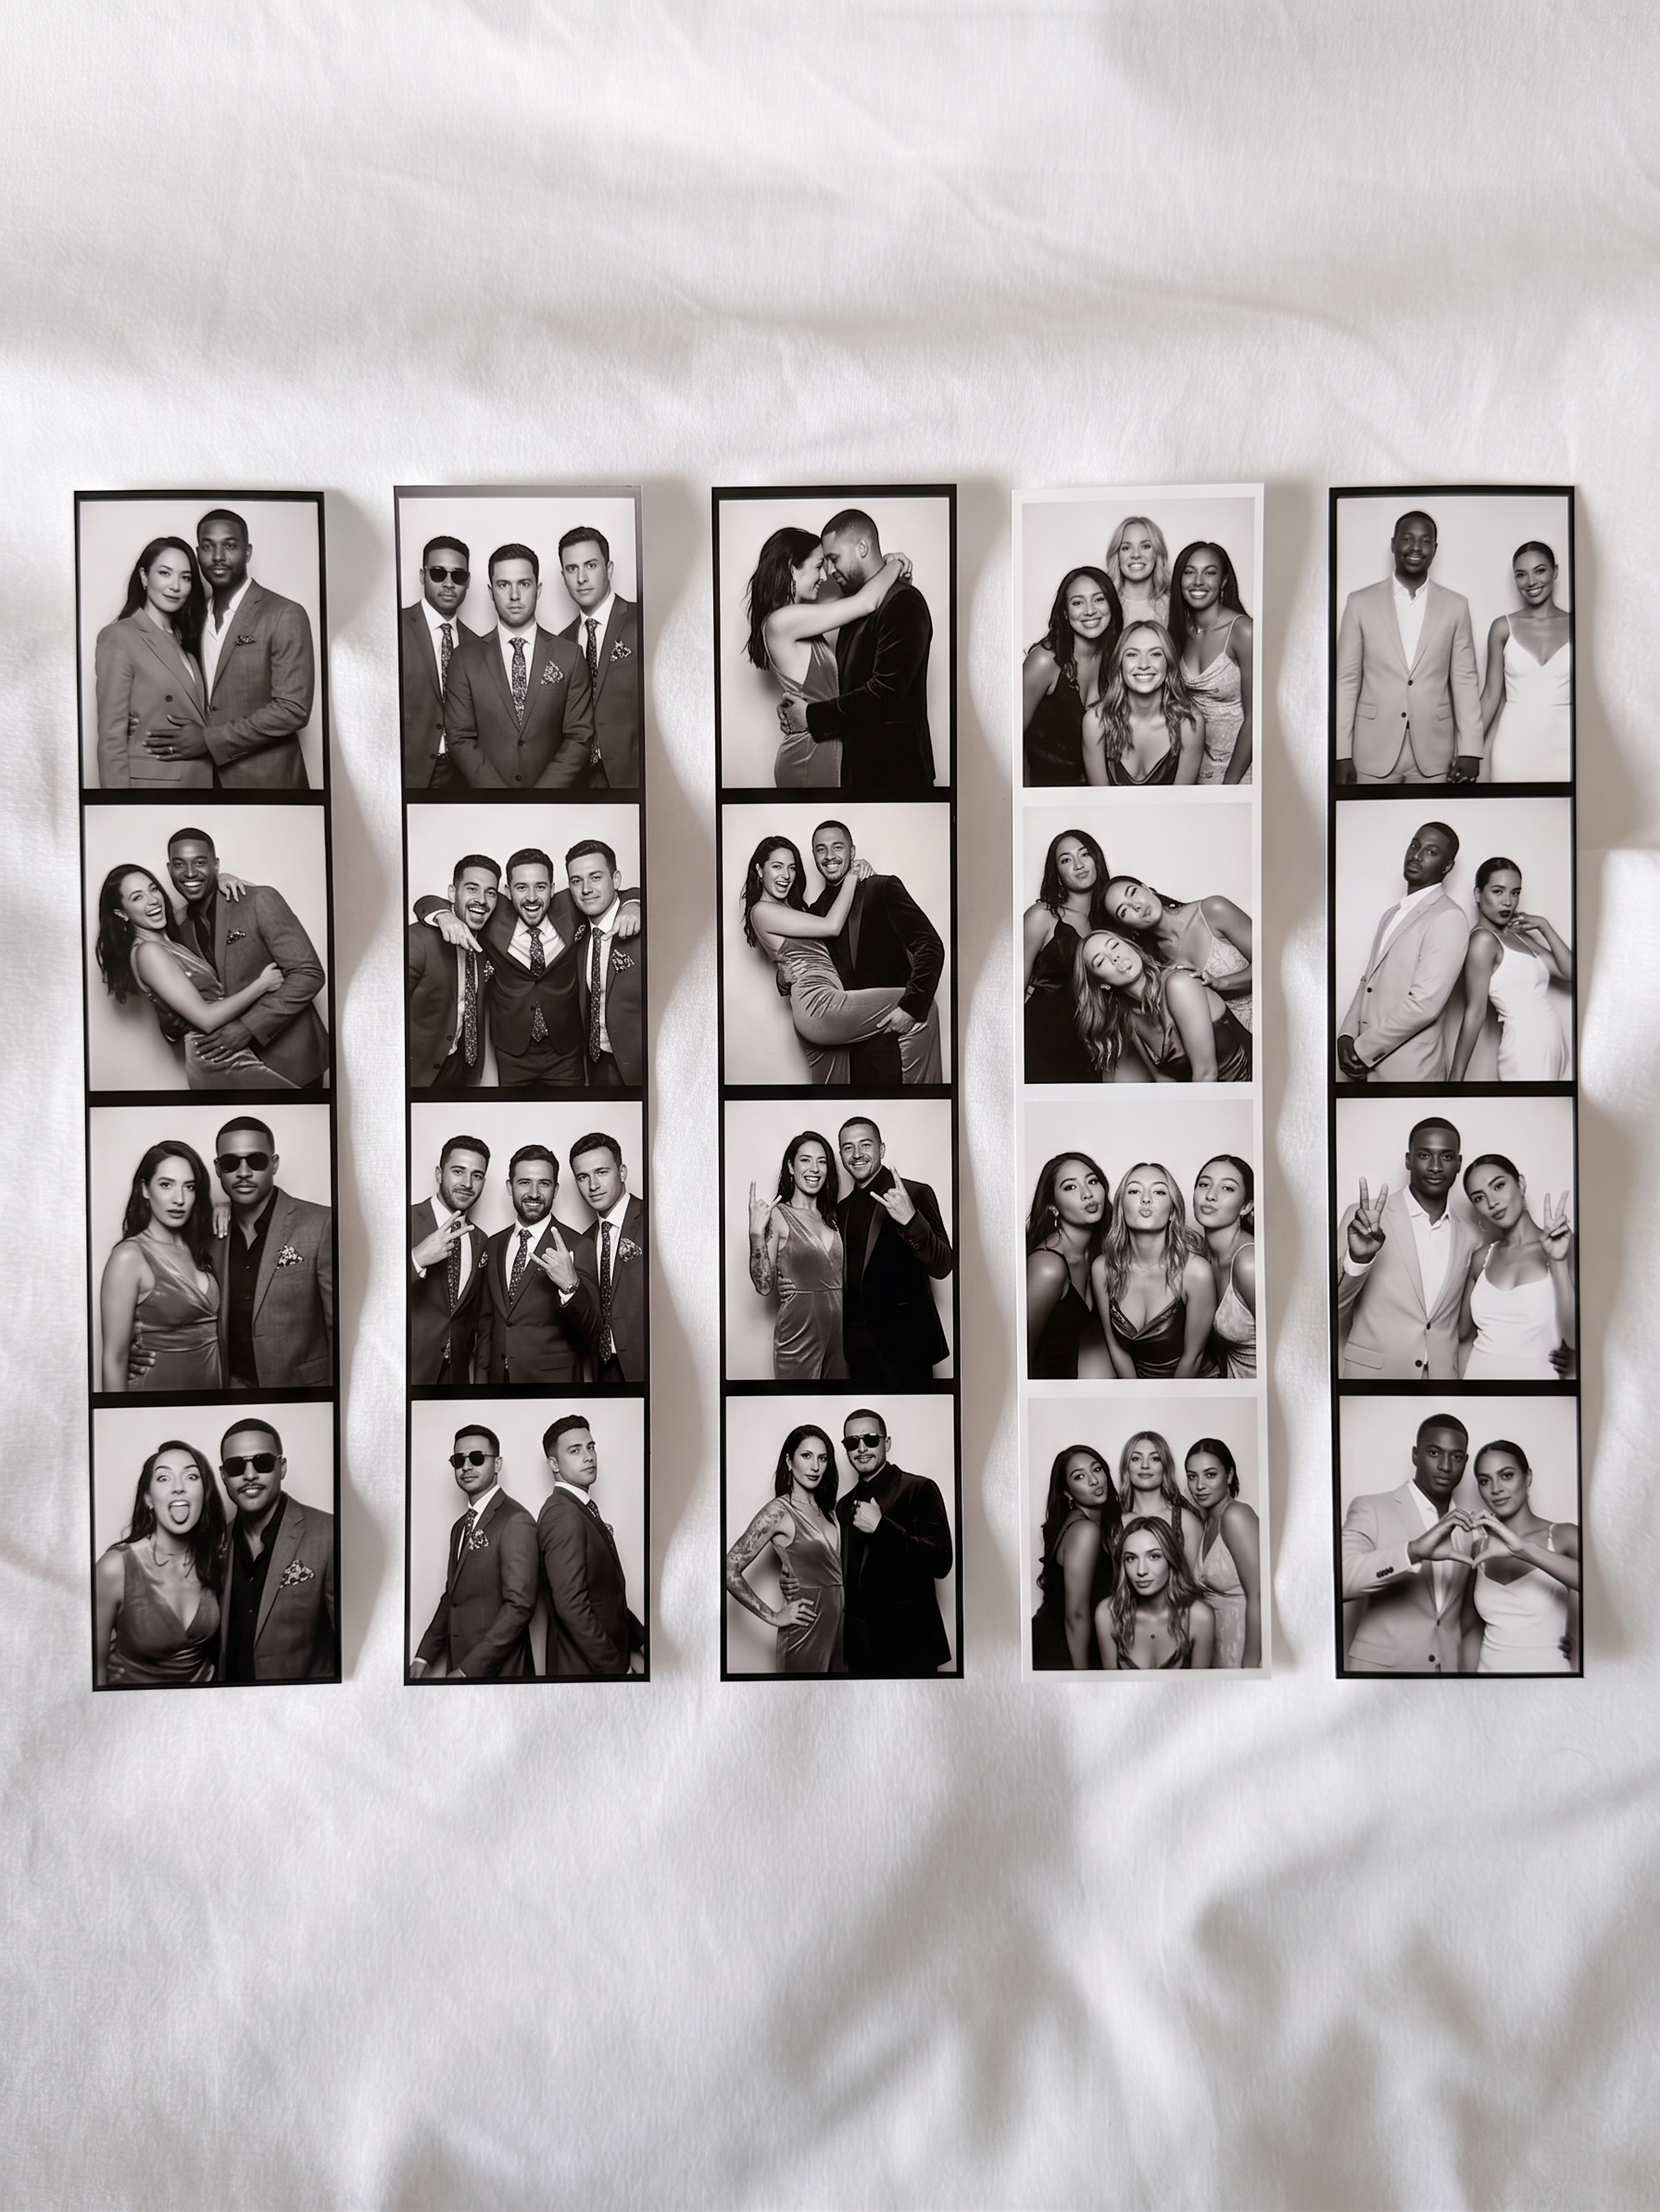
    Think about the photos that truly matter from an event. They are almost always the spontaneous ones…the moment a group bursts into laughter, the silly pose that happens organically, the unexpected embrace. These moments are fragile; they are easily lost when the energy is interrupted by a technical delay.

    When a guest has to stop and think, “Wait, which filter do I choose? Where is the button for the video loop?” their focus shifts. Their smile becomes forced, their posture stiffens, and the spontaneous joy in their eyes is replaced by a slight furrow of concentration. This is what we call the Fiddling Tax…a subtle but pervasive reduction in the authenticity of the captured moment, caused by a machine that demands attention it doesn’t deserve.

    ZillaBooth pays no Fiddling Tax. Because the process is so quick…often less than 15 seconds from touching the screen to the flash firing…the interaction feels less like operating a computer and more like being snapped by a friendly, professional photographer who knows what they are doing. The guests stay in character. They stay present. They stay silly. They get to be themselves, which is the entire point of a memory capture tool.

    This focus allows the ZillaBooth to capture memories that are more vibrant, more authentic, and ultimately, more valuable to the client and their guests. The final photo strip is not a documentation of an interaction with a machine; it is a genuine, unfiltered record of joy. In a world of over-edited, over-produced event content, ZillaBooth delivers raw, authentic happiness. We believe the highest form of technology in this space is that which maximizes the emotional authenticity of the capture. It’s about preserving human connection, not showcasing hardware.The Professional’s Advantage: ROI in Reliability and Efficiency

    For the event industry professional…the rental company, the venue manager, the corporate planner…the streamlined design of ZillaBooth is a direct accelerator of Return on Investment (ROI).

    1. Reliability is Currency: Complexity is the ultimate enemy of reliability. When there are fewer moving parts, fewer software variables, and an interface that guides the user rather than challenging them, the risk of technical failure plummets. ZillaBooth is designed for maximum uptime, a system so robust it practically runs itself. Our single-purpose, highly-optimized software stack minimizes crashes, bugs, and operator errors. For a professional whose reputation rests on flawless execution, this reliability is priceless. It means less time troubleshooting during an event, less money spent on last-minute support, and a higher client satisfaction rate, leading directly to repeat bookings and high-value referrals. You sell peace of mind as much as you sell photography.

    2. Speed and Scalability: A streamlined experience doesn’t just benefit the guest; it benefits the flow of the event and the operator’s pocketbook. An over-complicated booth can create bottlenecks, leading to long, frustrating queues. This not only annoys guests but limits the number of photo sessions the booth can complete. ZillaBooth’s rapid memory loop ensures a higher throughput of guests. A greater number of guests taking photos means the client’s investment is being maximized. Furthermore, because the setup is so simple and the operation so automated, a single ZillaBooth operator can effortlessly manage multiple units across a large venue or can train a temporary staff member in minutes, dramatically improving the scalability of the rental business. Your overhead is lower, your potential for simultaneous bookings is higher, and your training costs are minimal.

    3. Future-Proof Simplicity: Technology evolves at a breakneck pace, forcing competitors to constantly chase the latest features. This often requires costly hardware or software overhauls. ZillaBooth’s strategy is to focus on a consistently excellent core experience…the perfect photo, the perfect print…and use smart, non-intrusive software updates to layer subtle enhancements that maintain simplicity. We don’t chase every feature fad. We refine the one thing that matters most: making the process of taking a picture invisible. This protects the professional’s investment, ensuring that a ZillaBooth unit purchased today remains a premium, high-demand asset for years to come because its value is based on timeless efficiency and reliable execution, not transient novelty. Our platform is designed to be agnostic to the next big social media trend; it simply provides the best, highest-quality base asset for guests to share wherever they choose.Concluding the Series: The Unbeatable Equation

    Over the past three months, we’ve examined the market from every angle. We’ve seen that the competition, obsessed with providing everything to everyone, is actually providing an experience that is confusing, time-consuming, and ultimately compromises the authenticity of the memories captured. They focus on the machine, and the moment suffers.

    ZillaBooth, conversely, doubled down on a singular, clear vision: * Streamlined User Interface leads to Zero Friction.
    * Focused Technology leads to Automated Reliability.
    * Zero Friction + Automated Reliability delivers Less Fiddling, More Memories.This is the unbeatable equation that delivers a better experience for the user and superior ROI for the professional. We are not just selling a photo booth; we are selling the most efficient, high-fidelity memory capture device on the market. We have stripped away the complexity, not out of technological limitation, but out of a profound respect for the event moment. We want guests to look at the camera, not the interface. We want operators to manage a flawlessly running business, not troubleshoot a cumbersome machine. The future of event capture is not about adding more; it’s about perfecting the essential. And in the world of event photography, ZillaBooth’s commitment to simplicity is the ultimate sophistication. The streamlined future is here, and it’s winning. Get out of the fiddling business and into the memory-making business. Choose ZillaBooth.

  • Geotagging Your Love Story: A ZillaBooth Pro Feature

    Geotagging Your Love Story: A ZillaBooth Pro Feature

    The sun is setting. It could be dipping below the rolling, vine-covered hills of Tuscany, bathing an ancient stone villa in a deep, honey-gold light. Or, just as magically, it could be sinking behind the familiar silhouette of the old oak tree in your parents’ backyard, casting long, familiar shadows across the lawn where you played as a child. In either scene, a love story is unfolding, and whether you flew halfway around the world or simply stepped out your back door, the setting itself is a silent, vital character in the narrative of your wedding day.

    For years, the wedding industry chased a certain kind of perfection…a polished, Pinterest-ready aesthetic that was often beautiful but occasionally lacked a deep sense of place. But the trend has shifted profoundly. Today, couples are obsessively focused on meaning. They aren’t just choosing a venue; they are choosing a location with a story, a sense of soul, and an identity that is meant to be woven into the fabric of their marriage. Destination weddings…from intimate elopements on remote cliffsides to grand, multi-day affairs in European capitals…have surged, but so too has the intentional, highly personalized ‘home’ wedding, staged on family property, in a favorite park, or at a meaningful local landmark.

    The problem with this new focus on location, however, is that once the final photo is taken and the last guest has departed, the digital evidence of that meaningful setting often dissolves into a vast, flat sprawl of files. Your photographer delivers thousands of images, your videographer sends terabytes of footage, and your guests, via a shared album, contribute hundreds of snapshots. You have a huge, beautiful collection, but the fundamental context…where exactly that beautiful, spontaneous moment occurred…is lost. Was that hilarious speech delivered next to the fountain overlooking the Adriatic, or was it given in the glow of the string lights under the old walnut tree? Digital files are stripped of their emotional geography, leaving you with an inventory of moments, but a fragmented map of the experience.

    This is where the magic of ZillaBooth Pro’s advanced Geotagging feature turns your digital memories from a simple gallery into an interactive, spatial memoir.ZillaBooth Pro’s Geotagging: The GPS of Your Soul

    ZillaBooth Pro is an indispensable tool for the modern wedding, allowing you to capture spontaneous, high-quality, and deeply personalized content from your guests without the awkwardness of a traditional, physical photo booth. But its most powerful feature for location-conscious couples is its seamless, hyper-accurate Geotagging technology.

    In simple terms, Geotagging is the automatic process of adding precise geographical identification metadata…latitude and longitude coordinates…to every single piece of content captured through the ZillaBooth Pro app. This includes every silly photo, every heartfelt guest video message, every slow-motion boomerang, and every stunning 360-degree clip.

    Unlike the generic geotags you see on social media, which often only register the name of the broad venue (e.g., “Villa Pienza”), ZillaBooth Pro utilizes your phone’s internal GPS with high granularity. This means it records the exact coordinate of the guest at the moment they hit the shutter or record button. The result is a memory bank that is organized, not just by time, but by space. When your final ZillaBooth Pro memory package is delivered, it’s not just a folder of files; it’s a living, breathing, interactive map of your wedding.Destination Memoir: Mapping the Multilingual Journey

    Consider the dream destination wedding in Tuscany. The celebration may span three days and multiple locations: the intimate rehearsal dinner in a medieval cellar on Thursday, the cliffside ceremony overlooking the Val d’Orcia on Friday, and the grand reception at the villa pool on Saturday.

    In a standard digital album, all these files would be sorted by date, but the distinct flavor of each setting would blend together. With ZillaBooth Pro Geotagging, your memory review becomes a journey: * The Proposal Spot Pin: Before the main event, you and your partner sneak back to the exact spot where he or she proposed…a tiny, overgrown chapel perhaps. You record a short, reflective video message together in the app. That memory is instantly pinned to those exact coordinates on your master map.
    * The Ceremony Overlook: The actual ceremony takes place at a specific, breathtaking overlook 500 meters from the villa. Guests capture their initial gasp of the view, close-up shots of the rings, and the tearful reactions to your vows. By clicking the pin labeled “Ceremony Site” on your ZillaBooth Pro map, you instantly filter all content to only the memories created in that sacred, fifteen-square-meter area.
    * The Aperitivo Corner: Later, during cocktail hour, one of your aunts is seen on a guest video message offering unsolicited, hilarious marriage advice. This memory is pinned, not just to the villa, but specifically to the corner of the terrace by the old olive tree where the Aperol Spritz bar was set up. Years later, you can click that exact spot and relive that perfectly timed moment, complete with the clink of glasses and the sound of Italian chatter from the street below.Geotagging in a destination setting is the ultimate organizational tool. It turns a vast, beautiful collection of moments into a chronological, geographical itinerary, allowing you to navigate your memories with the same intentionality you used to plan the trip itself. It ensures that the unique character of every stop on your wedding journey is permanently preserved and instantly retrievable.Local Legend: Elevating the Backyard to a Landmark

    But the true genius of Geotagging isn’t just for exotic locations…it’s for making familiar locations feel just as sacred and special. For the couple who chooses to host their wedding in the beloved, meaningful space of a family backyard, Geotagging is the tool that transforms a beloved piece of property into a living, breathing landmark of their union.

    A backyard wedding, while deeply personal, can be spatially confusing in retrospect. Every moment happens within a hundred-foot radius. The kitchen is the dressing room, the lawn is the dance floor, and the gazebo is the altar. Geotagging creates precise, memory-laden zones: * The Vows Pin: Your vows were exchanged beneath the old, enormous maple tree. Geotagging ensures that every photo or video taken of that sacred moment is grouped not under “Backyard,” but under “Maple Tree Altar – Vows.”
    * The Dessert Bar Pin: You spent weeks perfecting a stunning dessert bar, and your cousin took a video describing the full array of treats. That message isn’t lost in the general reception footage; it’s pinned precisely to the coordinates of the picnic table that held the cakes.
    * The Dance Floor Zone: ZillaBooth Pro can even create a virtual fence, or ‘geofence,’ around the dance floor area. By filtering the master map for this zone, you can instantly pull up every single photo, video, and GIF of your guests letting loose, effectively creating a “Best of the Dance Party” reel with a single click.For a local wedding, Geotagging transforms proximity into specificity. It acknowledges the emotional reality that the spot where you said ‘I do’ is fundamentally different from the spot where you cut the cake, even if they are only thirty feet apart. The feature acts like a professional archivist, differentiating and cataloging every micro-location to honor the specific memory created there, making the familiar feel uniquely profound.More Than Photos: The Spatialization of Sentiment

    ZillaBooth Pro’s Geotagging extends far beyond standard photography, adding unparalleled depth to other forms of memory capture:1. Geotagged Video Messages: The most valuable content captured by the app are often the spontaneous, heartfelt video messages from guests. With Geotagging, you don’t just get the message; you get the location. This can add subtle, beautiful context. Perhaps your grandmother recorded her message from a quiet bench on the edge of the property, providing a moment of calm reflection that is now permanently linked to that spot.
    2. Mapping Speeches: Even formal elements like speeches, which can sometimes be hard to locate in hours of video, become instantly accessible. Was your sister’s tear-jerking toast delivered from the veranda? Click the “Veranda” pin and jump straight to the exact moment.
    3. Future Proofing: By permanently embedding the exact location into the file metadata, you are future-proofing your memories. Ten, twenty, or thirty years from now, you will not rely on memory or cryptic filenames to recall the setting. The location data is part of the file itself, a timeless, unerasable link between the moment and the geography.In a world drowning in digital clutter, ZillaBooth Pro’s Geotagging is an anchor. It connects the fleeting, joyous chaos of your wedding day back to the fundamental constant of place. It transforms your collection of files into a deeply meaningful, navigable memory experience…a digital map of your love story. Whether your journey began in a sun-drenched Italian olive grove or under the comfortable shade of the backyard oak, this feature ensures that the unique geography of your celebration is never lost, allowing you to relive every single cherished moment exactly where it happened. It’s the difference between looking at a photograph of a castle and standing right where you stood when the photograph was taken. It’s the ultimate way to honor the most meaningful location in your life: the place where you officially became a family.

  • The SMTP Advantage: Why Custom Domains Matter

    The SMTP Advantage: Why Custom Domains Matter

    In the dynamic world of experiential marketing and event management, every single touchpoint matters. From the lighting and décor to the seamless flow of the guest experience, details dictate success. Yet, one critical…and often overlooked…element can silently undermine your brand’s polish and professionalism: the email address used to deliver those precious event memories.

    Imagine your guests, still buzzing from your spectacular event, receiving the photos they took in the ZillaBooth Party photo booth. They look down at their phone and see the email is from “photodelivery@genericboothservice.net” or, worse, something ending in “@gmail.com.” That instantaneous disconnect…that moment of recognizing an external, third-party service…is a missed opportunity.

    Now, imagine the alternative: the email lands in their inbox, boldly addressed from “events@yourbrand.com.” It’s seamless. It’s authoritative. It’s professional. This transformation is powered by the ability to utilize Custom SMTP (Simple Mail Transfer Protocol), a feature that ZillaBooth Party offers to elevate your entire post-event experience from functional to fundamentally branded.

    What is SMTP and Why Do You Need Custom Control?

    At its most basic, SMTP is the industry-standard protocol used for sending emails over the internet. When you use a software service like a photo booth platform to automatically email photos, that service typically relies on its own internal email infrastructure to send the message. This works, but it ties the delivery to their domain. This is why the sender address often looks generic or includes the service’s name in a less-than-ideal format.

    Custom SMTP changes the game. It allows you to configure the ZillaBooth Party system to send emails through your own dedicated email server (your brand’s domain). Instead of borrowing a generic mailbox, you are plugging the software directly into your professional communications pipeline. This single technical configuration is the foundation for all the powerful branding and deliverability advantages that follow.

    The Events@YourBrand.com Difference: Branding and Trust

    The aesthetic and psychological value of sending from “events@yourbrand.com” cannot be overstated.1. Reinforced Brand Identity: Your email address is a digital signature. Using your custom domain reinforces your brand identity in the guest’s inbox, where a professional marketing message belongs. It tells the recipient, “This memory is coming directly from the people who hosted this exceptional experience.” It removes the intermediary and strengthens the direct relationship between the guest and your brand.

    1. Instant Authority and Professionalism: An email from a custom domain immediately conveys legitimacy. It suggests an established, professional entity that has taken the time and resources to own its digital presence. A generic or free email address, on the other hand, can create a subconscious sense of amateurism or uncertainty, especially with automated content. When guests see your brand’s domain, they trust the content inside immediately, enhancing the perceived quality of the entire event.

    2. Seamless Customer Journey: Event photos are a powerful post-event asset…they are content that guests want and will open. This makes them a perfect vehicle for the next step in the customer journey. When the delivery email is from your brand, it makes it easier for guests to save the address, recognize future communications, and seamlessly click-through to your website or a follow-up campaign.Boosting Deliverability: Avoiding the Spam Folder

    Beyond the aesthetic benefits, Custom SMTP is a crucial technical component for maximizing email deliverability. A photo booth service might send hundreds or thousands of photos from a single event. Internet Service Providers (ISPs) like Gmail and Outlook are constantly scrutinizing sender reputation to filter out spam.

    Generic, high-volume sending addresses are more likely to be flagged or throttled. However, when you use a custom domain that is properly authenticated (via DNS records like SPF and DKIM, which are necessary for Custom SMTP setup), you are leveraging your brand’s existing, established sender reputation. * Authentication: Custom SMTP allows you to authenticate your sending domain, essentially proving to email providers that you are who you claim to be. This drastically lowers the chances of your valuable photos…and your brand’s message…ending up in the spam or junk folder.
    * Reputation Control: When you send through a shared, generic service, your sending reputation is tied to every other client using that service. If another user abuses it or has poor practices, your deliverability suffers. With Custom SMTP, your reputation is isolated and entirely under your control.Seamless Integration with ZillaBooth Party

    The technical barrier to setting up Custom SMTP is minimal, especially with a professional platform like ZillaBooth Party. The process involves a simple configuration with your email service provider (like Google Workspace, SendGrid, or Microsoft 365) to receive the necessary credentials (server address, port, and authentication details). Once entered into the ZillaBooth settings, every photo email instantly transforms.

    The investment is not just in a technical feature; it is an investment in brand consistency and long-term customer relationships. By taking ownership of the final, crucial step of photo delivery, you ensure that the high level of professionalism you demonstrated at the physical event is perfectly mirrored in the digital experience.

    Don’t let the final impression of your meticulously planned event be delivered by a generic, third-party email address. Utilize the SMTP advantage. Transform your photo delivery from a simple utility into an essential, branded, and professional touchpoint that drives deeper engagement and lasting trust.

  • The “Confirmation Animation”: Why Feedback Matters

    The “Confirmation Animation”: Why Feedback Matters

    The Silent Promise: Why Visual Feedback is Non-Negotiable in High-Energy, Low-Signal Environments

    In the world of user experience (UX) design, the goal is always clarity. An interface should speak fluently to its user, guiding them seamlessly through tasks. But what happens when that ‘voice’ is completely drowned out? This is the central design dilemma faced by apps operating in high-energy, high-noise settings…the concert hall, the sports arena, and perhaps most acutely, the nightclub or party venue.

    For ZillaBooth Party, an app designed to facilitate everything from queueing up a photo booth session to pre-ordering a drink from a busy bar, the environment itself is the primary antagonist to good UX. When the bass is vibrating through your body, the lights are strobing, and a hundred conversations are dissolving into white noise, the traditional pillars of app feedback…auditory cues, subtle visual changes, and even haptic vibrations…all but vanish. In this sensory overload zone, a simple tap on a button becomes an act of faith. The user taps ‘Confirm’ and is left with one anxious question: Did it work?

    The answer to this profound design challenge lies in a dedicated visual solution: the Confirmation Animation. It is a carefully engineered, non-verbal declaration of success…an unmistakable, full-screen moment designed to cut through the chaos and instantly deliver peace of mind.

    The Noise Floor: Why Traditional Cues Fail

    To appreciate the necessity of a dedicated confirmation animation, we must first analyze the sensory landscape of a club or a high-volume party. This environment dictates a complete re-evaluation of standard UX best practices.1. Auditory Bankruptcy: In a quiet setting, a simple ‘ding’ or ‘chime’ is an elegant sign of success. In a club where sound levels routinely exceed 90 decibels, the application’s sound feedback is not just missed; it is literally impossible to hear. The user may be wearing earplugs, or the phone speaker may be covered by a hand or jacket pocket. Relying on sound in this environment is a failure of design from the start.

    1. Haptic Ambiguity: Many designers turn to vibration as a silent communicator. While effective in a pocket or on a table in a quiet room, a phone’s vibration is easily lost in a loud environment. The low-frequency bass waves already cause subtle vibrations in the user’s hand and clothing. The tiny, localized pulse of a phone’s motor gets drowned out by the broader, systemic vibration of the music. Furthermore, a simple vibration is binary: it only communicates something happened, not what happened. Was that a confirmation, or just a new text message? The ambiguity is high.

    2. Subtle Visuals Are Invisible: Standard web and app design often uses subtle cues for success: a button fading from blue to green, a small checkmark appearing next to a list item, or a toast notification sliding in from the bottom. In the low, uneven light of a club…where the phone screen itself is a primary light source…the user’s eye is already fatigued and distracted. A small, corner-of-the-screen notification is simply not visible or registered in the user’s peripheral vision. The design must be bold, central, and impossible to overlook.Engineering Peace of Mind: Principles of the Confirmation Animation

    The ZillaBooth Party Confirmation Animation is thus not a mere embellishment; it is a critical functional element born from the necessity of its environment. It must adhere to a specific set of principles to be effective: * Maximum Contrast and Color Saturation: The animation must utilize colors that punch through a dark interface. This often means bright, high-value colors like electric green, radiant yellow, or pure white. Crucially, the animation should momentarily invert the color scheme, perhaps flashing from the app’s dark-mode background to a screen-filling burst of light, momentarily giving the user’s eyes an unmissable visual shock. This is the visual equivalent of shouting ‘YES!’
    * Full-Screen or Dominant Screen Real Estate: The animation must occupy the vast majority of the screen, if not the entire screen, for its duration. This prevents the user’s attention from drifting to other UI elements or the distracting environment. A large, simple icon…like an oversized, dynamic checkmark or a stylized, expanding ‘Success’ ring…is more effective than detailed text, which may require focused reading.
    * Purposeful, Unmistakable Motion: The movement itself must communicate finality. A quick, energetic motion that resolves into a static success state (e.g., a burst of particles that coalesces into a solid green checkmark) works better than a continuous loop or a subtle glow. The motion should clearly signal an event closure.
    * Strategic Duration: The animation must be slow enough to be fully processed but fast enough not to feel like a delay. A sweet spot often falls between 800 and 1200 milliseconds. This short window is long enough for the user to lift their gaze from the button, register the full-screen visual event, and consciously acknowledge the action’s success, all while maintaining the flow of their social activity.
    * Haptic Reinforcement (The Secondary Cue): While the visual is primary, the animation must be perfectly synchronized with a single, strong, unique haptic pulse. This pulse is not for primary communication, but for multi-sensory reinforcement. When the user sees the green flash and feels the strong, singular thud, the brain registers the confirmation with greater certainty.The Critical UX Benefit: Preventing Errors and Reducing Cognitive Load

    The payoff for engineering such a dramatic visual is enormous, extending far beyond simple aesthetics. In a high-pressure environment like a busy nightclub, the Confirmation Animation directly addresses the two greatest causes of user error:1. The Double-Tap Problem: The single most common failure state in any low-feedback environment is the “double-tap” or “triple-tap.” A user taps ‘Order,’ sees no immediate change, assumes the app failed, and taps again. In the context of ZillaBooth Party, this could mean: * System Strain: The app is now processing two identical photo booth orders, taxing the system unnecessarily.
    * Monetary Loss: The user is charged for two drinks or two photo strips when they only wanted one. The subsequent need for a refund or correction ruins the entire user experience.
    The instantaneous, unambiguous visual confirmation eliminates the doubt that leads to the double-tap, saving the user money and preventing system errors.2. Anxiety and Trust Erosion: Uncertainty breeds anxiety. When a user spends money or queues up a shared resource (like a photo booth slot), they need immediate reassurance. Did my payment go through? Is my photo slot saved? A lack of confirmation forces the user to divert cognitive resources…checking their bank balance, asking a friend, or worrying…instead of enjoying the event. The Confirmation Animation is a moment of total psychological release. It says, “Success confirmed, go back to having fun.” This builds profound trust in the ZillaBooth brand, transforming a stressful interaction into a reliable utility.The ZillaBooth Scenario: A Walkthrough

    Consider a user, Sarah, standing in a crowded bar area within the venue. She wants to use ZillaBooth Party to pre-order a round of drinks before joining her friends at the photo booth. * Action: Sarah quickly selects her items and taps the ‘Pay Now’ button.
    * The Wait (The Hidden Danger): The app takes 500ms to communicate with the payment server. In a quiet room, a subtle loading spinner would suffice. Here, the spinner is tiny and ignored. Sarah’s finger hovers over the button. Doubt begins to set in.
    * The Confirmation Animation Firework: Just as Sarah is about to tap the button again, the app receives success confirmation. Immediately, the entire screen goes momentarily white-hot, overlaid with a massive, stylized, emerald-green checkmark that dynamically draws itself out with a fast, satisfying swoop. A strong, synchronized haptic buzz is delivered.
    * Outcome: Sarah registers the full-screen event instantly. The clarity is total. The feeling is not just success, but relief. She lowers her phone, confidently walks to the pickup point, and avoids a costly double-order.Conclusion

    The design of the Confirmation Animation in ZillaBooth Party is a perfect illustration of how effective UX must adapt to its environment. It is a bold, almost aggressive design choice…a purposeful over-communication…that directly counters the sensory chaos of the club. By maximizing contrast, screen space, and motion, and by minimizing ambiguity, the animation transforms a high-risk transaction into a moment of pure, silent certainty. In the loudest, darkest, most chaotic settings, the Confirmation Animation is ZillaBooth Party’s silent promise to the user: Your action was successful. Go enjoy the party. It proves that in UX, sometimes the most crucial communications are the ones that are seen, not heard. This foundational design choice is what separates an app that merely functions from one that truly elevates the high-energy social experience.

  • AirPrint Mastery: Wireless Printing Troubleshooting

    AirPrint Mastery: Wireless Printing Troubleshooting

    AirPrint, Apple’s proprietary wireless printing technology, is designed to be the definition of effortless technology. The promise is simple: press print on your iPhone, iPad, or Mac, and the job is automatically routed to a compatible printer on your local network…no drivers, no setup, and no messy wires. This functionality, often referred to as “Auto-Print,” works flawlessly for millions of users. But when it fails…when the printer mysteriously vanishes from the selection menu or when the “Auto-Print” function simply stalls…it transforms from a convenience into a major frustration. This comprehensive technical guide is for the user who is tired of the inconsistency. We’ll move past the basics of “is the printer on?” and dive deep into the network layer, where 90% of AirPrint problems truly reside, to ensure your wireless printing is reliable, consistently visible, and executes flawlessly every single time.

    THE AIRPRINT ARCHITECTURE: WHAT’S GOING WRONG?

    To troubleshoot AirPrint effectively, you must first understand how it works. AirPrint does not use a typical networking protocol. Instead, it relies on Apple’s implementation of Bonjour (also known as mDNS, or multicast DNS).

    Bonjour is a zero-configuration networking protocol that allows devices to automatically discover services on a local area network (LAN). Your iPhone doesn’t search for the printer’s IP address; it broadcasts a request that says, “Is there an AirPrint service available?” and your printer responds, “Yes, I am here.”

    When AirPrint fails, the service is almost never the problem. The issue is almost always that the Bonjour signal is being blocked, dropped, or delayed somewhere between your device and the printer, almost always within your Wi-Fi router’s configuration. This guide focuses primarily on fixing these underlying network communication faults.

    PHASE 1: THE ESSENTIAL QUICK-FIX CHECKLIST

    Before diving into advanced networking, ensure these four fundamentals are met. These resolve about 50% of all AirPrint issues.1. THE POWER CYCLE TRIAD: The simple act of turning things off and on often clears temporary IP or Bonjour cache conflicts. Do this in sequence:

      - Turn off the printer, unplug it for 60 seconds, and plug it back in.<br />
      - Restart your main Wi-Fi router.<br />
      - Restart your iOS device or Mac.
    
    1. SOFTWARE AND FIRMWARE SYNCHRONIZATION: AirPrint is constantly updated via iOS/macOS releases. Your printer also runs firmware that supports the protocol.
      • Ensure your iPhone/iPad/Mac is running the latest OS version.
      • Check your printer manufacturer’s website or the printer’s settings menu for the latest firmware update. This is critical, as older firmware versions often have buggy mDNS implementations.
    2. NETWORK CONFIRMATION: The single most common user error is device separation.
      • Your printing device (iPhone) and your printer must be connected to the exact same Wi-Fi network (SSID). If your house has “HomeNetwork” and “HomeNetwork-Guest,” connecting to different ones will fail the Bonjour discovery.
    3. CHECK THE PRINTER’S STATUS: Ensure the printer is not stuck in a low-power “deep sleep” mode. While some printers advertise that they “wake for AirPrint,” this function can be unreliable. Disable any power-saving modes that aggressively shut down the Wi-Fi card. A printer that takes two minutes to wake up is a printer that AirPrint will time out on.PHASE 2: NETWORK DEEP DIVE (THE AUTO-PRINT KILLERS)

    This is where we address the most persistent and frustrating AirPrint failures. Access your router’s settings (usually via a web browser and an IP address like 192.168.1.1).1. WI-FI BAND ISOLATION (2.4GHz vs 5GHz)
    Many modern routers use “band steering,” where they consolidate the 2.4GHz and 5GHz networks into a single SSID. While convenient, this is often an AirPrint killer.

      - Problem: Bonjour (mDNS) is a multicast protocol. Some routers struggle to properly bridge mDNS packets between the 2.4GHz band (which printers often prefer for range) and the 5GHz band (which phones often prefer for speed).<br />
      - Solution: Log into your router and *split* the bands. Give them two distinct names (e.g., "MyNetwork-2.4GHz" and "MyNetwork-5GHz"). Connect your printer to the 2.4GHz network. Connect your printing device (iPhone/Mac) to the *same* 2.4GHz network. This ensures all traffic is within the same band, maximizing Bonjour reliability.
    
    1. ACCESS POINT (AP) ISOLATION AND GUEST NETWORKS
      This is the most frequent cause of “printer not found” errors.

      • Problem: Router security features like AP Isolation (sometimes called Client Isolation) or Guest Network Mode prevent devices connected to the Wi-Fi network from seeing each other. This is great for security but completely blocks Bonjour discovery.
      • Solution: Ensure AP Isolation is disabled on your main network. Never connect your printer to a dedicated “Guest Network,” as these are designed to prevent device-to-device communication.
    2. FIREWALL AND MULTICAST CONTROL
      Your router’s internal firewall may be aggressively blocking multicast traffic.

      • Problem: Bonjour/mDNS uses UDP port 5353. If your router has a configurable internal firewall or a setting called “Multicast Control” or “IGMP Snooping,” it might be restricting this traffic. IGMP Snooping, in particular, is meant to reduce network chatter but often overzealously filters Bonjour packets.
      • Solution: Look for a setting in your router’s Wireless or Advanced Networking section labeled “IGMP Snooping” or “mDNS Relay.” If found, try disabling IGMP Snooping. If your router has an “mDNS Relay” feature, ensure it is enabled to properly pass traffic between different network segments or bands.
    3. PRINTER IP ADDRESS MANAGEMENT (DHCP RESERVATION)
      An inconsistent IP address can cause an “Auto-Print” failure after a week of working fine.

      • Problem: Every time your printer restarts, your router’s DHCP service gives it a new IP address. Your iPhone may have an old, cached IP address for the printer, causing connection attempts to fail when the printer’s address changes.
      • Solution: Log into your router’s settings and locate the DHCP Reservation section. Find your printer (by its MAC address, usually listed in the printer’s network status report) and assign it a permanent, static IP address. This ensures that the printer always has the same address, greatly improving the reliability of the Bonjour service.PHASE 3: THE “FLAWLESS AUTO-PRINT” CHECKLIST

    Once the network foundation is stable, focus on the device and printer consistency.1. CLEANING THE AIRPRINT CACHE (MAC ONLY)
    On a Mac, a corrupted print queue can prevent AirPrint from seeing any printers.

      - Steps: Go to System Settings (or System Preferences) > Printers &#038; Scanners. Right-click in the empty space of the printer list. Select "Reset Printing System..." This deletes all existing printers and print jobs and clears the system's AirPrint cache, forcing a fresh, clean discovery. *Warning: You will have to re-add all printers.*
    
    1. PRINTER PLACEMENT AND WI-FI STRENGTH
      A weak Wi-Fi signal will cause AirPrint to fail consistently, as Bonjour discovery packets are small and easily lost.

      • Place the printer as close as reasonably possible to the main Wi-Fi router or an access point.
      • If you are using a Wi-Fi extender, ensure the extender is configured in “bridge” or “access point” mode and not a separate “repeater” mode. An incorrectly configured repeater can often block Bonjour traffic.
    2. BLUETOOTH INTERFERENCE
      While AirPrint is a Wi-Fi protocol, many printers use Bluetooth Low Energy (BLE) for the initial, quick setup process.

      • Temporarily disable Bluetooth on your Mac or iPhone. If the printer appears and works, the printer’s BLE radio may be conflicting with its Wi-Fi card. This requires a firmware update or a setting change on the printer itself.HARDWARE AND PRINTER RECOMMENDATIONS (CANON SELPHY EXAMPLE)

    The reliability of AirPrint heavily depends on the quality of the printer’s network hardware. Cheaper printers often have very basic network chips that struggle with multicast traffic and aggressive power-saving. For the most consistently flawless AirPrint experience, look for a printer that is certified for AirPrint 2.0 or newer. – Canon Selphy CP Series: These are excellent examples of reliable, compact AirPrint devices. While they are specialized for 4×6 photo printing, the Selphy (like the Canon Selphy CP1500) often uses a more robust Wi-Fi implementation because its primary function is mobile/wireless photo transfer. For a junior writer needing quick, tangible results or a user who needs reliable photo proofing, the Selphy line offers extremely dependable connectivity, making the “Auto-Print” function nearly instantaneous.

    • Key Features to Look For in a New Printer:
      • Dual-Band Wi-Fi: Printers with both 2.4GHz and 5GHz radios often have a more sophisticated network interface controller (NIC) that handles mDNS bridging better.
      • Epson and HP High-End Models: While all major brands support AirPrint, the higher-tier business or photography models from HP and Epson usually have better processors and network cards, leading to faster wake times and more consistent discovery.
    • Why AirPrint is Superior to Other Apps: Resist the urge to use a manufacturer’s proprietary printing app (e.g., HP Smart, Epson iPrint) as a workaround. While these apps can sometimes force a print job through, they bypass the Bonjour protocol, meaning you lose the “Auto-Print” functionality directly from standard applications like Safari, Photos, and Mail…which is the entire point of AirPrint Mastery.FINAL THOUGHTS: MAINTENANCE AND CONSISTENCY

    Mastering AirPrint is fundamentally about mastering your home network. By implementing a static IP address for your printer and ensuring your router’s settings (especially AP isolation and IGMP Snooping) are not blocking multicast traffic, you address the root causes of nearly all wireless printing frustration.

    AirPrint is a low-maintenance technology, but it does require a perfectly tuned Bonjour channel to remain flawless. Make it a habit to check for printer firmware updates every six months, and, most importantly, commit to connecting all your Apple devices and your printer to the same Wi-Fi band. Once configured correctly at the network level, you can finally enjoy the true convenience of “Auto-Print” where the printer simply appears, and the job always finishes, reliably and effortlessly.

  • Guided Access: The Secret to “Kid-Proofing” Your Booth

    Guided Access: The Secret to “Kid-Proofing” Your Booth

    The Definitive Technical Guide to Locking Down Your iPad Photo Booth

    If you have ever operated an iPad photo booth at a high-traffic event…whether a vibrant wedding, a corporate gala, or a kid’s birthday party…you have likely experienced the immediate, stomach-dropping panic when you realize a guest, particularly a curious child or an enthusiastically tipsy adult, has somehow managed to exit the photo booth application. Suddenly, your beautifully branded, revenue-generating machine is a vulnerable piece of personal computing hardware, potentially displaying your private messages, exposing your Wi-Fi password, or deleting critical data. This is not just a minor annoyance; it is a critical security and user-experience flaw that can derail an event and damage your professional reputation.

    The solution is not a physical lock, but a digital fortress. To deliver a truly professional, worry-free photo booth service that runs flawlessly, unattended, from the first snap to the last, you must master the strategic, two-part combination of the ZillaBooth Party ‘Keep Awake’ setting and the powerful native iOS feature known as Guided Access. This technical deep dive is your blueprint for transforming a consumer-grade iPad into a hardened, dedicated commercial kiosk that is functionally “kid-proof.”

    The first line of defense is ensuring the booth is always operational, which is precisely where the ZillaBooth Party ‘Keep Awake’ feature comes in. Standard iOS settings are designed to save battery by putting the device to sleep after a short period of inactivity. For a photo booth, this is a fatal flaw; a dark, unresponsive screen is the primary cause of lost revenue and user confusion. The ‘Keep Awake’ function within ZillaBooth Party is an essential, application-level safeguard that sends a continuous, subtle signal to the iOS operating system. This signal prevents the screen from dimming or the device from auto-locking, regardless of the system-wide time-out setting. You will typically find this simple toggle switch within the general or kiosk-mode settings of the ZillaBooth app. When activated, it guarantees that your custom start screen, instructions, and entire user interface remain fully illuminated and responsive at all times, ensuring the interactive surface is consistently welcoming and available. While this feature is crucial for event continuity and user experience, it does not prevent users from attempting to exit the app, which is why the full solution requires the next, more secure step.

    The true secret to locking down your photo booth lies in the deep technical implementation of Guided Access. Guided Access is an extremely robust, often-overlooked accessibility feature built directly into the iOS operating system. Its original intent was to help users with certain cognitive challenges stay focused on a single task, but its functionality makes it the perfect Kiosk Mode for any public-facing iPad application. When correctly enabled and configured, Guided Access locks the iPad into a single, specified application and, crucially, allows the administrator to selectively disable hardware buttons and specific touch areas on the screen.

    Technical Setup: Enabling Guided Access on the iPad

    The setup process requires a one-time configuration in your iPad’s settings.1. Navigate to Settings: Open your iPad’s main Settings application.
    2. Access the Feature: Scroll down and tap on the Accessibility menu.
    3. Locate Guided Access: In the Accessibility features list, scroll down past the Vision and Physical/Motor sections until you find the Learning category, which contains Guided Access. Tap this to open the configuration pane.
    4. Activate and Secure:
    * Toggle the main Guided Access switch to the ‘On’ position.
    * Immediately tap on Passcode Settings. This is the most vital step: setting a Guided Access Passcode. This passcode must be complex and entirely distinct from your main iPad lock screen passcode. This unique code is the only way to exit or disable the lock once it is activated. Do not use an easily guessable sequence. You may also enable Face ID or Touch ID here, which allows you to bypass the manual passcode entry simply by authenticating yourself…a major time saver during an event.
    5. Enable the Shortcut: Toggle the Accessibility Shortcut to ‘On’. This enables the control center for Guided Access to be accessed instantly by a simple triple-click of the Home button (on older iPads) or the Side/Power button (on newer models). Without this shortcut, starting and stopping the session requires navigating back into the Settings app, which is impractical and time-consuming during an event.The Final Lock: Implementing the Kiosk Mode in ZillaBooth Party

    Once the feature is enabled, the final stage is to activate the lock specifically around the ZillaBooth Party application. This procedure is performed live, on-site, just before the event begins, taking only seconds to deploy the full security protocol.1. Launch the Application: Open the ZillaBooth Party app and ensure it is displaying the event’s start screen or the main interactive menu.

    1. Activate the Control Panel: Perform the quick, triple-click on the Home or Side button. The Guided Access control panel will overlay the ZillaBooth screen. If this is the first session since setup, you may be prompted to enter your Guided Access passcode.

    2. Configure Session Options (The Technical Deep Dive): Tap the Options button at the bottom of the screen. This is where you finalize the kiosk’s security. This menu allows for granular control over the iPad’s physical and screen functions:
      • Side/Sleep/Wake Button: OFF (Critical). This prevents users from being able to put the device to sleep, which would temporarily disrupt the booth.
      • Volume Buttons: OFF (Recommended). Prevents users from accidentally or intentionally muting or blasting the photo booth’s sound effects and music.
      • Motion (Screen Rotation): OFF (Recommended). Ensures that if the iPad stand is accidentally bumped, the screen cannot rotate, which can break the user experience and the booth’s calibration.
      • Keyboards: OFF (Optional/Secure). If your photo booth mode does not require text entry (like for email sharing), disabling the on-screen keyboard adds an extra layer of security.
      • Touch (Advanced Restriction): While the main touch function must remain ON for the guests to interact, this setting also enables the ability to zone-restrict the screen. With your finger, you can draw circles or boxes around any specific area of the screen you wish to make non-responsive. For instance, if ZillaBooth has a small settings cog or an on-screen exit button that is visible but not for guest use, you can draw a restrictive circle over it. Guided Access will instantly create a gray overlay in that area, making touch input permanently disabled only in that region, leaving the rest of the screen fully interactive for the photo booth. This highly technical, precise control is what separates a basic lock from a fully managed kiosk interface.
    3. Start the Session: Once all options are configured, tap Start in the upper-right corner. The iPad is now fully locked. A small banner will briefly appear confirming “Guided Access Started.” At this point, no amount of frantic button pressing, swiping, or gesture control will allow a user to exit the ZillaBooth Party application. The physical hardware buttons are disabled, the home-screen swipe gestures are neutralized, and the device is now a dedicated, secure photo booth kiosk.Exiting the Lock and Final Thoughts

    To exit the Guided Access session and regain control of the iPad for event wrap-up, maintenance, or software updates, you simply perform the initial triple-click of the Home or Side button again. The screen will prompt you to enter the Guided Access passcode (or use your pre-configured Face ID/Touch ID). Upon successful authentication, you will be returned to the Guided Access configuration screen, where you must tap End in the top-left corner to fully unlock the device.

    For the professional photo booth operator, the strategic combination of ZillaBooth Party’s screen-management functionality and the robust, multi-layered security of iOS Guided Access is the definitive, non-negotiable standard for unattended operation. This dual-layered security is a proactive technical investment that eliminates the single biggest operational headache in the photo booth business, safeguarding your event continuity, your data, and the professional integrity of your service. Mastering this powerful iOS feature is the secret to a stress-free, profitable, and truly “kid-proof” photo booth experience.

  • The “Auto-Restart” Feature: Keeping the Line Moving

    The “Auto-Restart” Feature: Keeping the Line Moving

    The success of any photo booth rental business hinges on one core metric at the event: throughput. It doesn’t matter if your props are top-of-the-line or your backdrop is custom-designed by an artist; if a bottleneck forms at the booth, the entire guest experience suffers. A long line is an immediate sign of a high-demand service, which is great, but a stagnant line quickly transforms excitement into frustration.

    The single biggest drain on efficiency, the hidden time sink that silently shaves off dozens of potential sessions per event, is the need for manual screen resets.

    Consider the scene: A high-energy wedding reception or a busy corporate holiday party. Guests are excited, fueled by music and celebration, and they surge toward your ZillaBooth Party setup. One group finishes their session, prints their strip, and walks away. The screen remains on the “Thank You” or “Share Your Photo” screen, waiting for the next action. The next group steps up…a new, slightly less technical set of users…and they hesitate. They tap the screen, but nothing happens. They look around, confused, searching for a ‘Home’ button, a ‘Start Over’ prompt, or the attendant. Even if they only take 10 seconds to figure out that they need to tap the small ‘X’ or ‘Back’ arrow, that 10 seconds is now multiplied by every single group that uses the booth. Over a four-hour rental, these tiny increments of hesitation and manual intervention can cost you an hour of actual photo-taking time, translating directly to fewer sessions, a longer line, and ultimately, a less satisfactory client report.

    This is precisely why the “Auto-Restart” feature in ZillaBooth Party isn’t just a convenient toggle; it is the fundamental, non-negotiable engine for high-volume event success. It’s the feature that allows your booth to function as a truly autonomous, high-throughput machine, guaranteeing that the line…and the fun…never stops.

    The Mechanics of Uninterrupted Flow

    At its core, the Auto-Restart feature performs one incredibly simple but critical function: it enforces a strict, time-based, zero-touch reset of the photo booth session.

    When enabled in the ZillaBooth Party settings, you set an “inactivity timer”…typically between 15 and 30 seconds. This timer starts ticking the moment a user completes their last action in the session flow…whether that is taking the final photo, sending a text, or printing their strip. If the booth detects zero touch input for the duration of that timer, it bypasses the final screens (thank you, sharing, etc.) and instantly reverts to the main, welcoming “Tap to Begin” screen.

    The immediate, palpable benefit of this process is the elimination of the “handoff hesitation.”

    Imagine the perspective of the next group in line. The previous party has just left. Before they can even fully step into the frame, the booth screen flicks back to the branded start screen, brightly displaying a clear, unambiguous invitation: “Tap Here to Start!” There is no confusion, no hunting for a button, and no attendant needed to physically press ‘Home.’ The booth is instantaneously ready for the next session.

    This continuous readiness is what separates an amateur operation from a professional one. In a professional, high-volume environment…a busy school prom, a major trade show, a packed wedding cocktail hour…you aren’t running an art installation; you are running a service based on speed, efficiency, and entertainment delivery. The Auto-Restart feature is the silent productivity manager for your photo booth.

    Auto-Restart as a Business Imperative

    The importance of this feature can be broken down into three critical business imperatives for any successful photo booth operator:1. Maximizing Session Throughput (The Revenue Generator):
    The most direct and measurable benefit. Every minute a booth is stuck on a ‘Thank You’ screen is a minute lost. An average photo session takes 60 seconds. If a manual reset adds 10 seconds of delay, that’s an 11.6% drop in potential session volume. Over four hours (240 minutes), that’s a potential reduction of 28 sessions (10 seconds/session * 240 minutes = 2400 seconds of delay, or 40 minutes lost). By eliminating this friction point, Auto-Restart ensures you get the absolute maximum number of sessions possible, which is a key metric for corporate clients tracking engagement and a huge value-add for social clients who want every one of their 200 guests to get a turn. For the operator, more sessions mean more proofs of value and a stronger portfolio for landing future high-end contracts.

    1. Maintaining Operational Attendant-Free Reliability (The Attendant’s Friend):
      One of the highest costs in the rental business is labor…specifically, a reliable, engaging attendant. Auto-Restart dramatically reduces the attendant’s workload. Instead of having to constantly hover and manage the screen reset for groups, the attendant is freed up to focus on higher-value tasks: engaging shy guests, managing the prop table organization, solving minor printing issues, or simply serving as a more engaging brand ambassador for your company. For an operator running multiple booths, Auto-Restart is what makes the “drop-off” or “unattended” model viable, allowing you to charge a premium for a self-sufficient booth that will never freeze on an intermediate screen. The feature guarantees that the booth is always “on task.”

    2. Ensuring Guest Privacy and Aesthetic Consistency (The Brand Protector):
      Imagine a group finishes their session and is momentarily distracted by a text message or a conversation before walking away. If the screen is still showing their captured images, their sharing options, or…worst of all…a successful login to a sharing platform, the next group in line immediately sees private data. Auto-Restart acts as an automated privacy filter. By instantly reverting to the neutral, branded start screen, it ensures that every new guest is greeted by your logo and theme, not the personal photos or information of the previous group. This protects guest privacy and maintains the polished, professional look of your brand throughout the entire event.Setting Up the Optimal Auto-Restart Configuration

    The power of the feature lies in its configurability within ZillaBooth Party’s administrative settings. Operators can typically find this control under a “Session Flow” or “Timing” menu. Here are the best practices for setting the timer: * The Sweet Spot (15-20 Seconds): For high-volume events like weddings or public festivals, 15 to 20 seconds is often the perfect balance. It’s just long enough to allow a slow-moving guest to grab their print or quickly text the photo to themselves, but short enough to immediately reset the screen before the next group even fully walks up to the enclosure.
    * The Corporate/Unattended Setting (30-45 Seconds): For more relaxed corporate environments or unattended drop-off setups, a slightly longer timer can be used. This provides a bit more buffer time, ensuring that guests who are taking a moment to read a corporate message or share to a unique platform aren’t prematurely interrupted, while still guaranteeing the eventual reset.It is crucial to understand that the timer is an inactivity timer. Any touch on the screen…a tap on the ‘Share’ button, a scroll through the photos, a touch to the ‘Print’ button…will reset the counter. This intelligent design ensures that while an active user is engaging with the final screens, their interaction won’t be suddenly cut short, only the passive waiting time is eliminated.

    The Professional Difference: The Case of a Corporate Gala

    To truly appreciate the value of Auto-Restart, consider its performance at a 3-hour corporate gala with 400 attendees and a single booth. The client is paying a premium, and the goal is maximum brand visibility and engagement.| Metric | Manual Reset Booth (No Auto-Restart) | Auto-Restart Booth (20-sec timer) |
    | :——————————- | :—————————————- | :————————————————- |
    | Delay Per Session | 10 seconds (attendant/guest intervention) | 0 seconds (instantaneous reset) |
    | Total Session Time | 70 seconds (60 sec active + 10 sec delay) | 60-80 seconds (depending on guest choice) |
    | Sessions Per Hour | ~51 sessions | ~60 sessions |
    | Total Sessions (3 Hrs) | 153 sessions | 180 sessions |
    | Additional Engagement Gained | – | 27 Sessions (Approx. 100-120 extra guests engaged) |
    The 27 additional sessions translate directly into 27 more groups of people who received a branded takeaway, shared the branded content digitally, and left the event with a positive, friction-free memory of the photo booth experience. This difference is not a small detail; it is a fundamental shift in service capacity and perceived value. It is the core reason why a booth operator utilizing ZillaBooth Party with Auto-Restart can confidently command a higher rate and consistently deliver superior results compared to competitors relying on outdated software that necessitates constant baby-sitting.

    In the fast-paced, competitive world of event rentals, every second counts. The “Auto-Restart” feature in ZillaBooth Party is more than just a software utility; it is the silent workhorse that optimizes every single moment of your rental window. It ensures that your booth is not a source of confusion or delay, but a continuous, high-speed entertainment factory. By automating the most tedious and time-consuming part of the session lifecycle…the reset…you are not just keeping the line moving; you are proving to every client and every guest that your operation is built on professional-grade efficiency and a commitment to a seamless experience. It is the key to unlocking maximum performance from your booth and cementing your status as a top-tier service provider.