Tag: Vintage Aesthetic

  • DIY Props: Making Your Own Vintage Accessories

    DIY Props: Making Your Own Vintage Accessories

    The allure of vintage is undeniable. There’s something captivating about stepping back in time…a fascination that extends beyond history books and into our celebrations, parties, and, most importantly, our photography. Whether you are hosting a Roaring Twenties jazz night, a Victorian tea, or a mid-century rockabilly rave, the right accessories transform a good theme into an unforgettable experience.

    But here is the common problem: authentic, high-quality vintage props are either incredibly expensive or too fragile for a photo booth full of enthusiastic guests. That’s where the DIY approach saves the day. By crafting your own accessories, you can achieve that perfect, era-specific look with materials that are durable, customizable, and budget-friendly. This guide provides step-by-step instructions for creating three iconic, history-celebrating props…the must-have “Mustache on a Stick,” the timeless “Cloche Hat,” and the glamorous “Flapper Feather Headband”…all designed to be high-impact elements when viewed through the lens of a high-resolution camera setup, perfect for your next ZillaBooth session.

    Why DIY Props? The ZillaBooth Difference

    When you take a photo with a dedicated camera system like ZillaBooth, the high-definition capture and controlled lighting mean every detail counts. A store-bought prop often looks cheap or flat under a powerful flash. A handmade prop, however, carries a distinct texture and depth that translates beautifully to print and digital display. We are not just making props; we are creating tactile storytelling elements that enhance the visual narrative of your event.

    Project 1: The Distinguished Gentleman’s Mustaches on Sticks

    The mustache on a stick is the quintessential photo booth prop. It’s simple, universally recognizable, and instantly hilarious. The key to making it look vintage and high-quality lies in the material selection and the detailing.

    Materials You Will Need: – Sheets of craft felt (Black, dark brown, and a deep charcoal gray…choose high-quality, thick felt for stiffness).
    – Wooden dowels or bamboo skewers (approx. 10-12 inches long).
    – Hot glue gun and extra glue sticks.
    – Sharp fabric scissors.
    – Free mustache templates (printable templates for styles like the Handlebar, Chevron, Walrus, and Toothbrush).Step-by-Step Crafting Guide:1. Prepare the Templates: Search online for free printable mustache templates. Print them out and cut the shapes from cardstock. The stiffness of the cardstock will allow you to trace the shapes more accurately. For a truly authentic vintage feel, select styles from the late 19th century through the 1920s.
    2. Cut the Felt Layers: Place your cardstock templates onto the felt. Use a chalk pencil or a fine-tipped marker to trace the outline. You will need to cut two identical pieces of felt for every single mustache. Cutting two layers and gluing them together is the secret to creating a prop that is stiff, durable, and won’t flop over in front of the camera. Cut the felt shapes carefully with sharp scissors to ensure clean, crisp edges that define the style of the mustache.
    3. Construct the Prop: Heat up your hot glue gun. Lay one felt piece flat, then run a line of hot glue directly down the center. Immediately place the tip of the wooden dowel (or skewer) onto the glue line, extending the dowel down to the bottom edge of the felt. Add another thin layer of glue over the portion of the dowel that is sitting on the felt.
    4. Final Assembly: Quickly take the second identical felt piece and align it perfectly over the first piece, sandwiching the dowel and the glue in between. Press firmly across the entire mustache. This bonding process must be fast while the glue is hot. Once dried, you should have a firm, dual-layered prop that holds its shape beautifully.
    5. Finishing Touches: While not necessary, you can lightly mist the felt mustaches with a fabric stiffener spray to give them extra resilience against moisture and handling.Project 2: The Roaring Twenties Cloche Hat (Simplified DIY)

    The cloche hat, French for “bell,” was the height of fashion in the 1920s. Characterized by its close-fitting crown and small, downward-sloping brim, it is surprisingly easy to replicate for prop use without getting into complex millinery. This is a minimal-sew or no-sew project.

    Materials You Will Need: – A large piece of stiff, dark felt (wool blend or heavy synthetic is best), or a simple, cheap felt beanie.
    – A large, round mixing bowl (the bowl must be slightly smaller than the head size you want).
    – Fabric stiffener spray (or a mixture of cornstarch and water).
    – Ribbons (velvet or grosgrain ribbon, about 1-2 inches wide, to wrap the crown).
    – Embellishments (a small fabric flower, a cluster of beads, or a simple feather).
    – Hot glue gun or strong fabric glue.Step-by-Step Crafting Guide:1. Prep and Shaping (The Crown): If you are using a flat piece of felt, you will need to shape the dome of the hat. A simple way is to use the mixing bowl as a form. Drape the felt over the inverted bowl. The goal is to get the felt to conform to the rounded shape.
    * The Stiffening Method: Once draped, spray the exposed felt heavily with fabric stiffener (or brush on your cornstarch/water mixture). Let it dry completely. The felt will hold the dome shape of the bowl. Alternatively, for a no-stiffener method, purchase a ready-made, inexpensive felt beanie and simply fold and glue the brim inward and upward to create the downward slope of the cloche.
    2. Creating the Cloche Edge: The defining feature of the cloche is its deep, downward slope, which often came right down over the eyebrows.
    * For Shaped Felt: Once the felt is dry and stiff, cut a circular piece large enough to cover the top of the head form and extend 2-3 inches past the base of the bowl. You can then gently fold this excess felt downward and inward, securing the shape with tiny dabs of glue on the inside. You are creating the “bell” shape.
    * For Beanie: Pull the beanie onto a foam head or the mixing bowl. Pull the edge down and pin it so it sits at a slightly unnatural, deep angle…this is the cloche look. Secure the fold with fabric glue or a few quick stitches.
    3. Adding the Signature Band: In the 1920s, the ribbon band was essential and was often decorated. Cut a length of ribbon long enough to wrap around the base of your newly shaped felt hat. Secure the ribbon band with hot glue. Make sure the seam where the ribbon meets is neat, as this is where your embellishment will go.
    4. The Embellishment: Glue your chosen embellishment…the fabric flower, beadwork, or feather…directly over the ribbon seam. This instantly elevates the prop from a plain hat to a period-accurate accessory. The high-contrast lighting of the ZillaBooth will pick up the textures of the ribbon and the sparkle of the beads, ensuring the prop stands out in the final image.Project 3: The Classic Flapper Feather Headband

    For a prop that is pure glamour and requires almost no skill, the feather headband is a perfect choice, embodying the spirit of Art Deco exuberance.

    Materials You Will Need: – A length of black, gold, or silver elastic or sequined ribbon (long enough to wrap around the head).
    – A large, single-plume ostrich or peacock feather (these are inexpensive at craft stores).
    – Rhinestones, costume jewels, or a small brooch.
    – Hot glue gun.Step-by-Step Crafting Guide:1. Measure and Cut the Band: Measure the elastic or ribbon to fit comfortably around a typical adult head. Glue the ends together to form a seamless loop. If you are using plain ribbon, you can glue a line of rhinestones to the front center to create a focal point.
    2. Attach the Focal Point: The feather must be placed high on the side of the head, near the temple. Use a generous amount of hot glue to secure the stem of the feather directly to the ribbon or elastic band. Hold it firmly until the glue sets.
    3. Conceal and Finish: Glue your brooch or cluster of jewels/rhinestones directly over the base of the feather stem. This covers the messy glue connection and adds the essential sparkle that defines the flapper era. The high shine of the rhinestones will catch the light perfectly in the photo booth.Prop Use and ZillaBooth Tips

    A well-made prop needs to be used correctly to maximize its impact in the final photo. When directing guests or preparing for your own photo session, remember the unique qualities of the props you’ve created: – Mustaches: Encourage users to hold the mustache slightly away from the face, letting the light cast a slight shadow for a dramatic, editorial look. The prop should frame the mouth, not hide it.
    – Cloche Hat: Since the hat is designed to sit low, instruct users to tilt their head back slightly to ensure their eyes are visible and not completely obscured by the brim. This pose instantly mimics the posture of the 1920s.
    – Headbands: The feather should be positioned so that it breaks the silhouette of the head. In group photos, this adds dynamic vertical variation.The beauty of these DIY vintage props is that they introduce an element of intentional, handcrafted imperfection that contrasts wonderfully with the crisp, clean output of a professional photo booth like ZillaBooth. They are not merely accessories; they are conversation pieces that capture the fun, history, and craft behind your themed celebration. So gather your supplies, fire up that glue gun, and start crafting the history you want to celebrate…one perfectly styled, ready-for-its-close-up prop at a time.
  • The “Anti-Bride” Aesthetic: Why Perfect Photos Are Out and “Blurry” Is In

    The “Anti-Bride” Aesthetic: Why Perfect Photos Are Out and “Blurry” Is In

    The era of hyper-curated, flawlessly filtered, and stiffly posed event photography is officially over. Driven primarily by Gen Z, a new cultural movement is challenging the very definition of a “perfect picture,” especially in the high-stakes world of weddings and celebrations.

    This shift isn’t just about a preference for film grain or a different color palette; it’s a fundamental rebellion against the commodification of memory. It’s the arrival of the “Anti-Bride” aesthetic, where the most cherished images are the ones that capture genuine, raw, unscripted energy…even if they are a little (or a lot) blurry. This is the modern remix of tradition, declaring that a photo’s authenticity outweighs its technical perfection every single time.

    For decades, the standard for wedding and event photography was sharpness, light, and symmetry. Photographers chased the “golden hour,” meticulously straightened dresses, and demanded guests stand still for pristine, high-resolution masterpieces. The resulting images were beautiful, yes, but often sterile…a polished, airbrushed rendition of a memory that felt more like an advertisement than a lived experience. This pursuit of the impossible, flawless moment has exhausted a generation that is acutely aware of the performance inherent in social media perfection. They are done with the illusion.

    Analog film photograph of section 1 related to The

    The Anti-Bride aesthetic rejects this pressure to perform. It embraces the candid, the accidental, the messy truth of a celebration. Instead of flawless, they crave feeling. Instead of still, they demand action. This cultural craving has crystallized into the definitive photographic trend of the moment: “Blurred-Action” photography.

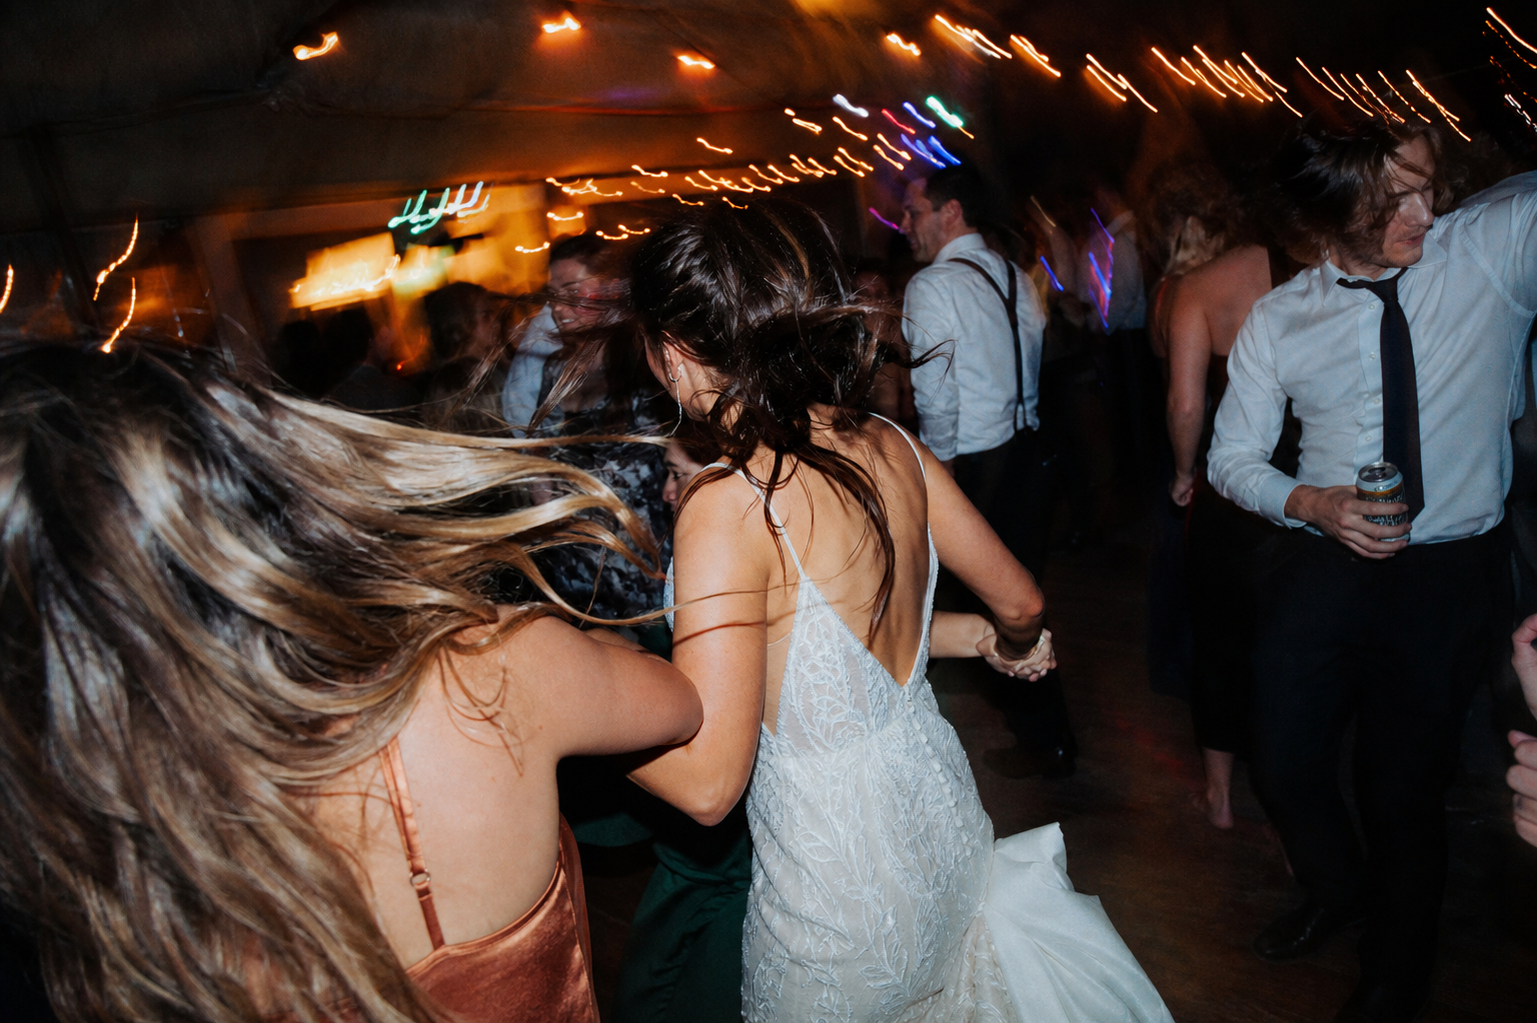
    What exactly is Blurred-Action photography? It’s the visual equivalent of a memory rush…that feeling of high-energy chaos, a spin on the dance floor, a genuine burst of laughter, or a quick movement across the room. Technically, it is the deliberate use of motion blur to convey speed and dynamism, making the image feel alive rather than frozen. In a Blurred-Action photo, the subject might be soft, the lights might streak, and the background might be a smear of color, but the story of the moment is crystal clear. It communicates: “This was fun. This was fast. This was real.”

    This style intentionally evokes the look of old, inexpensive point-and-shoot film cameras or the late-night flash photos from the early 2000s…the kind of spontaneous, high-contrast, often imperfect snapshots that were taken without any thought of social media approval. It’s raw, it’s rebellious, and it’s a direct counterpoint to the meticulously posed, sun-drenched shots that have clogged Instagram feeds for the last decade. The Anti-Bride and the celebration host who embraces this look wants their guests to move, dance, and celebrate freely, knowing that the camera’s job is not to stop the action, but to harness it.

    Analog film photograph of section 2 related to The

    The key to mastering this dynamic look is realizing that your standard camera app is actively working against you. Modern smartphone cameras, including the iPhone’s native app, are programmed for one thing: to eliminate blur, automatically increasing shutter speed and smoothing movement to deliver a perfectly sharp image. To capture true Blurred-Action, you need to wrest back control and instruct the camera to slow down , allowing light and movement to streak across the sensor.

    This is where dedicated, professional-grade camera applications like ZillaBooth become essential. ZillaBooth is designed for creators who want to prioritize energy and atmosphere over mere technical accuracy. It gives the photographer the ability to “weaponize” motion.

    Here is how any user, from a seasoned photographer to a junior writer documenting an event, can utilize ZillaBooth’s features to capture movement and energy that is impossible to achieve with a standard camera app, perfectly embodying the spirit of the Anti-Bride aesthetic:1. The Essential Setting: Manual Shutter Speed ControlThe foundation of the Blurred-Action aesthetic is a slow shutter speed. Shutter speed determines how long the camera’s sensor is exposed to light. A fast shutter (e.g., 1/1000th of a second) freezes action; a slow shutter (e.g., 1/15th of a second) captures movement as a blur.

    Analog film photograph of section 3 related to The

    ZillaBooth Pro unlocks this critical setting, which the native phone app locks down. – The Technique: Navigate to ZillaBooth’s manual controls and locate the Shutter Speed (often labeled as an ‘S’ or a time value).

    For moderate blur that still hints at the subject, try a shutter speed between 1/30 and 1/15 of a second. This range is excellent for capturing a fast spin on the dance floor or a subject walking quickly. For more dramatic, abstract blur, such as lights streaking into lines or a completely smeared background, experiment with speeds as slow as 1/8 or 1/4 of a second.

    • The Intent: By forcing the shutter open longer, you are literally telling the camera to record the duration of the action, not just a single instant. The goal is to see the subject’s path of motion within the frame.2. Focus on Panning: The Sharp-Blur ContrastTo create an image that feels incredibly dynamic but still has a clear point of focus, employ the panning technique…a classic photography trick made easier by ZillaBooth’s manual focus lock. Panning involves moving the camera with the subject while the shutter is open. – The Technique: Set a moderately slow shutter speed (1/30 to 1/60 is a good starting point). As your subject (a person walking, a dancer) moves past you, lock your focus on them using ZillaBooth’s manual focus lock feature. Then, move your phone to follow them smoothly as you press the shutter.
    • The Intent: The subject, because the camera is tracking their movement, will appear relatively sharp, but the background will be rendered as spectacular, horizontal streaks of color and light. This contrast creates an incredible sense of speed and forward momentum, isolating the energy of the subject against a blurred backdrop of the event.3. The Flash-Blur Combination (For Maximum Drama)Many photographers forget that the flash can also be used with a slow shutter speed, and this combination is a potent tool for the Blurred-Action aesthetic, especially in dimly lit venues. – The Technique: Set ZillaBooth to a slow shutter speed (e.g., 1/15) and manually force the flash ‘On’ (which ZillaBooth allows). When you take the photo, the flash will freeze the subject for an instant (creating a sharp ghost image) while the rest of the 1/15-second exposure records the subject’s movement after the flash fires.
    • The Intent: This technique, often called ‘rear-curtain sync’ in professional cameras, results in an image where the subject is distinct but the trails of movement follow behind them, suggesting they are moving out of the blurred energy, or captured mid-spin. This produces a dramatic, slightly surreal, and highly energetic party photo.4. Movement Priority Poses: Shoot the Transition, Not the StillThe Anti-Bride look is fundamentally about capturing movement over stiff poses. As a photographer or event documenter, your role is to encourage and anticipate this movement, not stop it. – The Subject: Tell people to do an action: spin, jump, hug, cheer, or walk down a flight of stairs quickly. Never ask them to stand still.
    • The Technique: With a slow shutter (1/30), deliberately take the photo as the action is happening…not before or after. Shoot the half-step, the mid-air jump, the moment the head is thrown back in laughter. This is when the camera’s slow shutter will maximize the motion blur, capturing the true physical expression of the energy. A photo of a couple walking towards the camera at 1/15 of a second will result in soft, smeared faces and streaking foregrounds…capturing the feeling of a grand, sweeping entrance better than any perfectly sharp shot ever could.5. Embrace the Grain and Edit for VibeOnce the image is captured with ZillaBooth’s manual controls, the final step is to emphasize the raw, analogue-like feel. – The Technique: ZillaBooth and many post-processing apps allow for the addition of film grain or noise. Don’t smooth the image; add intentional noise to give the high-energy, digitized film look of the late 90s.
    • The Intent: The final image should look like an artifact…a treasured snapshot that couldn’t possibly be a highly-edited, commercial photograph. The grain enhances the raw, unpolished honesty that the Anti-Bride aesthetic champions.The shift toward Blurred-Action photography is more than just a passing style; it’s a cultural declaration. It’s a rebellion against the pressure to be perfect and a celebration of authentic, unrepeatable moments of joy. Gen Z isn’t throwing out tradition; they are remixing it, insisting that a wedding or major celebration should be documented as it feels…fast, fun, and a little chaotic…rather than how a magazine or social media feed dictates it should look.

    By using ZillaBooth to take back the power of manual shutter control, any user can move past the limitations of the default camera app. You’re not just creating a blurry photo; you’re creating a story. You are moving from documenting a pose to capturing a movement, from recording a smile to immortalizing a moment of pure, unadulterated energy. Step away from the stifling perfection and embrace the beautiful, dynamic, and wonderfully imperfect chaos of the Anti-Bride’s real-life celebration. Use the blur to make your memories feel more real.

  • The “Vintage” Filter: Why We Hate It (And Why We Love Raw)

    The “Vintage” Filter: Why We Hate It (And Why We Love Raw)

    The modern aesthetic revolution is defined by one fundamental truth: we are filter-fatigued. The heavy-handed “vintage” filters of the early 2010s…sepia washes, aggressive vignetting, and manufactured scratches…have been soundly rejected, especially by Gen Z, who crave authenticity. They don’t want a digital representation of the past; they want the true characteristics of film photography. This distinction is everything. A filter adds a layer of artifice; true film characteristics are a function of light, chemistry, and optics. They are imperfections that tell a real story.

    Analog film photograph of section 1 related to The

    To replicate the coveted film look naturally in your ZillaBooth shots, you must stop thinking in terms of post-production layers and start thinking like a film photographer managing a constrained, chemical medium. The key is in manipulating light and contrast before you press the shutter.1. Embrace Imperfect Lighting and Underexposure: Film has a much more limited dynamic range than a modern digital sensor. When shooting, a film photographer had to choose what to sacrifice: highlights or shadows. The result is often a ‘moody’ look with deep, crushed blacks and perhaps slightly blown-out highlights.

    To mimic this: – Low-Key Setup: In ZillaBooth, intentionally use lighting that is slightly too dim for the scene, forcing the digital sensor to struggle and creating dramatic, inky shadows. – Manual Exposure Adjustment: Manually underexpose the shot by about -0.5 to -1 stop. This prevents the sensor from automatically lifting the shadows, which is what gives digital images their “clean” but often sterile look. By underexposing, you create a rich, heavy tonal range reminiscent of properly printed film that wasn’t trying to be perfectly balanced.2. The Warmth of Aged Emulsion: Many people associate “vintage” with a warm, slightly reddish tint. This is not a sepia filter; it’s the natural result of certain film stocks, print paper, or chemical shifts over time.

    Analog film photograph of section 2 related to The

    – Manual White Balance: Ignore the auto white balance. Manually shift your ZillaBooth white balance to a warmer Kelvin temperature (e.g., 5500K-6000K for a daylight-balanced shoot that wants a subtle, warm shift). This will naturally bathe the entire scene in a soft, golden cast that is far more nuanced and integrated than any overlaid filter. The subtle color shift feels organic and interacts realistically with the existing light sources in the shot.3. Soft Diffusion and Lens Glow: The lenses on old, inexpensive film cameras often weren’t perfectly sharp and lacked the sophisticated coatings of modern digital lenses.

    This resulted in a slight softness and a characteristic “glow” around bright highlights. – Simple Diffusion: For a natural glow, place a single layer of a very sheer material (like a thin stocking or a piece of plastic wrap) carefully over your ZillaBooth lens. This acts as an organic light diffuser, slightly softening the focus and creating a beautiful, subtle ‘bloom’ around light sources. This is a practical, in-camera effect that digital filters attempt to mimic poorly. – Avoid Over-Sharpening: Turn off any in-camera sharpening features to maintain that smooth, slightly fuzzy quality that film is known for.By focusing on these in-camera lighting, exposure, and lensing techniques within ZillaBooth, you are not applying a fake effect; you are engineering a high-quality digital image that inherently possesses the raw, imperfect, and beautiful characteristics that make true film photography timeless. It’s about light management, not filter application.

  • The “Mall Mall” Aesthetic: 90s Nostalgia

    The “Mall Mall” Aesthetic: 90s Nostalgia

    The Vibe Check: Why the 90s Mall is Back

    The late 1990s mall was more than just a place to shop; it was the air-conditioned, neon-lit social epicenter for an entire generation. It was the smell of soft pretzels mixing with cheap cologne, the thumping soundtrack of pop-punk, and the satisfying clack of chunky platform sneakers on the tiled floor. This is the feeling the “Mall Mall” aesthetic captures…a deliberate, stylized flashback to that golden era of casual consumerism and teenage autonomy.

    Analog film photograph of section 1 related to The

    In a world saturated with highly curated, minimalist feeds, the maximalist, slightly chaotic, and utterly human energy of the 90s mall photo booth is hitting differently. We’re craving the low-stakes, high-fun authenticity of a time before smartphones, when photo booths were the only place you could get a truly instant, physical memory with your friends.

    This trend isn’t just about fashion; it’s about recreating a feeling of freedom, an “after school” vibe where the only thing on the agenda was hanging out and making a memory. It’s a nostalgic rebellion against the curated perfection of today, and it starts with your outfit and ends with the perfect 2×2 grid.

    Styling for the “Mall Mall” Vibe

    To fully embody this aesthetic, your clothing needs to scream “just got off the bus and have three hours to kill.” It’s less about high fashion and more about mixing textures, embracing bold colors, and piling on accessories from your favorite mall kiosk.1. Denim, Everywhere: Forget form-fitting silhouettes; the foundation of this look is relaxed, light-wash, and probably a little baggy. The denim of the 90s had a specific weight and wash that felt effortlessly cool.

    Analog film photograph of section 2 related to The

    * The Overalls: The easiest entry point. Wear them with one strap unhooked…it was the universal symbol for casual cool…and a brightly colored tee underneath. Cuffed hems are a must.<br /> * High-Rise Mom or Carpenter Jeans: Look for a fit that is loose through the hip and leg.

    Cuffed at the ankle is essential to show off a pair of classic white crew socks and your chosen footwear. These pants are all about comfort and function, perfect for sitting on a bench for hours.<br /> * Denim Jackets: Oversized, faded, and potentially covered in patches or enamel pins. For the perfect slouch, throw it over one shoulder or tie it around your waist. The faded wash is critical; it should look like it’s been through a thousand washes.

    1. Neon Pop: The 90s didn’t do subtle, especially under the fluorescent lights of the food court. Layering neon pieces brings that classic, synthetic mall lighting to life.
      • Turtlenecks and T-Shirts: Use neon green, hot pink, or electric blue tees or turtlenecks under your denim or mesh tops. The key is strategic layering. A bright mock-neck under a chunky cardigan or a neon stripe peeking out from under a graphic tee provides that necessary pop.
      • Windbreakers and Anoraks: These are essential outer layers, even when it’s not windy. Choose one with bold, geometric color blocking. The crinkly texture adds another layer to the aesthetic. Roll the sleeves up to the elbow for maximum attitude.
      • Chunky Footwear is Non-Negotiable: You need shoes built for pacing the mall for hours.
        • Platform Sneakers: The undisputed champion of the 90s mall floor. Think thick white soles, a slightly beat-up look, and perhaps a Velcro strap. Brands with an athletic or skate heritage are perfect. They literally elevate your style.
        • Combat Boots: The grunge edge to the aesthetic. Pair them with floral mini-dresses or skirts for a softer contrast. The lacing should look slightly undone.
        • Jelly Sandals: For a more playful, early-90s look, or colorful athletic slides with branded socks. The key is visible, bold footwear.
        • Accessorize Like It’s 1999: This is where you finalize the look and add personality. The accessories of the “Mall Mall” aesthetic are often plastic, playful, and layered on.
          • Scrunchies: Mandatory. Use a velvet scrunchie in a high ponytail, a messy bun, or piled up on your wrist. The bigger the bow or flower, the better.
          • Mini Backpacks: The smaller and more impractical, the better. Bonus points if it’s metallic, velvet, or clear plastic. It’s for carrying your Lip Smackers and quarters for the arcade.
          • Chokers: Specifically the black velvet band or the stretchy, plastic “tattoo” variety that everyone bought at the same kiosk. Layer them with a long, thin necklace featuring a yin-yang or a sun/moon pendant.
          • Lip Gloss and Hair Clips: Not just makeup, but critical accessories. The shinier the lip gloss (bonus for flavored), the more on-brand. Snap or butterfly clips should be liberally applied to frame the face.The ZillaBooth 2×2 Grid: Replicating the Photo Booth Moment
    Analog film photograph of section 3 related to The

    The physical photo booth…that cramped, curtained-off machine…was the original social media. It was where you captured true friendship and immediate, unedited joy. The key feature was the strip of four sequential, tightly framed images. This is where the ZillaBooth app, with its specific 2×2 grid feature, becomes the perfect digital vehicle for the “Mall Mall” aesthetic. It simulates the constraints and spontaneity of the original.1. Frame It Tight: The magic of the photo booth was the close crop. To nail the look, you must fill the frame.

      * Get Close: The 2x2 grid format naturally demands you fill the frame. Gather your friends tightly, shoulders touching and faces near the lens. Your expression should dominate the individual squares.<br /> * Use the ZillaBooth Timer: The actual photo booth worked on a timed delay, often catching people mid-pose or with a spontaneous, slightly surprised reaction. Use the app's delay function so you can't see the exact moment the photo snaps, guaranteeing a more candid, less posed expression. 

    1. Master the Four Poses: The 2×2 grid is a micro-story in four parts. Plan your progression to capture the true mall energy: a moment of shared, uninhibited fun.
      • Pose 1: The Serious Stare. Start by looking directly into the camera with a neutral, slightly moody expression. A head tilt is optional. This sets up the tension, mimicking the typical “let’s look cool” first shot.
      • Pose 2: The Sudden Silly. The first spontaneous burst of energy. Maybe a tongue-out, a ridiculous hand gesture, a sudden peace sign, or a fake gasp. This breaks the mood and injects the casual fun.
      • Pose 3: The Friendship Cuddle. Get even closer, lean heads together, maybe a playful pinch of the cheek, or a dramatic hand-on-hip pose. This is the warmth and intimacy of the “after school” hangout, a testament to your bond.
      • Pose 4: The Shared Laugh. The perfect finale. Something in the middle squares made everyone genuinely crack up. This shot captures the uninhibited, authentic laughter that defines the whole era.
      • Lighting and Contrast: The booth photos were never technically perfect. They were often washed out, slightly too dark, or had weird color shifts. This imperfection is the goal.
        • Flash is Your Friend: The single most important step. Turn on the ZillaBooth flash function to mimic the booth’s harsh, direct, and non-diffused light source. This will flatten the image, create distinct, deep shadows behind you, and bring out the texture in your denim and the shine of your accessories…just like the original.
        • Vintage Presets: Use a low-saturation filter to give the photo a slightly faded, film-like quality. The original prints weren’t high-definition, and yours shouldn’t be either. Aim for a slightly green or magenta tint around the edges, adding to the synthetic glow.The “Mall Mall” aesthetic is a rebellion against the pressure to be perfectly polished online. It’s a return to an era where fun was analog, fashion was loud, and your greatest concern was whether you had enough quarters for a soft drink and the arcade. By combining the unmistakable style cues of 90s denim and neon with the specific, unpolished, and sequential framing of the ZillaBooth 2×2 grid, you don’t just take a photo…you capture a pure, concentrated hit of after-school nostalgia. It’s more than a trend; it’s a love letter to the last great era of genuine teenage hangouts, perfectly packaged for a new generation.
  • Messy Flatlays & Chaos: The New “Detail Shot”

    Messy Flatlays & Chaos: The New “Detail Shot”

    The era of the meticulously curated, perfectly lit, and utterly pristine flatlay is officially over. For years, the gold standard for any event recap or professional detail shot involved a sterile table setting, a pair of artfully arranged shoes, or a champagne flute positioned just-so to catch the perfect glint of sunlight. It was beautiful, yes, but it was also predictable, emotionally inert, and ultimately, a lie.

    Today, the most compelling visual stories of any great celebration are found not in the ‘before’ but in the glorious, messy ‘aftermath.’ We’re not talking about staging a prop to look slightly dishevelled; we’re talking about documenting the genuine, glorious chaos that is the indelible evidence of a party that truly succeeded. This is the new detail shot, and it is a powerful statement of authenticity that your followers and your clients are craving.

    It’s the half-eaten slice of cake abandoned on a cocktail napkin because the DJ dropped a banger and the guest ran to the dance floor. It’s the pile of discarded photo booth props, the scattering of confetti, and the shoes that were kicked off hours ago. These aren’t just pictures of debris; they are the visual transcripts of unadulterated joy.

    The Aesthetics of Aftermath: Why Mess is the Message

    Why has this shift occurred? Simple: audience fatigue. We’ve all scrolled past thousands of identical, hyper-edited images. They lack grit, vulnerability, and the sense of a real, lived moment. The messy detail shot, conversely, offers an instant injection of reality. It’s a raw, spontaneous energy that speaks volumes. When a photographer captures a perfectly untouched space, it says “We were here.” When you capture the beautiful debris, it shouts “WE HAD A BLAST HERE.”

    Analog film photograph of section 1 related to Messy Flatlays & Chaos: The New

    This aesthetic is deeply rooted in a contemporary craving for authenticity over perfection. The small, scattered elements…a smudge of lipstick on a glass, a crumpled thank-you note, the wilted flowers from a table centerpiece…become powerful storytelling devices. They are artifacts of a memory in progress.

    They possess a lo-fi, almost accidental quality that contrasts sharply with the high-production sheen of standard event photography. This contrast is what makes them arresting and magnetic. The chaos is a badge of honour, signaling to the viewer that the energy of the night was simply too good for anyone to stop and tidy up. To master this look is to stop documenting the staging and start documenting the story .

    The Game-Changer: Weaponizing the iPad Photo Booth

    Now, let’s talk about the secret weapon for capturing this beautiful disorder: your iPad photo booth. Typically, the booth is a stationary fixture, a magnet for smiling faces. But late in the evening, when the room is dark and the party is peaking or winding down, it needs to become a mobile, handheld instrument of photojournalism.

    Analog film photograph of section 2 related to Messy Flatlays & Chaos: The New

    The traditional detail photographer with a huge DSLR can often look out of place, breaking the spell of the late-night vibe. But the familiar, simple profile of an iPad is non-intrusive. It blends in, allowing you to capture moments that feel truly candid.

    This is the key instruction: encourage and train your users…whether they are junior staff or clients…to take the iPad booth off its stand. The goal is to liberate the camera and turn it into a dedicated tool for capturing the night’s aftermath.

    This should be an authorized move reserved for the final hour of the event when the dance floor is spent, the caterers are clearing out, and the lights are low. The iPad’s inherent limitations in low light, when combined with its internal flash (which you should force to fire if possible, or rely solely on ambient light), perfectly replicate that desirable, high-contrast, grainy, early-2000s disposable camera look.

    Analog film photograph of section 3 related to Messy Flatlays & Chaos: The New

    Tutorial: Capturing the Chaotic Debris in Grid Format

    Once you’ve liberated the booth, the most crucial tool in your composition arsenal is the Grid Format. You must always shoot with the 3×3 grid display activated on the screen. The grid provides a simple, structured method for organizing visual chaos, ensuring that your messy photo still reads as an intentional, aesthetically pleasing image, not just a haphazard snapshot. The grid is what turns clutter into composition.

    Analog film photograph of section 4 related to Messy Flatlays & Chaos: The New

    Step 1: Go Mobile and Hunt for Evidence Around 30 minutes before the end of the event, or after the main action has passed, remove the iPad from its stand. Move through the event space like an archaeologist. Ignore people for a moment; you are looking for evidence of their revelry. * The Half-Eaten Cake: Don’t focus on the remaining pristine slice. Zoom in on the area where the first slice was messily carved out. Look for the fork, the smear of frosting, the crumbs scattered on the linen. * Dance Floor Relics: A fallen tie, a single shoe, a discarded funny hat, or a handful of tangled streamers. Focus on a grouping of three or more items. * The Bar Aftermath: Piles of used cocktail napkins, a few abandoned glasses with condensation rings, a twist of lime rind, and a spilled drop of red wine. * The Booth’s Own Debris: A pile of photo booth printouts scattered haphazardly on a table, perhaps with a stray glass on top of them. This is the ultimate meta-shot.Step 2: Compose Using the Rule of Thirds The 3×3 grid should be your guiding principle. Instead of centering the mess, you must use the grid lines and their four intersection points (the ‘power points’) to compose the shot. * Subject Placement: Identify the single most interesting or telling element…the ‘hero’ of the mess (e.g., the bright red lipstick stain, the glint of a lost earring). Place this element directly on one of the four intersection points. This gives the photo an immediate focal point that anchors the surrounding chaos. * Framing the Debris: Use the grid lines to establish borders. For example, you can line up the edge of a table or a long, fallen streamer along one of the horizontal or vertical grid lines. This imposes intentional structure on the random elements. * Negative Space: A common mistake is filling the entire frame with clutter. To make the messy detail shot work, you need to use a clean section of the floor, a dark corner of a wall, or a solid tablecloth as negative space. Use one or two of the grid sections to contain the mess, leaving the remaining sections as purposeful negative space. This highlights the chaos, giving it room to breathe. For example, frame a pile of confetti in the bottom right corner (one grid square), allowing the empty, shadowed floor to take up the rest of the shot.Step 3: Embrace the Low-Light Grain and Flash Do not be afraid of the noise or graininess that comes from shooting late at night with low, ambient light. This is an essential part of the aesthetic. It adds texture and drama. If the venue lighting is too low to capture anything legible, turn the iPad’s flash on (manual on, not auto). The harsh, undiffused light from the iPad’s small flash will cast deep, dramatic shadows and blow out highlights on reflective surfaces (like sequins or metal), which is exactly the high-contrast, rebellious look we are after. This direct light aggressively isolates the debris, cutting it out from the shadowy background and emphasizing the drama.

    Why Grid Format is Essential to Chaotic Photography

    Analog film photograph of section 5 related to Messy Flatlays & Chaos: The New

    In traditional photography, the Rule of Thirds is used to place important elements in a balanced, visually pleasing way. In chaotic photography, the grid does something more powerful: it legitimizes the mess. Without the grid, the photo looks accidental…just a picture of trash.

    With the grid, the viewer understands that the mess has been chosen and framed . * Balancing Visual Weight: A pile of abandoned glow sticks might be visually ‘heavy.’ You can balance this weight by placing it in the bottom third of the frame, leaving the upper two-thirds for a clean, darker background like an empty wall. The grid helps you measure this balance instantly.

    • Leading the Eye: Scattered objects like streamers, spilled powder, or tracks on the dance floor can be used as leading lines. Align these natural lines of debris with a grid line to direct the viewer’s eye toward the main point of interest (the intersection point).
    • Creating Tension: Placing a solitary, significant object (like a single, lost key) in the center of one of the empty grid sections, surrounded by the mess, creates a powerful sense of isolation and dramatic tension.

    The Impact on Your Brand Story

    The final messy detail shots, composed using the grid format and captured with the inherent drama of late-night light, are the ultimate testimonial. They don’t just show that an event was beautiful; they prove it was alive.

    This new aesthetic shifts the narrative of your event photos from a cold portfolio of perfect styling to a warm, genuine scrapbook of shared experience. These are the images that get saved, shared, and talked about. They are relatable, honest, and far more memorable than any staged flatlay.

    The photo booth, liberated from its stand, becomes the ultimate storyteller, a documentary filmmaker capturing the authentic, unscripted moments that define the success of an event. Stop cleaning up your photos. Start embracing the glorious, beautifully composed chaos. Take your iPad off the stand, turn on that grid, and document the party’s beautiful, brilliant surrender.

  • Film Photography Vibes: Why We Still Love the “Grain”

    Film Photography Vibes: Why We Still Love the “Grain”

    In an era dominated by instantaneous, high-resolution, and algorithmically perfect digital images, a surprising and deeply satisfying trend has taken hold: the resurgence of film photography. It’s more than a mere aesthetic choice; it’s a cultural counterpoint to the relentless pursuit of digital perfection.

    We have reached peak clarity. Our smartphone cameras, powered by computational wizardry, correct for every flaw, banish every shadow, and smooth every texture. And yet, what we truly crave are the imperfections…the light leaks, the accidental blur, the soft colors, and, most importantly, the inimitable texture of the “grain.” This craving is not just for the look of film, but for the feeling of it, and a new generation of users is discovering that the power of a tangible visual keepsake is far greater than that of a file saved in the cloud.

    The comeback of film is intrinsically linked to nostalgia…specifically, the nostalgia for a time when photography was deliberate, limited, and resulted in a physical object. A roll of film was finite. Each click of the shutter carried a cost and a risk. You wouldn’t know what you had until it was developed.

    This deliberate, slow, and physical process is the antithesis of modern digital photography, where we shoot hundreds of photos and immediately delete ninety-five of them, never truly bonding with the few we keep. The “grain”…that beautiful, organic texture resulting from silver halide crystals on film…is the fingerprint of that analog process. It signals authenticity, imperfection, and a moment captured without the heavy hand of over-editing. It is an aesthetic of trust: trust in the moment, trust in the light, and trust in the process.

    Analog film photograph of section 1 related to Film Photography Vibes: Why We Still Love the

    But the film phenomenon runs deeper than just texture and color palettes. It’s about the form in which these memories are kept. When we think of vintage photography, we picture stacks of Polaroids, shoeboxes of printed 4x6s, or even slides.

    These objects have weight, a scent, and a distinct physical presence. They can be held, shared, and rediscovered years later. In this space of profound digital fatigue, where our photos are trapped in an endless, undifferentiated stream on a phone’s camera roll, the desire for a physical, defined, and shareable format has become a dominant psychological need. We want keepsakes, not data.

    This is where the venerable photo booth and its classic 1×4 film strip format re-enters the conversation, not just as a novelty, but as a powerfully resonant memory vessel. The photo strip is perhaps the ultimate example of a “tangible visual keepsake.” It is a cultural icon. Think about it: four small, square images, arranged vertically, connected by the chemical-stained border of the strip. Each image is a mini-narrative…a progression of goofy faces, shared kisses, or spontaneous bursts of laughter.

    The strip itself is slender, easily pocketed, tacked onto a corkboard, or slipped into a wallet. It is inherently personal, collectible, and utterly resistant to the tyranny of the digital feed. The magic of the photo strip is that it forces a moment of performance and finality. You get four shots, and that’s it.

    The genius of ZillaBooth Pro is its recognition of this cultural demand, translating the spirit and physical constraints of the classic analog photo booth into a powerful, accessible modern tool. The key element is its signature 1×4 strip layout. By deliberately structuring the digital output into this instantly recognizable format, ZillaBooth Pro doesn’t just mimic the look of a physical strip; it satisfies the psychological craving for that defined, tangible keepsake.

    Analog film photograph of section 2 related to Film Photography Vibes: Why We Still Love the

    When a user selects the 1×4 strip layout in ZillaBooth Pro, they are not just selecting a template; they are opting into a curated experience that replicates the scarcity and progression of the analog process. The app guides the user through four distinct, sequential captures. This process encourages spontaneity and performance in a way a single digital shot never could. The images are meant to tell a story: the first shot is often the most controlled, the final two are the most expressive and relaxed.

    Crucially, the ZillaBooth Pro output is designed for both digital sharing and, more importantly, for physical printing . A traditional digital image file is an undefined, boundless entity. A ZillaBooth Pro 1×4 strip file, however, is a pre-formatted, printable object . When printed, the strip emerges as a perfect, standardized visual artifact, ready to be pinned up, given away, or archived.

    This direct translation from screen to object is the core of its appeal. It bypasses the complexity of a regular photo printer, eliminating questions about cropping, size, and aspect ratio. You hit print, and you have your tangible keepsake. This streamlined process is essential for bridging the gap between digital ease and analog desire.

    Furthermore, ZillaBooth Pro enhances the nostalgic experience by layering in film-emulating effects that work perfectly within the high-contrast photo booth context. Users can apply filters that introduce realistic digital “grain,” subtle vignettes, and color shifts that mimic the aging or imperfect chemical development of film stock.

    The application often incorporates the classic high-contrast black and white look…a staple of vintage photo booths…which inherently enhances the dramatic, raw, and spontaneous feeling associated with physical media. When these grain and color filters are combined with the rigid structure of the 1×4 layout, the final product feels less like a photo and more like a cherished piece of history, instantly created.

    Analog film photograph of section 3 related to Film Photography Vibes: Why We Still Love the

    The ZillaBooth Pro’s focus on the 1×4 strip is a brilliant move that addresses the limitations of the modern digital landscape. In the vast, infinite scroll of a social media feed, a single photo is easily lost. But a photo strip…especially one featuring the iconic texture and visual progression of the ZillaBooth Pro output…demands attention. It is a visual blockquote, a curated micro-gallery of a moment, and its distinct shape makes it a statement piece. It’s an instant signifier of fun, retro charm, and intentional memory-making.

    For many, the app’s value lies in its ability to recapture the communal, shared experience of the photo booth. We are drawn to film because it is a shared experience. You take photos with friends, you wait for the final strip, and you instantly divide the tangible memory between you. ZillaBooth Pro allows for this same dynamic interaction: friends gather, pose, and see their four-shot story unfold, culminating in a printout that is immediately split and treasured. It transforms a solo digital activity back into a group performance, forging stronger emotional links to the resulting images.

    In conclusion, the passion for film photography and the enduring appeal of the “grain” is not a fleeting trend but a significant shift toward value, substance, and tangibility in our digital lives. ZillaBooth Pro has successfully tapped into this desire by recognizing that the format is just as important as the content.

    By standardizing the output to the nostalgic, powerful 1×4 strip, and overlaying it with authentic film-like textures, ZillaBooth Pro is not simply a camera application.

    It is a modern engine for generating “tangible visual keepsakes.” It offers users a deliberate, curated, and wonderfully nostalgic way to capture, print, and cherish the moments that matter, rescuing our memories from the infinite, undifferentiated abyss of the digital camera roll and giving them the physical weight and personality they deserve. The grain, in this context, is more than just an effect…it’s the beautiful, imperfect signal that this memory is real, it’s ours, and it’s meant to be held.

  • The “Old School” Disposable Camera Trend (Without the Development Cost)

    The “Old School” Disposable Camera Trend (Without the Development Cost)

    The return of the harsh, unfiltered flash is one of the most surprising and dominant photography trends of 2026. After years of chasing soft, natural light, carefully editing out shadows, and defaulting to our phone’s automatic low-light settings, we’ve collectively thrown out the rule book and embraced the high-contrast, often unflattering aesthetic of the direct flash photograph. It’s not just a passing fad; it’s a full cultural moment rooted deeply in nostalgia for the late 1990s and early 2000s, an era when inexpensive point-and-shoot digital cameras and the classic disposable film cameras reigned supreme.

    What the modern photographer is craving is the “off-the-cuff” feel…that raw, sequential aesthetic born from a device that required zero technical expertise and gave you exactly what you got. It’s the look of spontaneity, a visual diary of real life captured without the digital artifice of filters, airbrushing, or meticulous staging.

    The disposable camera, with its non-diffused, front-facing flash, was the master of this style, casting deep, unmistakable shadows, often blowing out skin tones, and creating dramatic, high-contrast highlights. It’s a vibe that screams “This was taken right now and no one had time to adjust the lighting.” It feels real, spontaneous, and unposed.

    This aesthetic is the visual equivalent of lo-fi music…imperfect, slightly rebellious, and immediately evocative. It’s the raw energy that contrasts sharply with the meticulously curated, sun-drenched perfection that has dominated social media for the past decade. The shadows are part of the story, the blown-out highlights are a badge of authenticity, and the intense focus on the subject creates an undeniable sense of drama.

    The Expensive Wait for Authenticity

    So why not just buy an actual disposable camera? The truth is, while the aesthetic is cool, the classic “old school” method comes with major pain points that simply don’t fit into our instantaneous digital world. First, there’s the cost. Disposables are not cheap, and the film and developing fees quickly add up, turning a fun trend into an expensive habit.

    Analog film photograph of section 1 related to The

    Second, and perhaps the biggest hurdle: the wait. You have to finish the roll, drop it off, and wait anywhere from a few days to a week to see your pictures. That delay kills the immediacy of a moment, frustrating a generation used to instant feedback. You might realize your flash wasn’t working, or the moment was totally missed, but only after your memories have been held hostage in a lab for a week. The environmental cost of single-use plastic and chemical development is also a growing concern for many.

    This is where ZillaBooth enters the chat. We understand you want the look…that raw, sequential aesthetic…without the week-long wait, the cost per photo, or the environmental guilt. ZillaBooth is the ultimate digital equivalent of the classic disposable camera, giving you the power to capture that raw, high-contrast aesthetic instantly on your iPhone. It’s about leveraging your phone’s camera to behave exactly like a primitive, flash-forward-only point-and-shoot, but with the instant gratification of a modern device.

    Mastering the Look with ZillaBooth Pro

    Replicating the “disposable camera aesthetic” requires forcing your phone’s incredibly smart camera to override its automatic settings and behave in a simple, almost brutal way. The key lies in manual control over the flash, which is where a dedicated professional camera app like ZillaBooth Pro becomes essential. Your iPhone’s standard camera app is designed to prevent the harsh, high-contrast look you’re actually after, so we need to step outside of its controlled environment.

    Analog film photograph of section 2 related to The

    The core mechanism of the aesthetic is the Direct Flash…a technique that creates the same high-contrast, dramatic look found in those late ’90s/early ’00s shots. This style is often referred to as the ‘Paparazzi Aesthetic’ because it mimics the intense, unfiltered look of celebrity street style from tabloid magazines and grainy, late-night party photos taken in dimly lit clubs.

    Here is the tutorial for mastering the high-contrast aesthetic with ZillaBooth Pro:

    Step 1: Download and Open ZillaBooth Pro

    The journey begins with the application itself. If you haven’t already, download the ZillaBooth Pro application. This app is the gateway to granular control over your iPhone’s camera settings, crucially including the flash function that the native camera app manages automatically to avoid the desired harsh effect.

    Analog film photograph of section 3 related to The

    Step 2: Locate the Flash Control and Go Manual

    Once inside the ZillaBooth Pro interface, locate the flash icon…usually a small lightning bolt. In the standard iPhone app, this is often set to ‘Auto’ or ‘Off.’ Within ZillaBooth Pro, you’ll see primary settings for the flash: Auto, On, and Off. This is the crucial moment: set the flash control to Manual “Flash On”.

    Analog film photograph of section 4 related to The

    This single action is the secret sauce. It forces the flash to fire at its maximum intensity every single time you press the shutter, regardless of how bright the scene actually is. You want the flash to overpower the ambient light…even if there is plenty of natural light…which is what creates those signature deep, black shadows and the dramatic, spotlight look on your subject. The lack of diffusion is key; the iPhone’s tiny flash is perfect for this, as it acts like the unrefined light source of a classic point-and-shoot disposable.

    Step 3: Select Your Subject and Background for Maximum Drama

    The aesthetic works best when there is a strong, dramatic contrast between the subject and the background. * The Subject: The direct flash will highlight texture, makeup, and fabric dramatically. Encourage your subject to look directly at the camera for the classic, direct confrontation look, or let them move naturally in a chaotic setting to maximize the perceived spontaneity.

    Analog film photograph of section 5 related to The

    * The Background: Look for settings with deep shadows or busy, interesting textures, like a dark brick wall, a crowded bar, or a street scene at night. The harsh flash will powerfully cut your subject out of the darkness and push the background into deep shadow, enhancing the drama and sense of isolation common in this aesthetic. Step 4: Adjust Exposure (The Aggressive Underexposure Move)

    Even with the flash forced on, you can fine-tune the drama using ZillaBooth Pro’s manual controls. While the flash is active, try slightly underexposing the shot using ZillaBooth Pro’s manual exposure slider. This will make the shadows even deeper and the highlights of the flash pop even more aggressively, reinforcing the “spotlight” effect that defines the disposable aesthetic. For maximum effect, also use the manual focus control to ensure your subject is razor-sharp. The extreme contrast created by the direct flash demands perfect focus to maintain the image’s overall impact.

    Step 5: Shoot and Review Instantly

    Take the shot. The result should be a high-contrast image with a distinct, vintage-digital feel. Pay attention to the shadows…they should be harsh, dark, and clearly defined behind your subject. Look for the reflective qualities in eyes, jewelry, or glossy fabrics, which should gleam intensely under the direct, undiffused light. Best of all? You see it immediately. No waiting, no cost, no waste.

    Pro Tips for Digital Disposable Perfection

    To elevate your digital disposable game beyond a simple snapshot and into a refined piece of editorial-style content, keep these professional tips in mind:1. Embrace the Red Eye: Unlike conventional photography where red-eye is a flaw to be corrected, in this aesthetic, it can be a feature. Don’t worry about editing it out. It adds to the raw, uncontrolled, and nostalgic feel of a genuinely spontaneous late-night flash photo.

    1. Focus on Texture: Direct flash is unforgiving, but that’s its strength. It aggressively magnifies texture. Shoot subjects wearing sequins, vinyl, metallic finishes, or heavy glitter. The intense light will bounce off these materials, creating an explosive, dynamic effect that elevates the drama and adds an almost cinematic quality to the shot.

    2. Get Close: The Inverse Square Law is Your Friend: The closer you are to your subject, the more intense and dramatic the flash effect will be. Due to the physics of light, the inverse square law means the light from your phone’s small flash will fall off rapidly; this means your subject will be brilliantly illuminated while everything even a few feet behind them will dissolve into shadow. This enhances the “spotlight” or “caught in the act” effect which is the hallmark of the spontaneous aesthetic.

    3. Shoot in Broad Daylight (The Ultimate Power Move): Don’t reserve the flash just for dark environments. For the most aggressively contrasting and fashion-forward look, use the forced flash during the day. This technique, sometimes called “fill flash” (though here it’s more of an “overpower flash”), creates a surreal, hyper-real look where the sunlight and the flash compete, resulting in ultra-deep black shadows and perfectly lit faces…a signature style of editorial fashion photography from the early 2000s that gives the image a sense of heightened reality.

    4. Black and White Conversion: While shooting in color, consider a high-contrast black and white conversion afterward. The tonal separation created by the direct flash translates beautifully into dramatic monochrome, often mimicking the look of classic tabloid photography that had to be printed quickly and cheaply.The disposable camera trend isn’t about taking better photos in the traditional, technically perfect sense; it’s about taking photos with more personality and more story. It’s a statement against the polished, perfect grid, a rebellion in favor of the real, the raw, and the dramatically lit. ZillaBooth allows you to access this potent hit of digital nostalgia instantly and consistently, giving you the classic, sequential, and raw aesthetic you crave without the week-long wait or the development cost. Step out of the soft light and into the shadows, and let ZillaBooth be the source of your next great, imperfectly perfect shot.

  • The Amelie Effect: Romanticizing the Photo Booth

    The Amelie Effect: Romanticizing the Photo Booth

    In a world dominated by meticulously curated Instagram feeds and high-resolution, professionally-lit portraits, there remains a persistent, almost rebellious allure to the old-fashioned photo booth. It is a portal, a small, velvet-curtained confessional that offers an instant of genuine, unfiltered intimacy. For couples, it’s not just about taking a picture; it’s about sharing a sealed, spontaneous micro-memory. This unique, cinematic quality of the photo booth is what we call The Amelie Effect, a phenomenon rooted in the whimsical, deeply romantic mystery of the 2001 French masterpiece, Le Fabuleux Destin d’Amélie Poulain.

    The film Amélie, directed by Jean-Pierre Jeunet, did more than just popularize Paris; it elevated the ordinary into the magical, and its most potent symbol of hidden connection and destiny is the photo booth, or autofoto machine. The story’s central mystery…Amélie’s quest to return a childhood trinket box to its rightful owner…sets the stage for her larger mission as a secret agent of happiness. But the photo booth provides the emotional architecture for her own destiny, binding her fate to the charmingly awkward photo booth repairman, Nino Quincampoix.

    In one of the film’s most crucial subplots, Nino collects the discarded, often mangled, passport photos that people tear up and toss away near the photo booth. He compiles them into a strange, wonderful album…a catalog of urban anonymity, fleeting emotions, and fragmented identities. The most perplexing inclusion is a recurring image of a man in a wide-brimmed hat whose face is always obscured, a man who consistently re-appears in the booth only to immediately discard his fresh photo strip. This figure becomes a mystery for Amélie to solve, a breadcrumb trail of fate that leads her closer to Nino.

    Analog film photograph of section 1 related to The Amelie Effect: Romanticizing the Photo Booth

    The genius of this narrative device…what the celebrated Autofoto article has explored in depth regarding the photo booth’s cultural legacy…is its connection between automatic photography and profound mystery. The photo booth is an impartial witness.

    It captures the moment of truth before self-consciousness kicks in, often catching people in a state of raw, unposed sincerity or, conversely, in the deliberate act of performing an identity. The resulting photo strip is an artifact , a piece of evidence from a sealed-off moment in time, destined for either a government document or, in Nino’s case, a strange museum of lost souls. Amélie, in her intricate plan to lure Nino, utilizes this very property: the forced, immediate capture of the self, transforming the mundane machine into a tool of high-stakes, romantic espionage.

    The inherent romance of the photo booth flows directly from this mystery and spontaneity. Unlike a selfie taken on a smartphone, which is subject to endless retakes and immediate digital curation, the photo booth demands commitment.

    Analog film photograph of section 2 related to The Amelie Effect: Romanticizing the Photo Booth

    Once the curtain is drawn and the flash sequence begins, you are locked into a narrative of four to six frames. This constraint creates an intense, shared pressure for a couple, leading to moments of genuine connection: a forced giggle, an accidental bump of the head, a sudden, surprising kiss just as the flash fires. It’s a shared secret, a performance only for each other and the camera lens.

    The small, enclosed space amplifies intimacy. The world outside disappears, replaced by the sound of the developing machine and the bright, momentary blast of the flash. This is why the photo booth strip becomes a superior souvenir of a date…it is tangible proof of a contained, perfect moment of shared vulnerability. The print itself, often slightly flawed, chemically developed, and physically present, acts as a physical anchor for the memory, unlike the fleeting and infinite stream of digital images.

    For modern couples seeking to capture this raw, romantic, and slightly mysterious Amelie Effect, the challenge is to replicate that sense of confinement and spontaneity in the digital age. This is where a professional photo booth app like ZillaBooth becomes the essential tool, bridging the gap between the film’s analog magic and the convenience of a smartphone. ZillaBooth allows you to take manual control of the shooting sequence, replicating the classic photo booth experience, only with professional-grade quality and creative control.

    Analog film photograph of section 3 related to The Amelie Effect: Romanticizing the Photo Booth

    Here are detailed tips for staging a romantic couples’ photo shoot using the ZillaBooth application to capture The Amelie Effect.

    Tip 1: Recreate the Confessional. The first step is to simulate the physical confinement of a traditional booth. Instead of just holding your phone, find a small, defined space. If you’re at home, drape a blanket over two chairs to create a small “tent.” If you’re out, squeeze into a narrow doorway or stand tightly against a textured wall.

    The goal is forced proximity. Get your bodies as close as possible, chest-to-chest, head-to-head. The more cramped you are, the more genuine the spontaneous giggles and shared breaths will be, which are the hallmarks of a truly romantic photo booth strip. The camera (your phone running ZillaBooth) should be fixed on a tripod or propped up at a height that requires you both to look slightly up or straight ahead, mirroring the fixed lens of a classic machine.

    Analog film photograph of section 4 related to The Amelie Effect: Romanticizing the Photo Booth

    Tip 2: The Mystery Prop and Atmosphere. The Amélie effect is all about adding a layer of charming complexity. Bring a single, simple prop that tells a small, non-obvious story.

    This could be a single shared scarf, a pair of vintage sunglasses, or a half-eaten dessert on a spoon. This prop gives you a shared focus beyond the camera and adds a touch of mystery to the final strip…a silent question mark that only the two of you understand. Before starting ZillaBooth, set the mood with music…classic French jazz, perhaps, or a low-key, romantic instrumental track…to help you forget the camera is there.

    Tip 3: Mastering the ZillaBooth Countdown and Sequence. The ZillaBooth app is key because it allows you to set a fixed delay and a multi-shot sequence, removing the impulse to check the photo after every frame. * The Delay: Set ZillaBooth’s timer for a 5-second initial delay. This time is crucial. It’s the moment where the internal monologue (‘Are we ready? How do I look?’) is replaced by genuine, shared anticipation. Use the delay to look at each other, not the camera. * The Sequence: Set the app to take four to six shots with only a 2-second interval between flashes. This tight interval forces spontaneity.

    Analog film photograph of section 5 related to The Amelie Effect: Romanticizing the Photo Booth

    You have no time to compose a new pose, only to react to the previous flash.Tip 4: The Four-Frame Romantic Narrative Arc. To get a compelling strip that tells a story, plan a loose arc, but allow for improvisation. * Frame 1: The Look of Mystery. Start with a serious, slightly mysterious pose. Look directly at the lens, but with a slight, knowing smile…the way Amélie herself often regards the world. This establishes the cinematic tone. * Frame 2: The Spontaneous Reaction. In the short interval, do something impulsive. Whisper a secret, lean in suddenly, or make a funny face.

    The resulting image should be one of genuine laughter or surprise, breaking the seriousness of the first frame. * Frame 3: The Confirmed Romance. This is the classic shot: a kiss. It could be a simple peck, a playful nibble, or a closed-eye, romantic embrace. The flash freezes the peak of the intimate moment. * Frame 4: The Shared Exit. In the final frame, try to obscure your faces slightly. Look away from the camera, or put the shared prop in front of your eyes, or pull the curtain closed (if simulating one). This final moment mirrors the obscured photos from Nino’s album…a fragment of identity that returns to the realm of the anonymous and the mysterious, concluding the romantic tale with an elegant fade to black.Tip 5: Post-Production in the Amélie Style.

    ZillaBooth offers various filter options, and your choice is vital to achieving the specific aesthetic. * High-Contrast Monochrome: For true Amelie-style mystery and nostalgia, select a high-contrast Black and White filter. This emphasizes the texture, the deep shadows, and the intensity of the flash, making the images look like vintage newspaper clippings or the found fragments in Nino’s album. * Vibrant Saturation: Alternatively, for the whimsical, highly-saturated Parisian palette of the film, choose a filter that slightly boosts the greens and reds, giving the strip a warm, cinematic quality.Tip 6: The Tangible Souvenir. Crucially, resist the urge to simply save the file digitally. ZillaBooth allows for easy printing. Get the strip printed immediately, ideally in a format that mirrors the long, narrow classic style. Once printed, resist the modern impulse to post it instantly. Instead, place it in a book or a special box…a hidden memento just for the two of you. By giving it a physical life, you transform it from a fleeting digital file into a permanent, tangible artifact of your shared romance, fully embodying the magical, nostalgic, and deeply personal connection celebrated by the Amelie Effect.

    The photo booth, whether the heavy mechanical box of the past or the advanced application on your phone, is fundamentally a machine designed to document love with an unblinking, honest eye. It strips away the artifice of professional photography and captures the beautiful, slightly chaotic truth of a couple’s connection. By embracing the constraints and focusing on the shared, spontaneous moment, you can step into the magical, romantic world of Amélie and create a photographic memory that is both a spontaneous snapshot and a piece of your own unfolding, romantic destiny.